Wellness Settings
Wellness Overview
Wellness settings allow you to create designated rooms and appointment types for time-based wellness appointments. This section covers how to create and manage these settings to begin scheduling wellness visits. Review the next few subpages for detailed instructions on how to configure wellness settings.
VIDEO ON THIS TOPIC
Wellness Rooms
Each appointment will need to be assigned to a "room". The rooms will be displayed on the Wellness Calendar as columns which appointments will be booked under. There are many ways to use rooms to accommodate your scheduling needs. Common configurations are matching your number of physical rooms, number of doctors, or they can be used to schedule only specific appointment types (e.g. Dental only room).
Wellness Appointment Types
Any services your clinic offers where the animal will not be receiving a spay/neuter surgery would be scheduled as a Wellness appointment. Wellness is the big umbrella for non-spay/neuter visits. Underneath that umbrella, you can create sub-types, such as Vaccines, Dental Cleaning, Mass Removal, Medication Pickup, etc.
Managing the Wellness Calendar Schedule
Learn how to manage the wellness calendar after setup HERE.
Appointment Types
Wellness Appointment Types
If your clinic provides any services to animals that do not involve spay/neuter surgery, those services would be scheduled as a Wellness appointment. The Wellness appointment is a broad category that can include sub-types.
Examples of Appointment Types are:
- Vaccine Clinic
- Dental
- Wellness Exam
- Surgery (non s/n)
- Medication Pickup
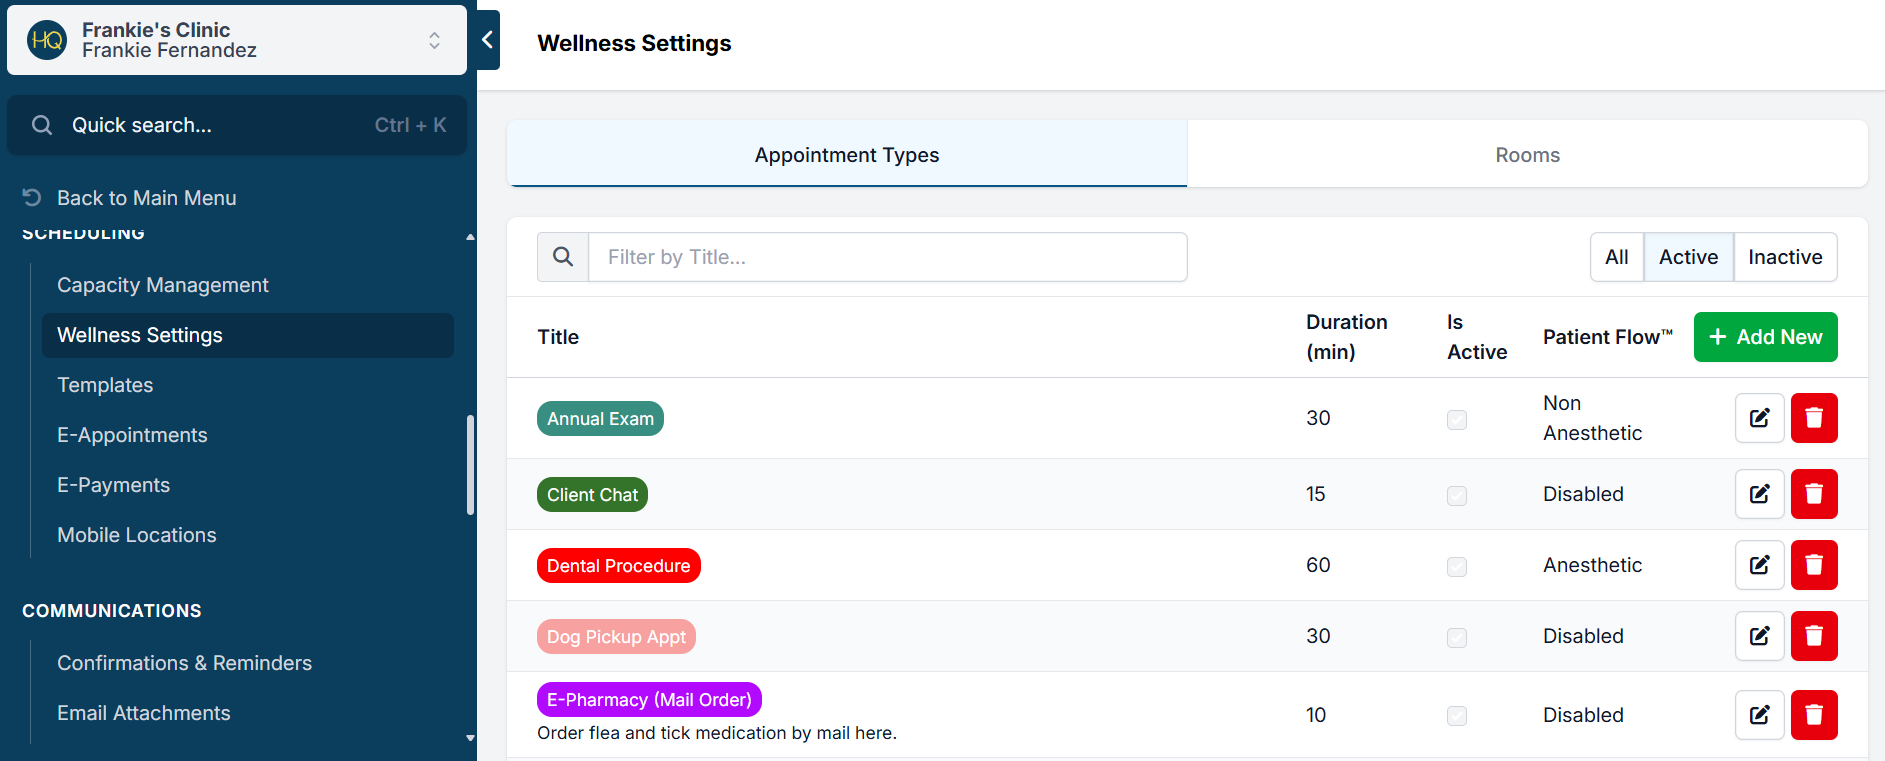
Create an Appointment Type
- Go to Settings > Wellness Settings.
- Click the +Add New button.
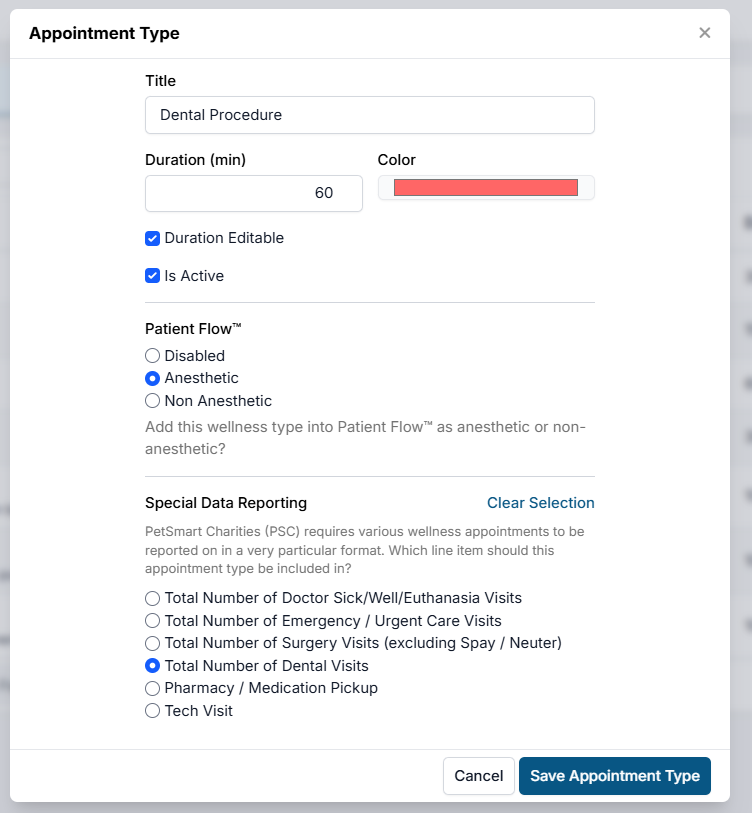
- Title: Name of the appointment type. This is client-facing and viewable from the Wellness Calendar.
- Duration: Frequency of appointments for this appointment type. This determines the amount of appointments available in a room. For example, if your wellness room is open for 5 hours and want to book 20 appointments, the duration should be set to 15 minutes. If you set the duration to editable, staff can internally extend or shorten the appointment time.
- Color: Color-coding for this appointment type. Both client and internally facing. Important: Do not leave the color white. The appointment title text is white, so it would be unreadable.
- Patient Flow: Determine if the appointment type should be available in Patient Flow. It can be assigned to Anesthetic or Non-Anesthetic. Anesthetic are for any appointments that need controlled substances drugs logged. Non-anesthetic appointments do not follow a sedation protocol. Individual appointments can be pushed from one type to the other without changing settings. If set to Disabled, it will not show up in Patient Flow at all.
- Special Data Reporting: Assign particular reporting functions to be compliant with PetSmart Charities grants. Learn how to assign these HERE.
- Save Appointment Type.
Rooms
Wellness Calendar Rooms
Wellness Rooms control the operating hours and scheduling of appointments on your wellness calendar. They appear as columns on your wellness calendar, which appointments will be dropped into. Rooms can be configured to match your physical capacity, vets, or specific types of appointments. For example, a room for dentals can be restricted to dental appointment types only.
Create a Wellness Room
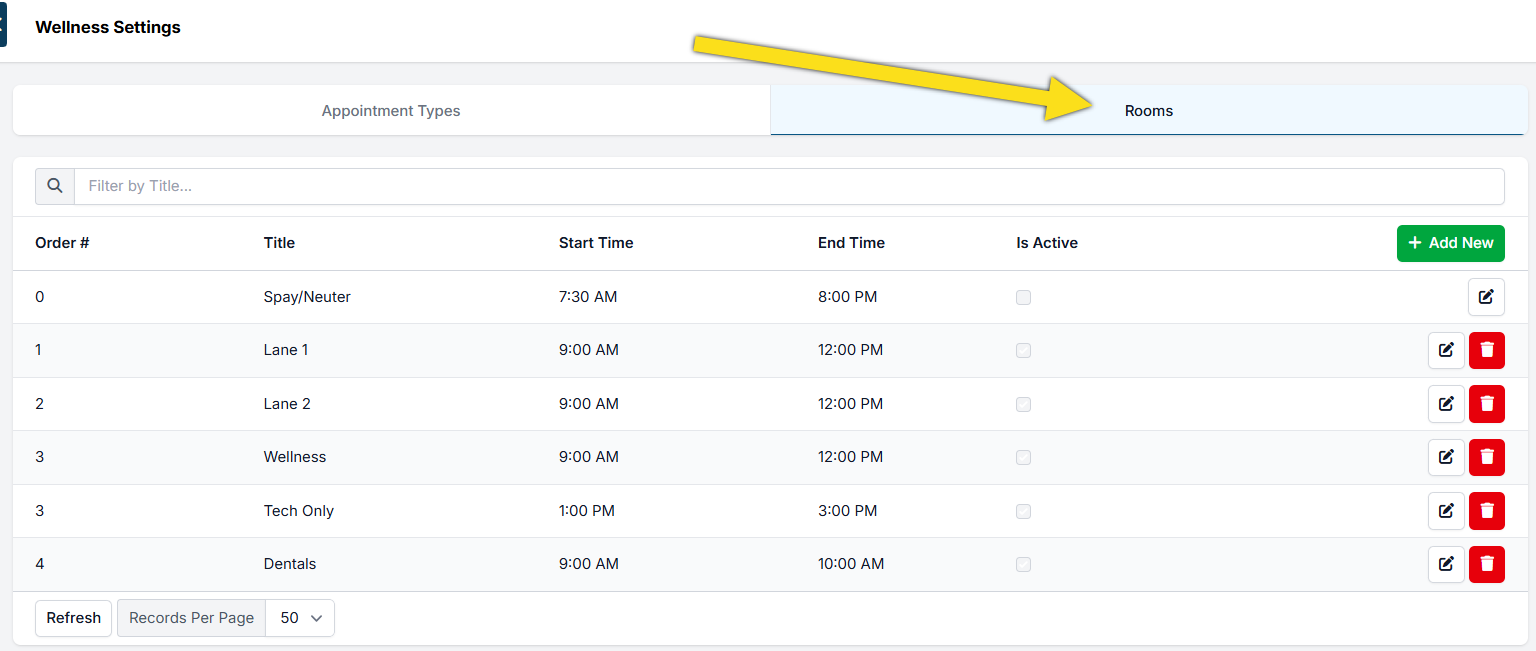
- Begin by creating a few appointment types your clinic offers following the previous guide. Once completed, navigate to Wellness Settings > Rooms.
- Click + Add New to create a new room.
- Complete the pop-up fields.
- Title: Name of the column displayed on the calendar. Cannot exceed 25 characters.
- Start Time: When the first appointment is scheduled to check in.
- End Time: When the last appointment for the room ends. Example: If you want your last appointment to be at 3 pm and the appointment length is 15 minutes, then your end time should be 3:15 pm.
- Order: The arrangement of the rooms on the calendar from left to right. "1" being the column furthest left.
- Is Active: If selected, this makes the room appear on the calendar.
- Any Appointment Type: If selected, all appointment types can be booked during the hours of this room. If you need to restrict which appointments can be booked at certain times, you will need to untick this setting and assign specific appointment types to the room.
Note: The Spay/Neuter room is only available if you use time-based S/N scheduling under Settings > Clinic Profile.
Appointment-specific Rooms
- Untick Any appointment type.
- From the dropdown menu, select the appointment type that can be scheduled in this room.
- Click +Add
- Do this for each appointment type that should be restricted to booking this room.
- Once configured, click Save.
Known Bug on Wellness Settings
Rooms cannot be deleted
In Settings > Wellness Settings > Rooms, rooms cannot be deleted. The solution is to Edit the appointment type and uncheck the "Is Active" box and Save. Appointment types that are not active will be moved to the Inactive list. These can be made active again if you need to reuse the appointment type.
Anesthetic or Mixed Service Wellness Considerations
Overview
Some HQ settings apply only to the overall Wellness umbrella, so they must be configured to cover all wellness sub-types rather than individual appointment types. These settings include Confirmations & Reminders, Consent Forms, and Take-Home templates. This section outlines recommended HQ setup for clinics that offer mixed wellness services.
Wellness Appointment Confirmations & Reminders
Confirmations and reminders cannot be customized by wellness sub-type (for example, Dentals vs. Vaccines). Messages can only be assigned to the Wellness appointment type. As a result, all instructions for wellness visits must be included in a single confirmation and reminder message.
Use conditional language to address different visit types, such as:
- “If your pet is scheduled for a Vaccine or Wellness Exam…”
- “If your pet is scheduled for a Dental…”
Wellness Templates
Anesthetic Wellness Consent Considerations
Your clinic will need one consent form that covers all wellness scenarios.
- Download the HQ-recommended templates HERE
- Edit the Wellness Vaccine Clinic Consent form to include waiver terms that cover risks associated with vaccines, anesthetic complications, and euthanasia terms if applicable. Anesthetic risk language may be reused from the Spay/Neuter Consent Form, with sterilization-specific references removed.
- Change the template title to Wellness Consent Form.
- Upload this template under Settings > Templates and assign e-signature capabilities for Wellness appointments.
Here's an example form that was edited to suit multiple appointment types.

Aftercare Instructions for Treatments or Anesthetic Procedures
Begin with Clinic HQ's recommended Wellness Visit Summary. Edit the template's second page to add aftercare instructions. Your custom template must contain the Client Communication merge field to include their medical notes.
There are two options on how to use Wellness aftercare templates:
Use one generalized aftercare document with Item Triggered Notes for service-specific aftercare instructions.
For example, if the animal received a dental cleaning, use the dental cleaning service item to populate a note about the effects of sedation and provide a small dinner instead of a full meal. This pre-written message will only appear on the visit summary if the animal has a dental on their services. To set this up:
- Go to Settings > Medical Notes.
- Find the Item Triggered Notes section.
- Click Add Item.
- Search for the service item.
- Enter aftercare instructions in the External Client Communication box.
- Save your setting.
Upload service-specific custom templates for each appointment type, then manually send them to clients after their visit.
Edit an existing visit summary template and change the second page instructions to be service-specific. For example, if the animal received a non-spay/neuter surgery such as mass removal or amputation. Upload this as a custom template in Settings > Templates. At Checkout, staff will use Print/Email Paperwork to print/send the corresponding aftercare instructions to owners.
PetSmart Charities Report - Settings
If your clinic has a PetSmart Charities grant, you will be required to report on the grant. We've created a report in HQ that provides the data for the report. We worked with PetSmart Charities to ensure that these are the metrics they want and they are calculated in an accurate way.
What are the metrics?
"Here is a document":{DOCUMENT-LINK+accelerator-clinic-metrics-master} that outlines the metrics in the PetSmart Charities report.
Inputs to make the report work correctly
First, you must connect pieces on the back end to make the report work correctly. We use a piece of HQ that already exists, the Wellness Settings in the Settings section. To set it up for reporting do the following.
- Go to Settings > Wellness Settings
- Here you'll see the wellness appointment types you've set up. If you've not set up any wellness appointment types, visit this page to show you how.
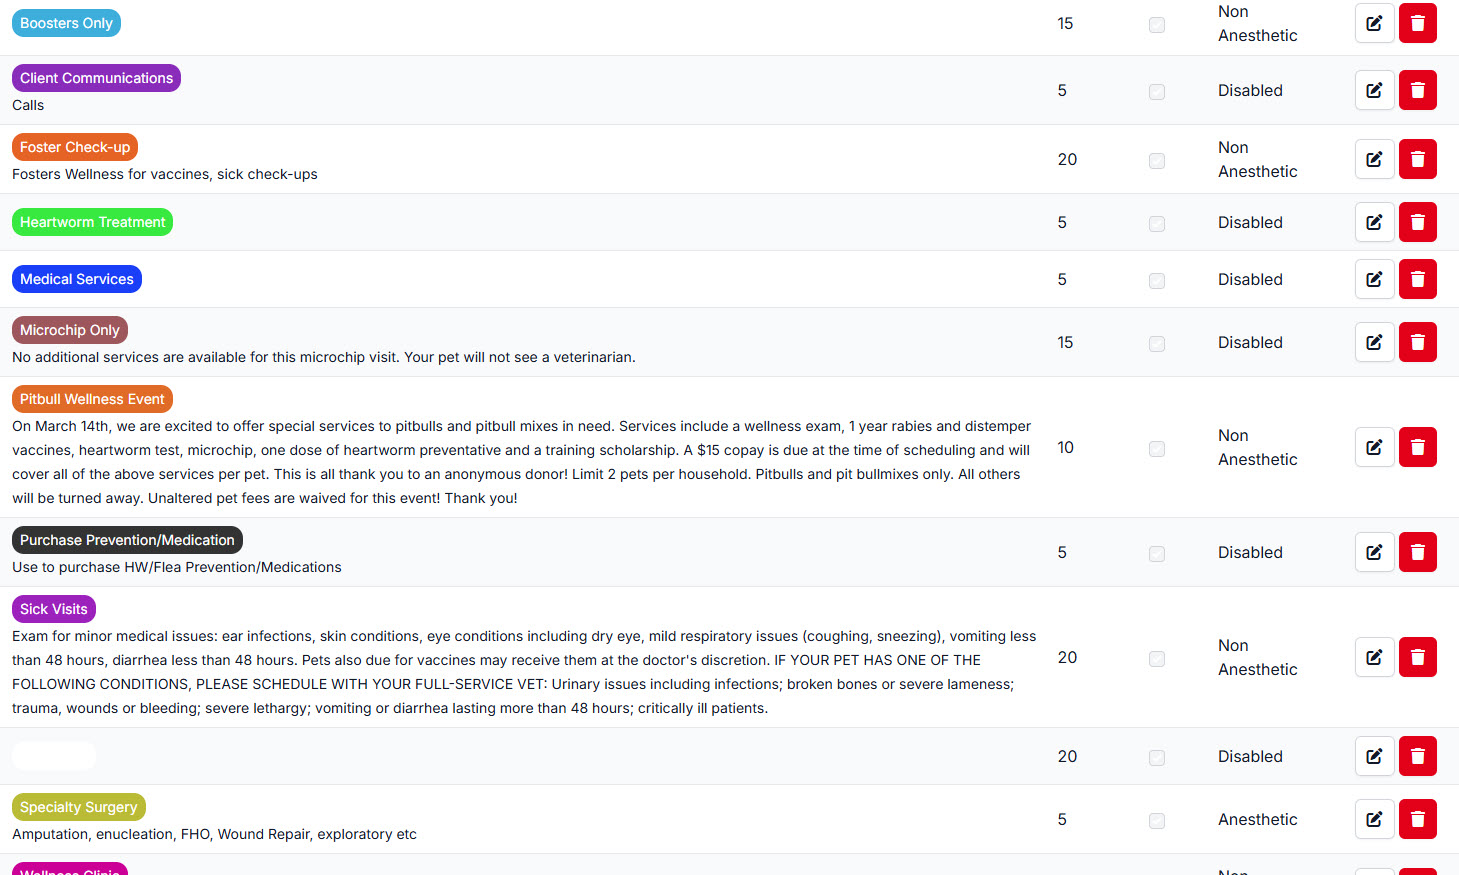
Now what you'll need to do is to connect the appointment types with the PetSmart Charities metrics. - Click the Edit icon for an appointment type and you'll notice a "Special Data Reporting" section at the bottom of the page. Here' is where you'll tick the tick box that corresponds to the PetSmart Charities type of appointment for key metrics. This will put these appointments in that bucket.
- Click Save Appointment Type button.