Clinic Profile

Clinic Profile Setup Overview
Here you will set up your clinic’s information and preferences. This section guides you through what each setting does and how it affects system behavior.
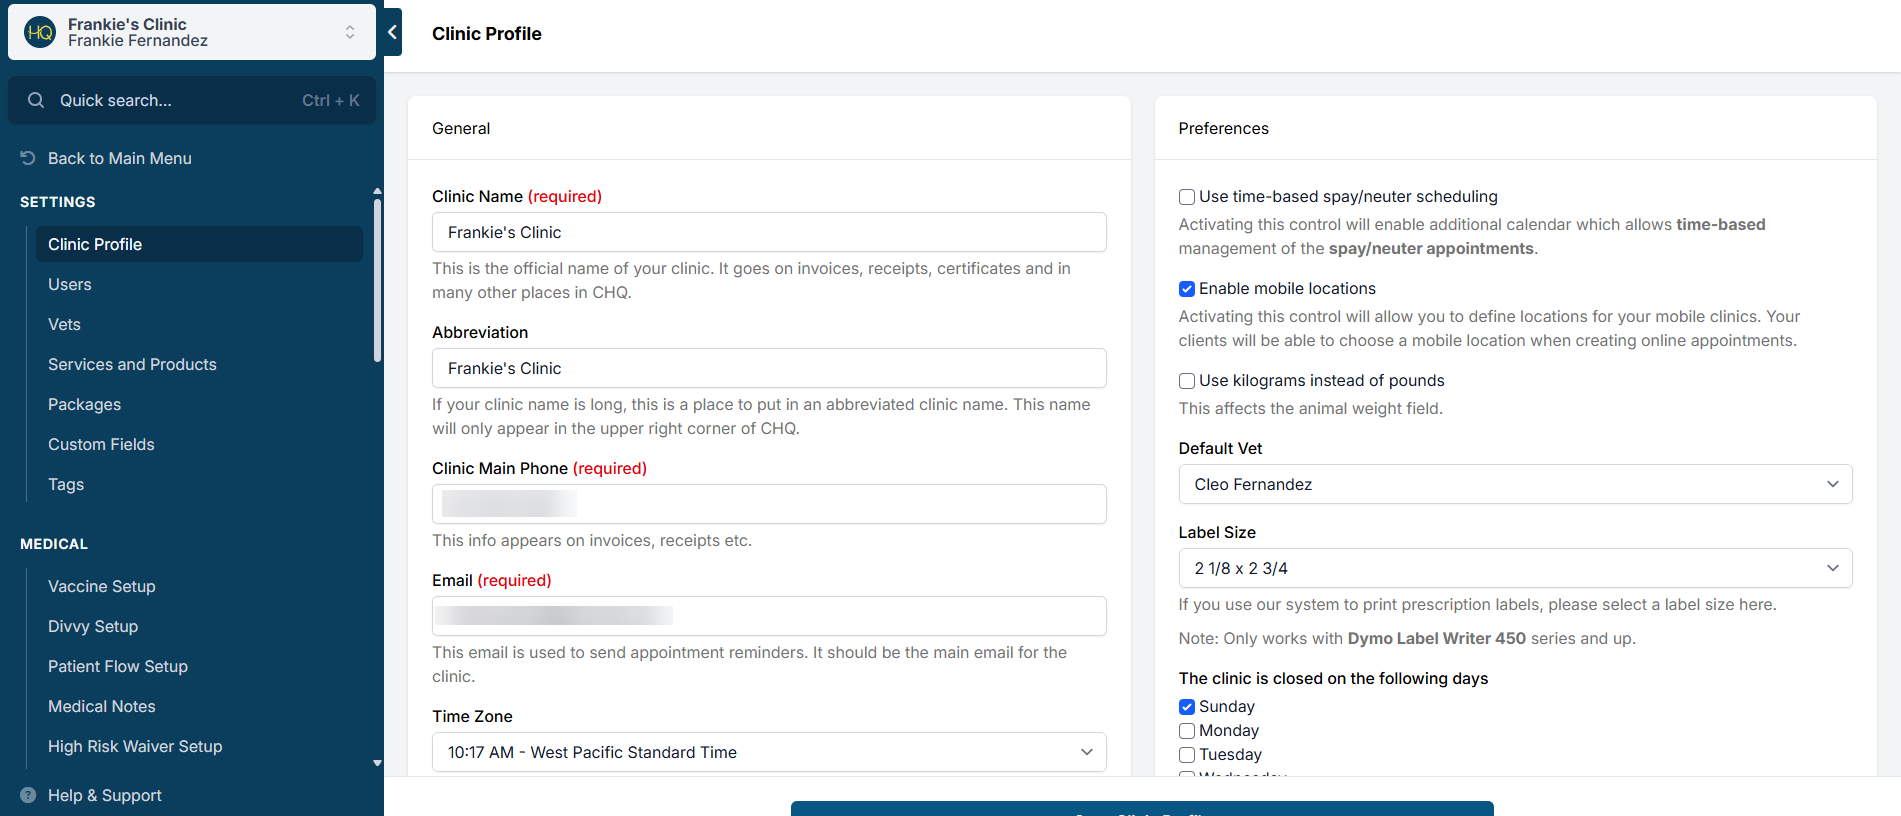
General
The General section of the clinic profile houses your clinic’s core information, such as the clinic name and contact details. Each field below impacts how information appears throughout the system.
- Clinic Name
- Establishes your official clinic name.
- Appears on rabies certificates, invoices, spay/neuter certificates, and email reminders.
- Clinic Abbreviation
- Displays in the upper-left corner of HQ. Clicking it opens the user profile menu.
- Clinic Main Phone
- Populates across the system, including certificates and invoices.
- Clinic Email
- Used to send confirmations and reminders and appears throughout HQ.
- Time Zone
- Typically preselected for your clinic, but editable if needed.
- Clinic Addresses
- Stores physical, mailing, and billing addresses. These addresses populate on invoices, certificates, and other system documents.
- Clinic Logo
- Upload your clinic logo by saving it from your website and selecting Choose File in HQ.
- After uploading, click Save to apply the change.
- If resizing is required, use an external program such as Microsoft Paint.
Preferences
The Preferences section contains clinic-wide settings that control how HQ behaves. After enabling or disabling any preference, you must click Save Clinic Profile for the change to take effect.
Turning On Time-Based Spay and Neuter Scheduling
Enabling Use time-based spay/neuter scheduling activates Spay/Neuter appointments on the Advanced Wellness Calendar. This allows you to assign specific appointment times for spay/neuter visits.
This setting is rarely used. Most clinics rely on bulk check-in times (for example, 7:30 AM to 8:30 AM), which are managed through the standard spay/neuter calendar. If your clinic uses bulk check-in, do not enable this option.
Enable Mobile Locations
Enabling Mobile Locations creates a new section in Settings where you can configure all locations served by your mobile unit. These locations then become selectable on the spay/neuter calendar.
After saving, a new page appears in the left navigation panel under Scheduling.
Kilograms Instead of Pounds
Selecting Use kilograms instead of pounds replaces lb with kg throughout the system.
If this setting is changed after drug charts are created, all dosages must be reviewed and adjusted accordingly.
Default Vet
The Default Vet setting automatically assigns a veterinarian of record when an appointment is checked in. This alleviates staff from manually selecting a veterinarian for each appointment.
This is especially useful for clinics with one veterinarian, or clinics with multiple veterinarians where only one works per day. Each morning, you can set the default vet, and all patients checked in that day will be assigned automatically.
Closed Days
Selecting days in this section closes those days on the spay/neuter calendar. For example, selecting Monday closes all Mondays.
If you need to open on a specific closed day, click Mark Day as Open directly on the calendar. This change applies across your entire calendar.
Invoice CC Email 1 and 2
These fields send copies of all generated invoices to designated email addresses. This feature is commonly used for accounting purposes.
Enter one email address per line.
Setting Up Species
This section defines which species your clinic schedules surgeries for. Dogs and cats are typically enabled by default.
- Disable species your clinic does not serve.
- Enable additional species such as rabbits, guinea pigs, or goats.
After enabling a new species, complete the following steps:
- Open Settings.
- Select Services and Products.
- Click Add New Item.
- Search for the appropriate spay or neuter services for the new species.
- Enable the services.
- Enter pricing.
- Click Save.
For example, if goats are enabled, activate Goat Spay and Goat Neuter services and enter pricing for each.
Setting Up Colors
This section controls animal key colors used by your clinic. You may enable or disable colors at any time.
By default, all colors are enabled in HQ.
Setting Up a Custom Text
The Custom Text section allows you to create a standardized message that appears on rabies certificates, receipts, and spay/neuter certificates. This is commonly used for thank-you messages or important vaccine-related information.
Breeds
Why Breeds Matter
Dog and cat breeds help distinguish animals and are required on rabies certificates and in medical records in most states as part of the animal description. Accurate breed selection supports compliance, reporting, and medical decision-making.
How Do I Get a Breed Added?
We receive frequent requests to add new breeds, especially hybrid or mixed names such as Chi-weenie, Weim-a-Doodle, or Shep-Poodle. Because the number of possible combinations is effectively endless, we apply clear rules to keep the breed list consistent and usable.
For dogs, we use the American Kennel Club (AKC) breed list as the official source of accepted dog breeds:
https://www.akc.org/dog-breeds/
A small number of regionally recognized breeds have been added as exceptions.
Early on, Mutt was added as a breed option. Because it is now used on thousands of records, it cannot be removed.
How to Request a Breed to Be Added
- Double-check the existing breed list to make sure the breed is not already available.
Open any record in checkout or open the appointment screen, then go to the breed field and begin typing a few letters. The breed may appear under a slightly different name. If so, additional variants cannot be added. - For dogs, confirm the breed appears on the AKC breed list:
https://www.akc.org/dog-breeds/
If it is not listed there, it cannot be added to HQ. - If the breed is listed by the AKC but not available in HQ, open Help & Support, click Open a Help Ticket, and request that the breed be added.
Be sure to specify whether it should be added to the dog or cat breed list.
What About Mixed Dog Breeds Such as Chiweenie or Cockapoo?
You may notice a small number of non-AKC breeds in HQ. These were added more than a decade ago, before clear rules were established.
While this may feel inconsistent, additional unofficial or hybrid breeds cannot be added now. Existing non-AKC breeds will remain, but no new ones will be introduced.
Why We Do Not Add Every Requested Breed
- It adds friction to your workflow.
If every requested breed were added, the list would grow to thousands of entries. This would increase scrolling time and slow down appointments. Even small delays per appointment can add up to hours of lost time each year. A limited list keeps workflows efficient. - It reduces the accuracy of breed reporting.
Consistent breed data supports accurate reporting. For example, if a grant or program applies to pit bulls, animals must be clearly identifiable. Creative mix names can lead to undercounting and missed opportunities tied to accurate data. - It has medical implications.
Some breeds have specific medical considerations. For example, brachycephalic breeds such as pugs should be clearly identifiable to support safe clinical decisions.
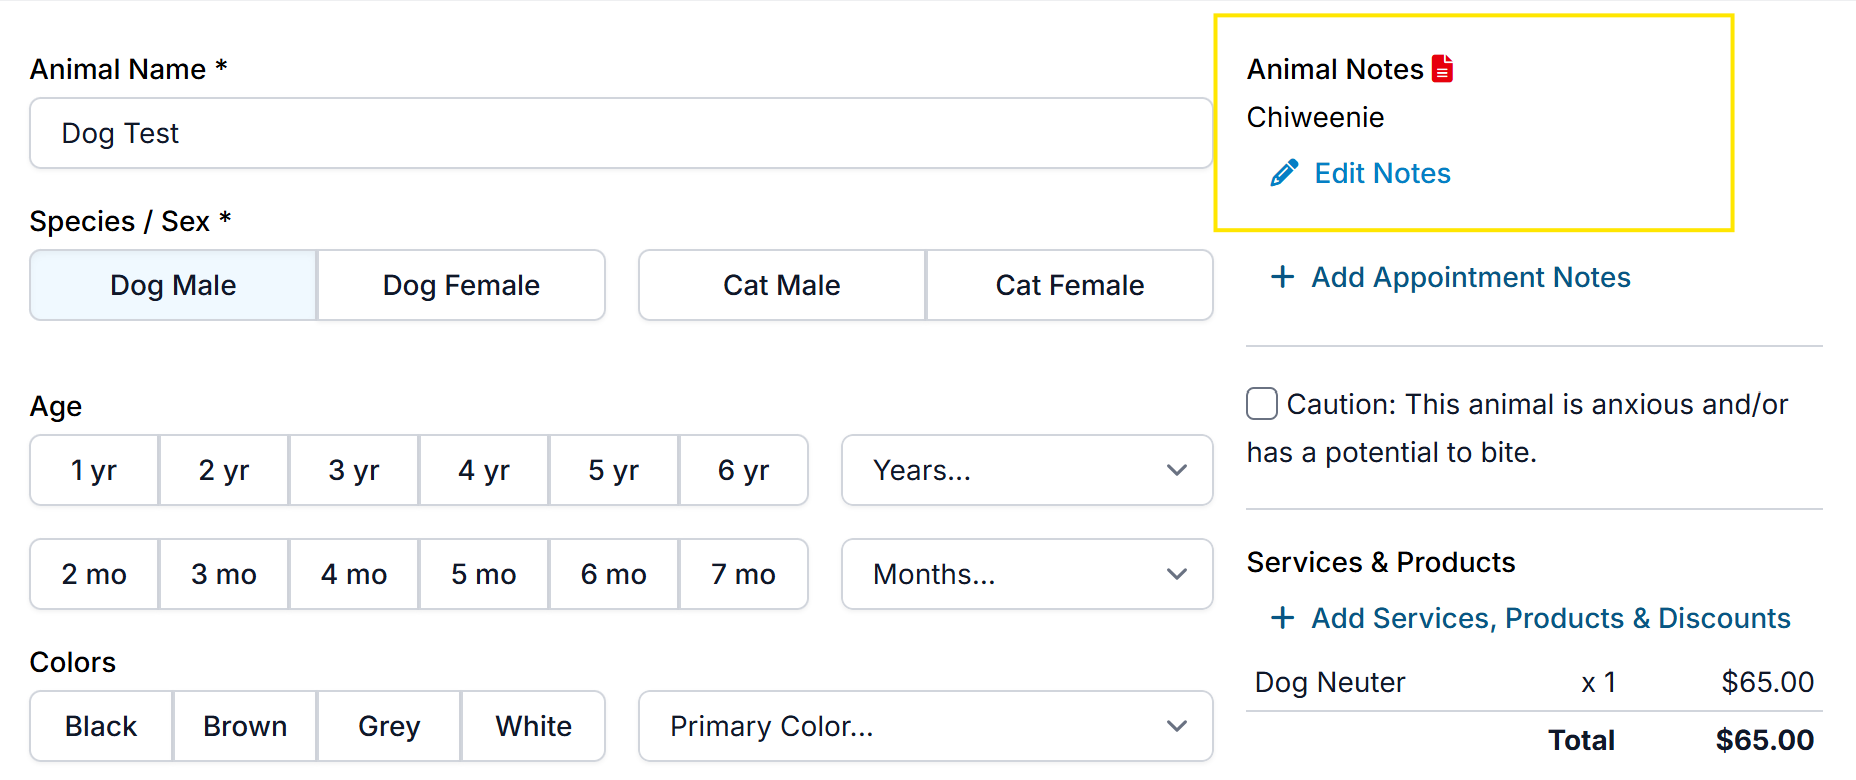
What If the Owner Wants the Breed Listed as “Chiweenie”?
This is not supported. Select the primary breed as Chihuahua and set Is Mixed? to Yes. If desired, note Chiweenie in the Animal Notes.
This approach preserves owner preference while maintaining data consistency and workflow efficiency.

Can We Remove Breeds from the Breed List?
Short answer: No. The breed list is not customizable by individual clinics.
We understand some clinics choose not to work with certain breeds due to medical or surgical risk factors (for example, brachycephalic breeds or those prone to von Willebrand’s disease).
To manage this:
- Clearly state breed restrictions on your website before clients request appointments.
- If a restricted breed is submitted, review and cancel the e-appointment request based on your clinic’s criteria.