Vaccine Clinics
This section provides a complete guide to running high-volume vaccine clinics using Clinic HQ — from initial setup and scheduling through pre-clinic preparation, running the clinic, and post-clinic wrap-up.
The concept with high volume vaccines (HVV) is the same as with the HVSN approach: do every single thing you can before the client gets there. This includes having people sign up online, selecting their services, and taking prepayments.
In 2019, HQ completed a vaccine clinic case study. Click here to watch the slideshow
Key Strategies
Decouple "Medicine Only"
- Use HQ's online scheduler for clients picking up preventatives only (e.g., flea/tick, heartworm).
- Requests appear as E-App submissions.
- Medications can be prepared in advance and logged into the medical record.
- Clients can pay online or in person at pickup.
Minimize Services
During the clinic itself, focus on core services:
- Core vaccines
- Dewormers
- Preventatives
- (Optional) Microchips — useful but more time-intensive.
Pre-Register & Pre-Pay
Use HQ's scheduler to collect client info and payment ahead of time. Benefits:
- Reduced wait times
- Appointment spacing
- Risk mitigation
- Inventory prep in advance
✅ Pro tip: Print paperwork the evening before (including rabies certificates). Pre-bag preventatives and staple them to the paperwork for fast distribution.
Setting Up the Vaccine Clinic Schedule in HQ
Step 1 — Block the Spay/Neuter Calendar
Make sure the day is open on the spay/neuter calendar. Open the day and set your capacity to 0 for spay/neuters on that date so no one can schedule a spay/neuter appointment online.
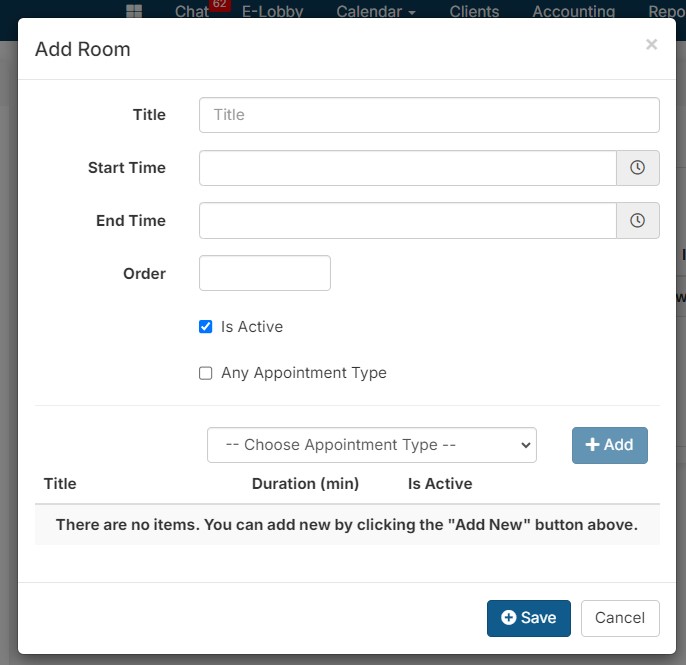
Step 2 — Set Up a Wellness Room
Go to Settings > Wellness Settings > Rooms tab. Click Add New and create a room (e.g., "Vax Clinic"). Set the start and end times to the full range of your vaccine clinic (e.g., 9 AM – 5 PM). You can block out specific times on the calendar later.
Step 3 — Create a Vaccine Clinic Appointment Type
Still in Settings > Wellness Settings, click the Appointment Types tab and click Add New. Name it something client-facing (e.g., "Vaccine Clinic"). Add a description that clients will understand.
Setting the appointment duration:
If your vaccine clinic runs 9 AM – 1 PM (4 hours = 240 minutes), and average appointment time is 2.5 minutes, that yields ~96 appointments per team. With three teams (one room per team), you could handle ~288 appointments.
This value is the Duration of the appointments.
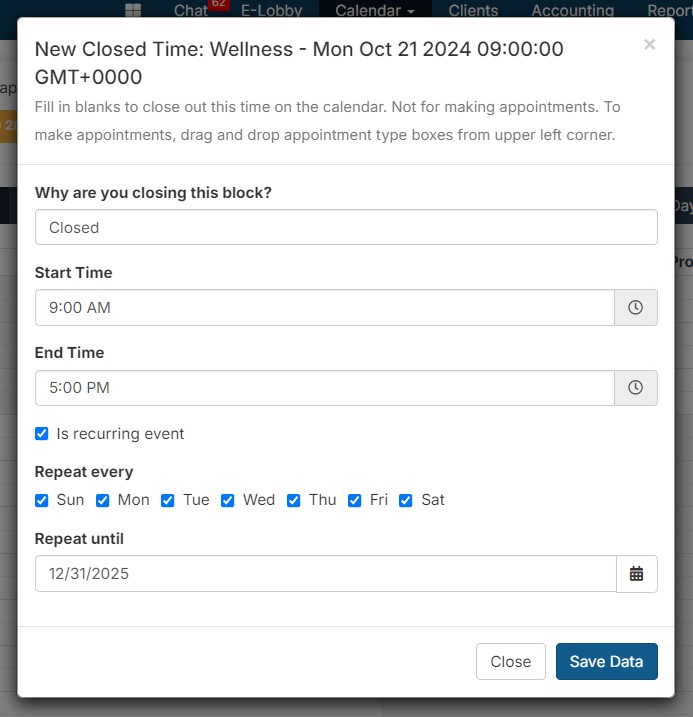
Step 4 — Block Off Non-Clinic Days on the Wellness Calendar
Go to the Wellness calendar. Click in the first open time slot to close it, and select the option to close all days. This prevents vaccine clinic appointments from appearing on days you are not running the clinic.
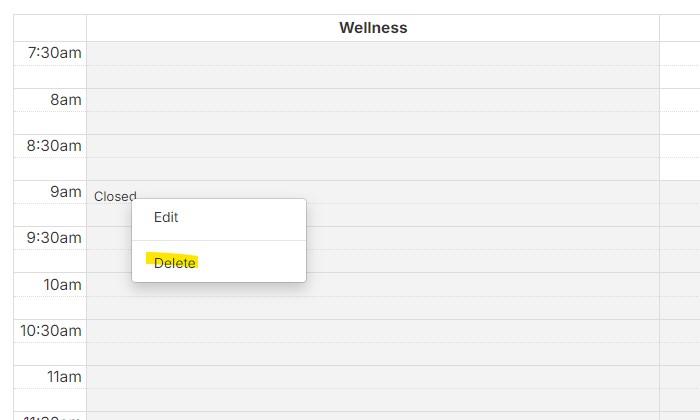
Step 5 — Open Your Clinic Day
Navigate to the specific date your vaccine clinic will run, click where it says "Closed," and click Delete. This removes just the closed block for that day.
Note: If you delete the closed block but it still says closed, that means the day is closed on your spay/neuter calendar. Open that day on the spay/neuter calendar and set capacities to 0.
Step 6 — Test Your E-Form
Go to Settings > E-Appointments, click Preview in new tab, and test the form to verify the schedule is set correctly.
Scheduling Vaccine Appointments
Scheduling Internally (Staff-Booked)
Clients can be scheduled for vaccine clinics by staff when they call your office. Internal scheduling helps maintain order while still giving clients a confirmed time slot.
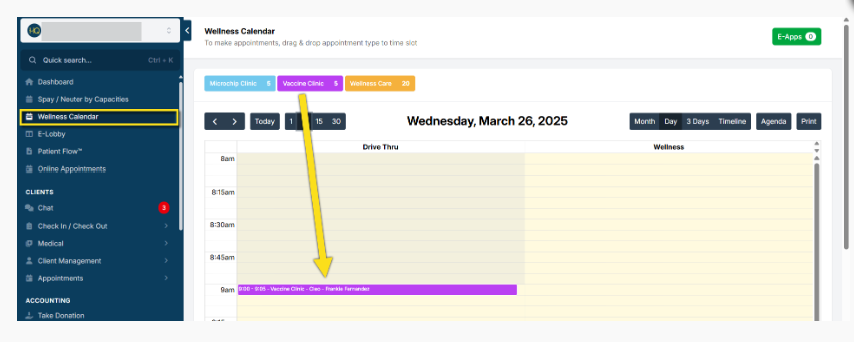
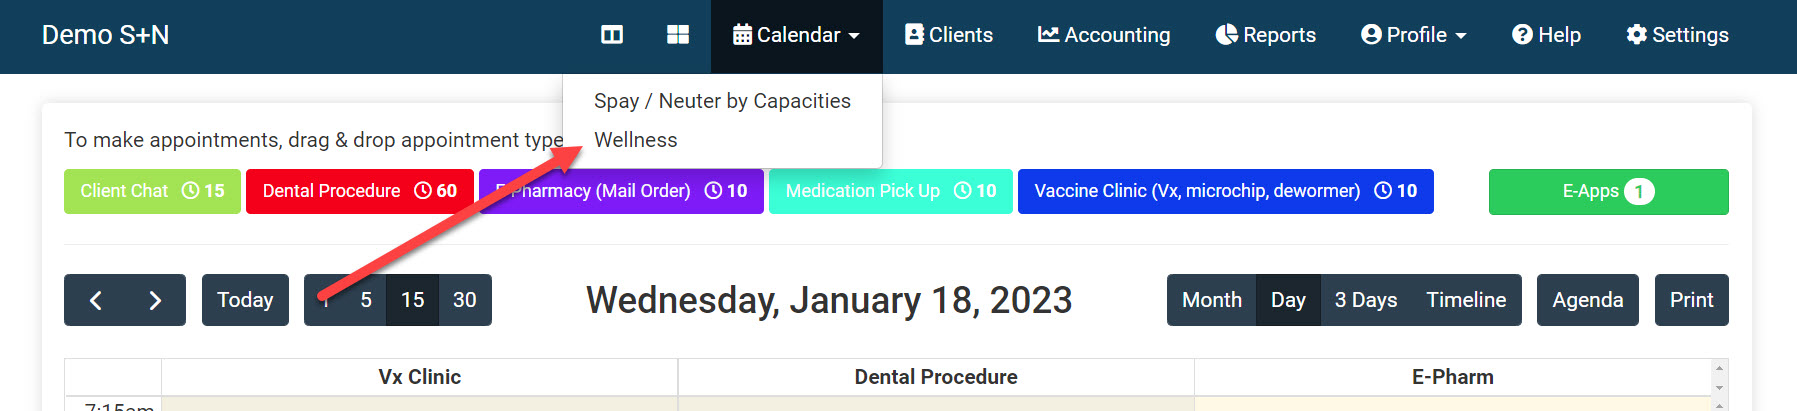
- Open the Wellness Calendar.
- Drag and drop the Vaccine Clinic appointment type into the desired time slot.
- The appointment form will open — enter the client and animal details.
✅ Pro Tip: Use the Advanced Wellness Calendar for vaccine clinics. Assign short time slots per animal to reduce crowding and wait times.
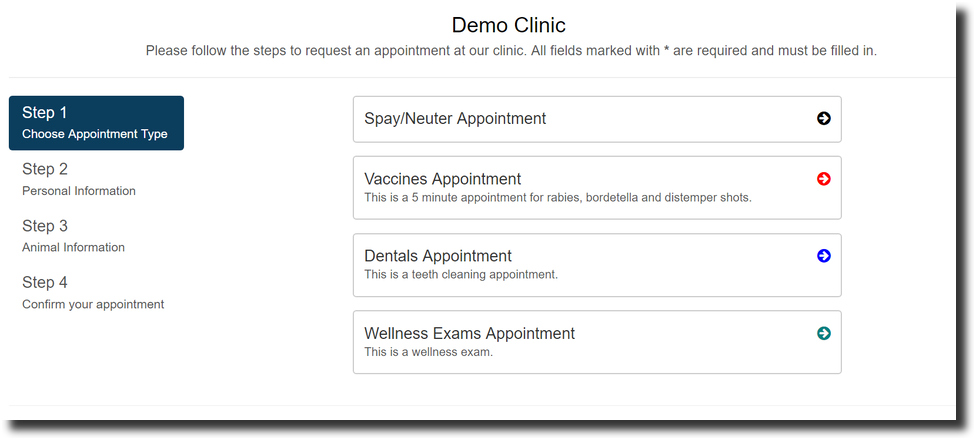
Scheduling Online (E-Appointments — Preferred)
Vaccine clinic appointments should be scheduled through your E-Appointments link whenever possible. This allows clients to pre-register, saving staff significant time on clinic day.
- Go to Settings > E-Appointments.
- Ensure the Vaccine Clinic appointment type is created and enabled.
- Generate an E-Appointment link for clients (see Creating Public E-Appointments for detailed setup).
- Share the link on your website, social media, or other communication channels.
- Add scheduling links to your website and allow phone-based registration through your clinic staff.
- For low-income neighborhood clinics, consider door-to-door pre-registration with a tablet.
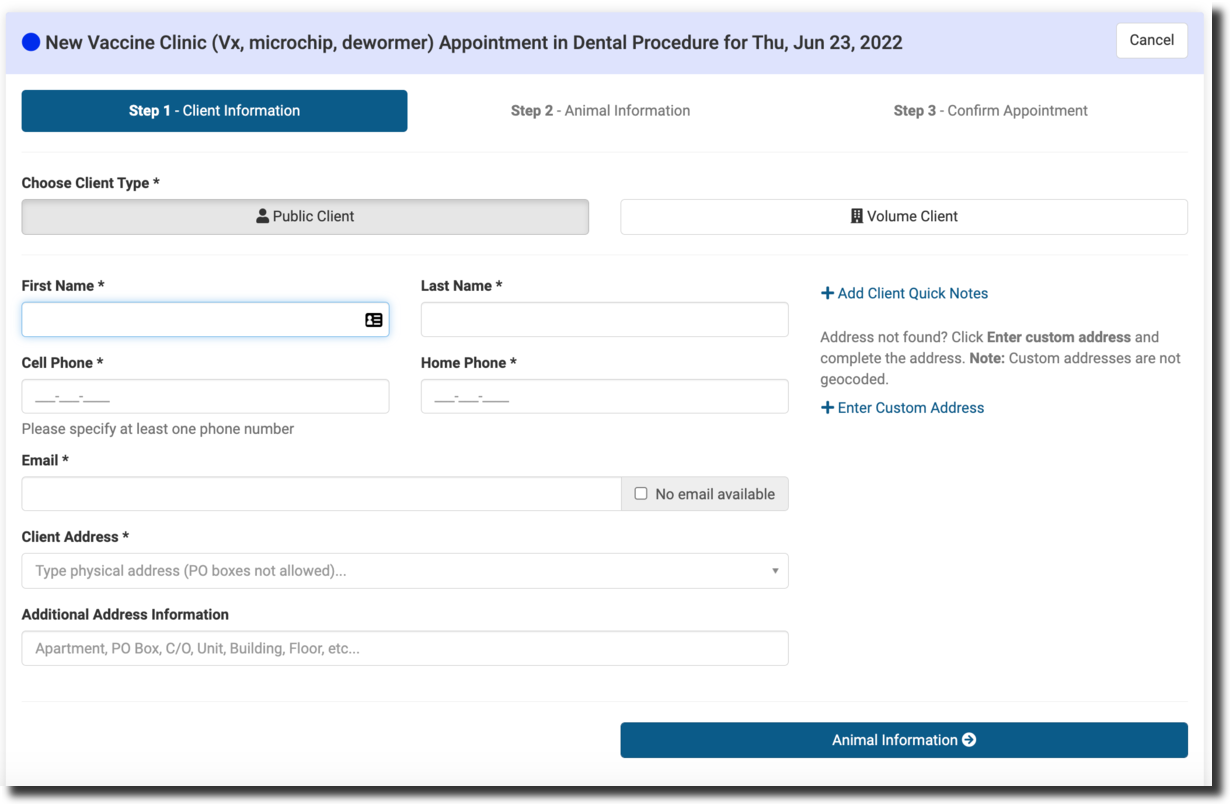
Client Experience (Online)
- Client clicks the E-Appointment link.
- Selects Vaccine Clinic appointment type.
- Chooses an available date and time slot.
- Fills in owner and animal information.
- Selects the required vaccines/services.
- Completes payment (if applicable) and submits the request.
After submission, clients receive an email notification that their request is pending review. Once confirmed, they receive a confirmation email.
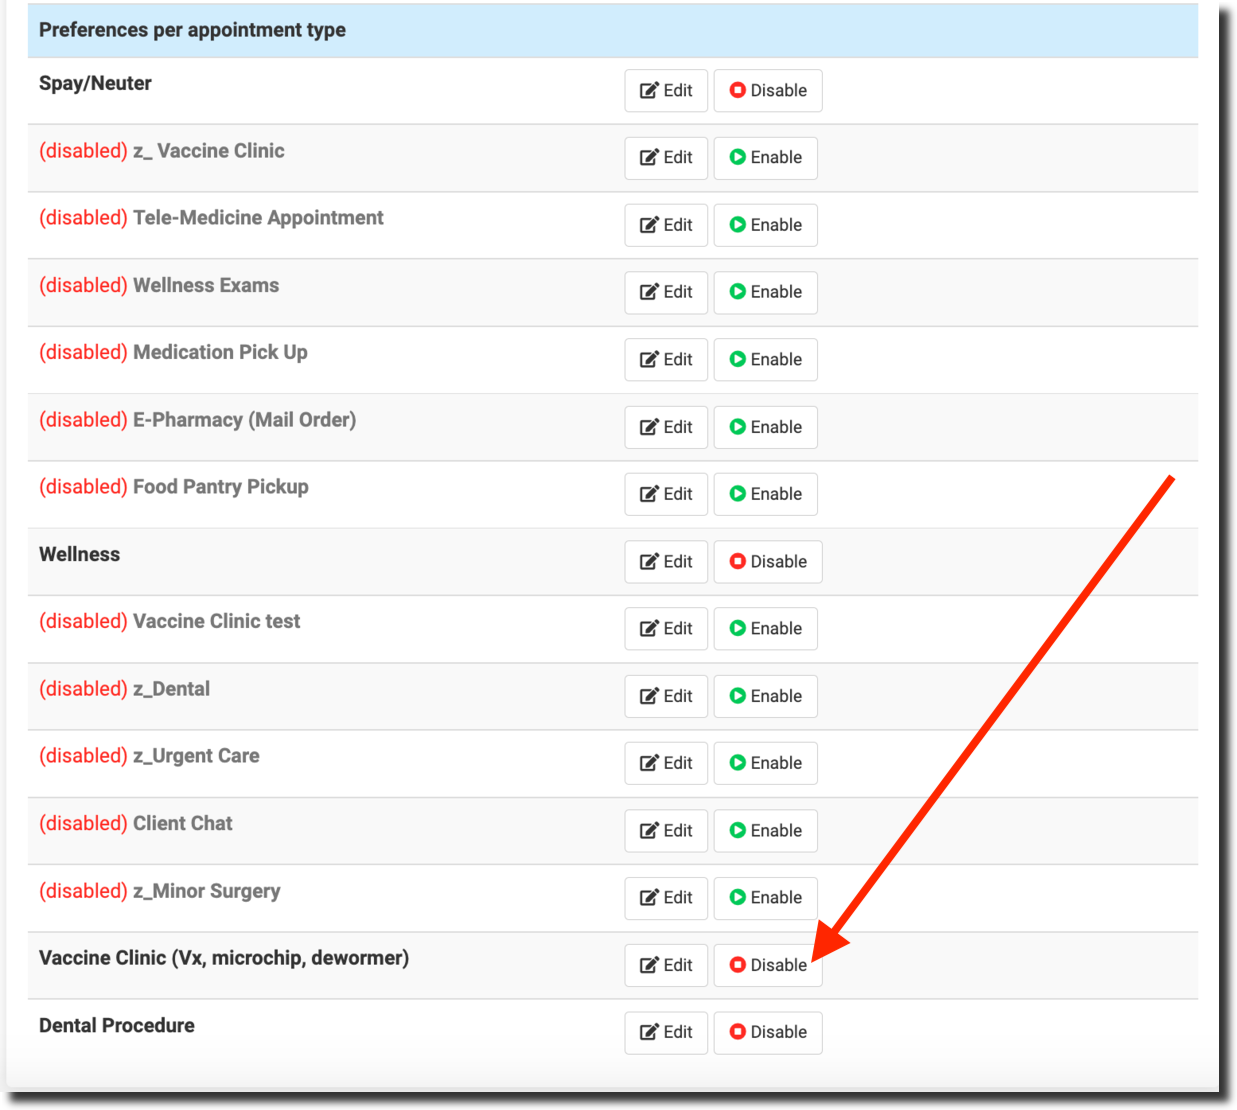
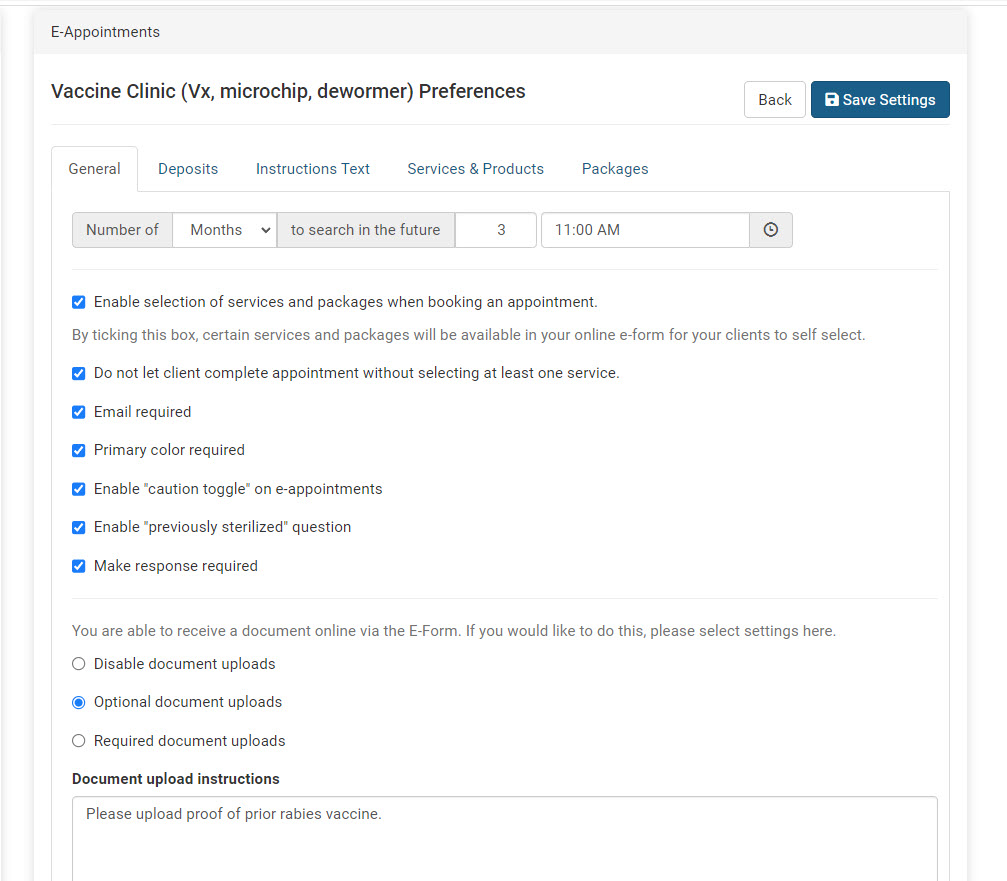
Refine Services for E-Appointments
- Go to Settings > E-Appointments and click Edit on the vaccine appointment type.
- Go to the Services & Products tab and toggle on the limited services available at your vaccine clinic.
- Add a description of any requirements for each vaccine — this is a big time saver and lets clients make their own decisions.
- You can also enable any packages you have.

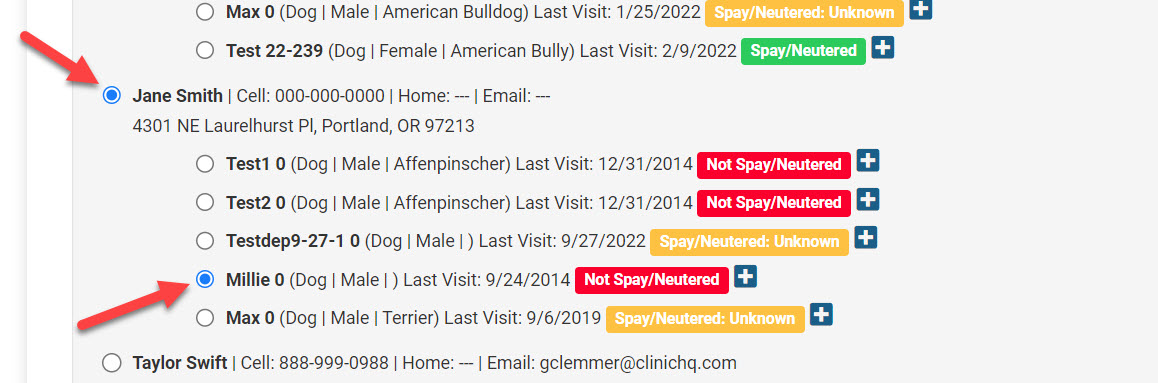
Approving Sign-Ups
- As sign-ups come in, go to your Wellness Calendar.
- Click the E-Apps button and approve the E-Appointments.
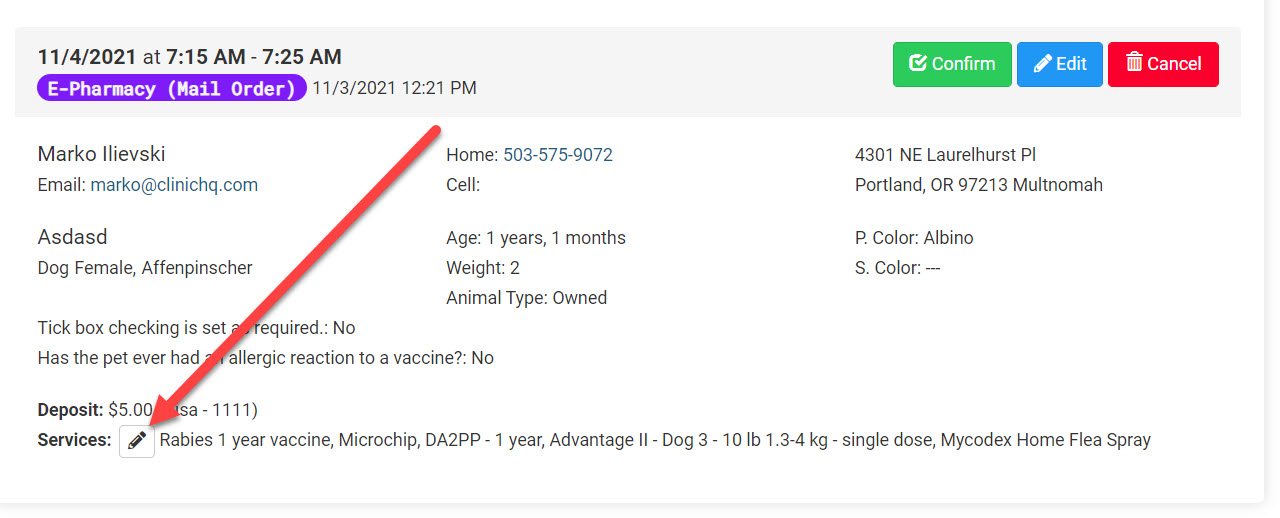
Select the owner and animal if they've been in your vaccine clinic before:
Managing Deposits
- To enable/disable deposits for vaccine appointments, go to Settings > E-Appointments > Edit (vaccine appointment) > Deposits tab.
- We suggest collecting the full amount due for services ahead of time to minimize transaction time during your clinic.
Pre-Clinic Preparation
There are many things to get ready prior to your clinic. This section takes you through pre-clinic, intra-clinic, and post-clinic preparation.
Forms
Consent to Treat Form: Download here — edit for your clinic and upload in HQ. See the Templates section for details.
Take-Home Form: Download here
Night-Before Checklist
- Print all paperwork: Clients > Check In/Checkout > Print/Email Paperwork. This ensures rabies certificates, consent forms, and service records are ready when clients arrive.
- Pre-bag preventatives and staple them to paperwork for fast distribution.
For Walk-Ups / Drive-Ups
You may need a mobile office to generate certificates and collect payments.
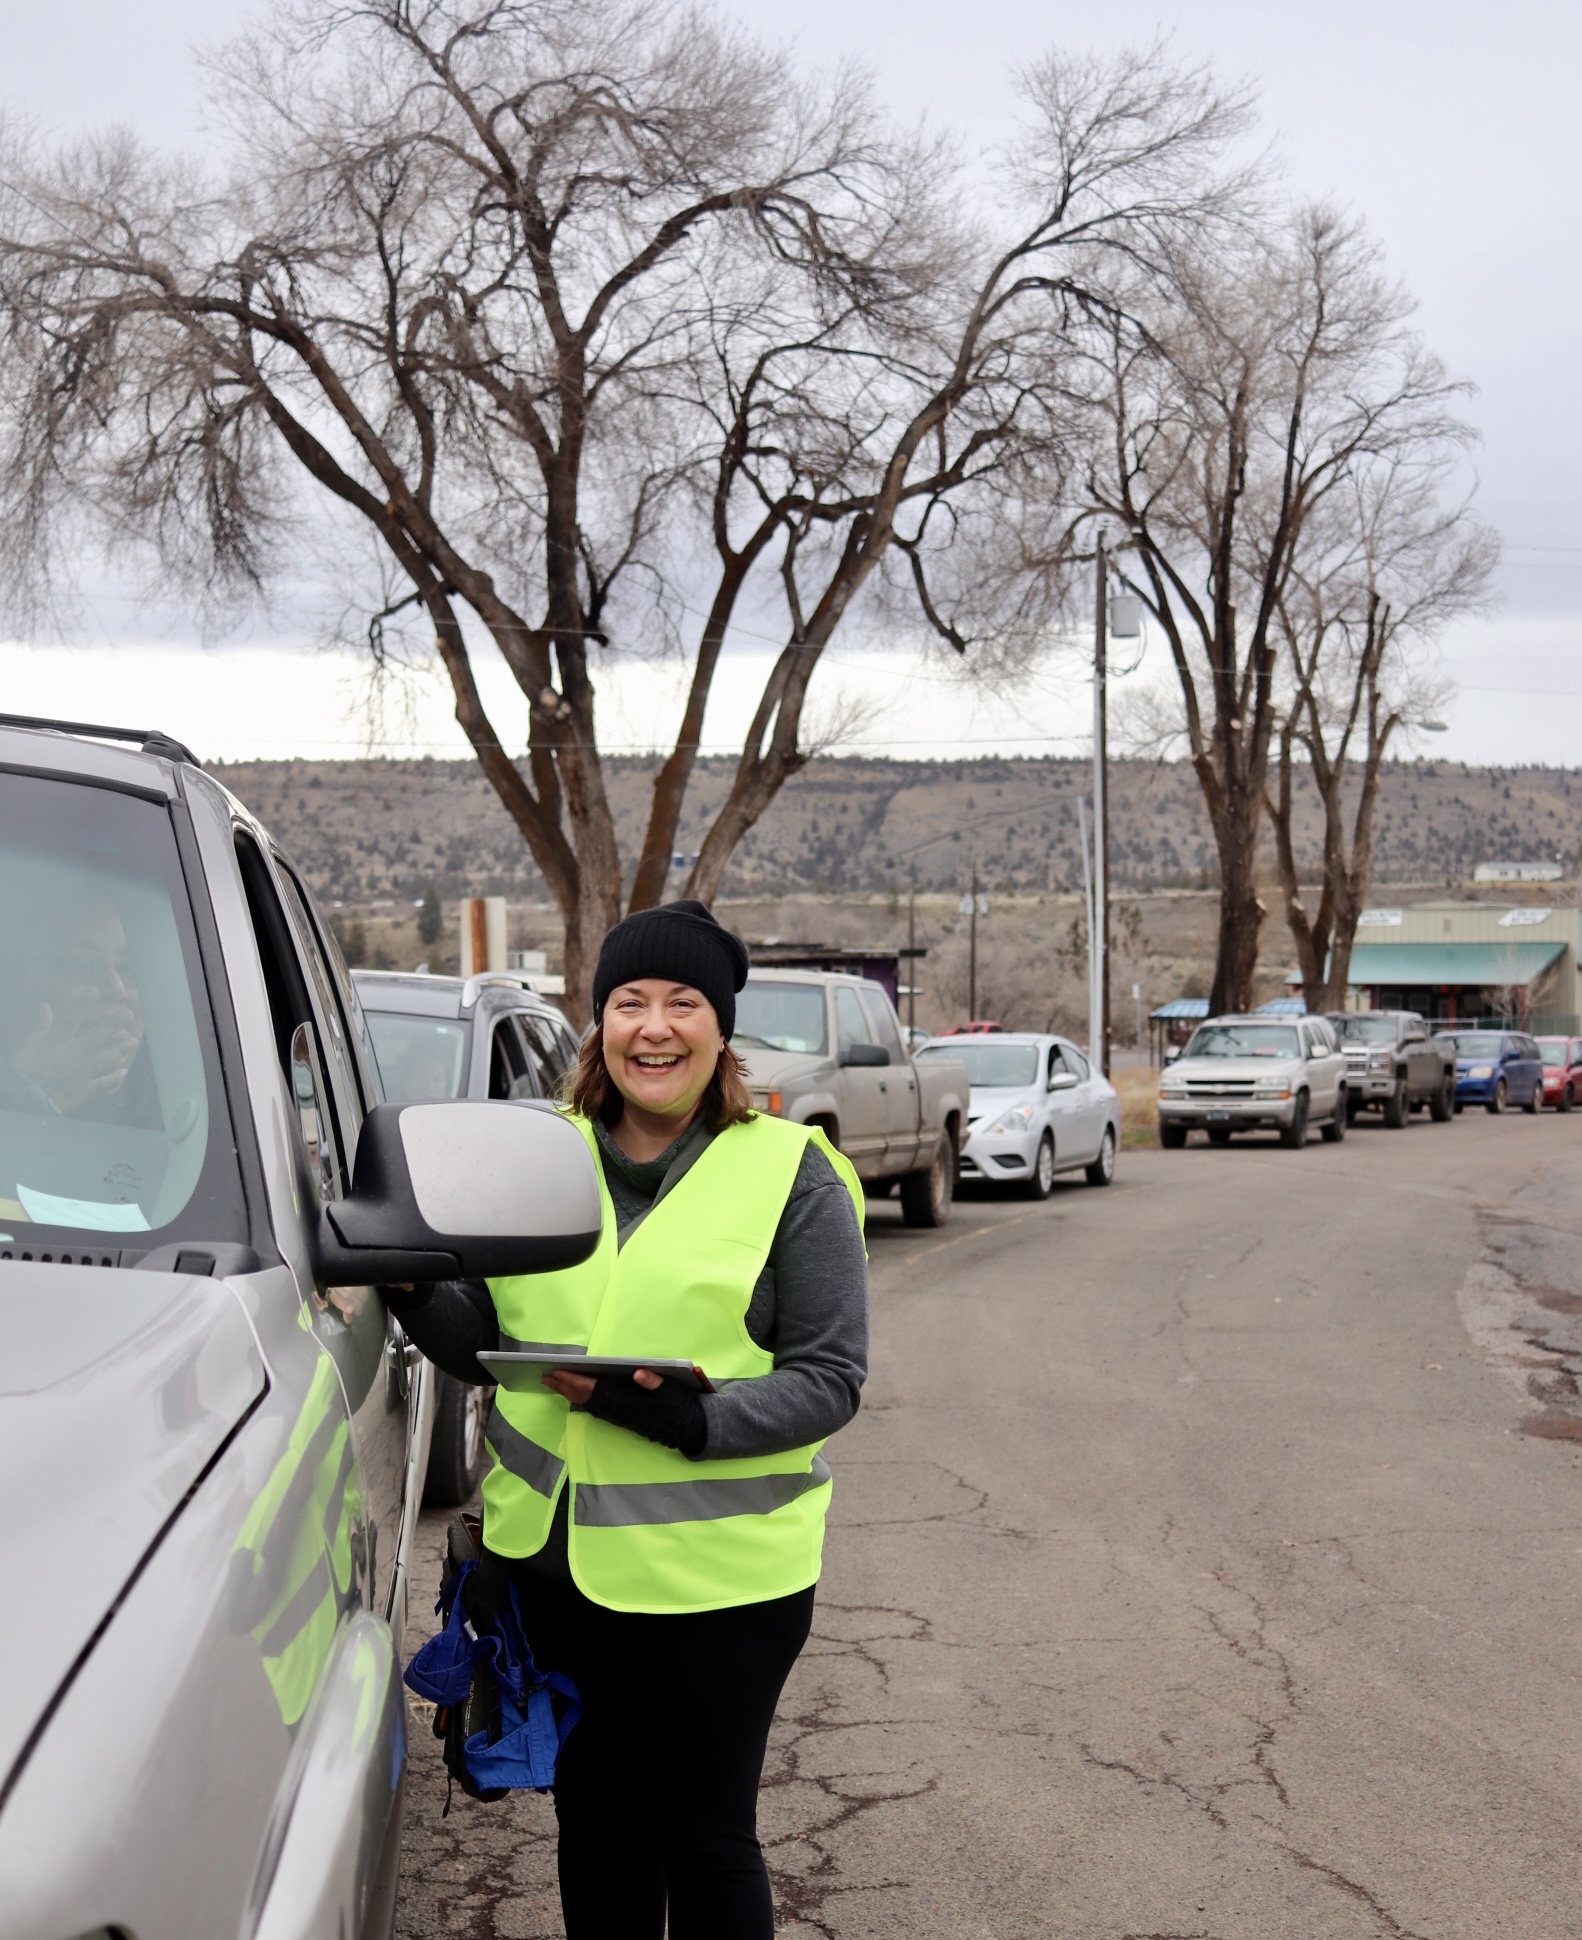
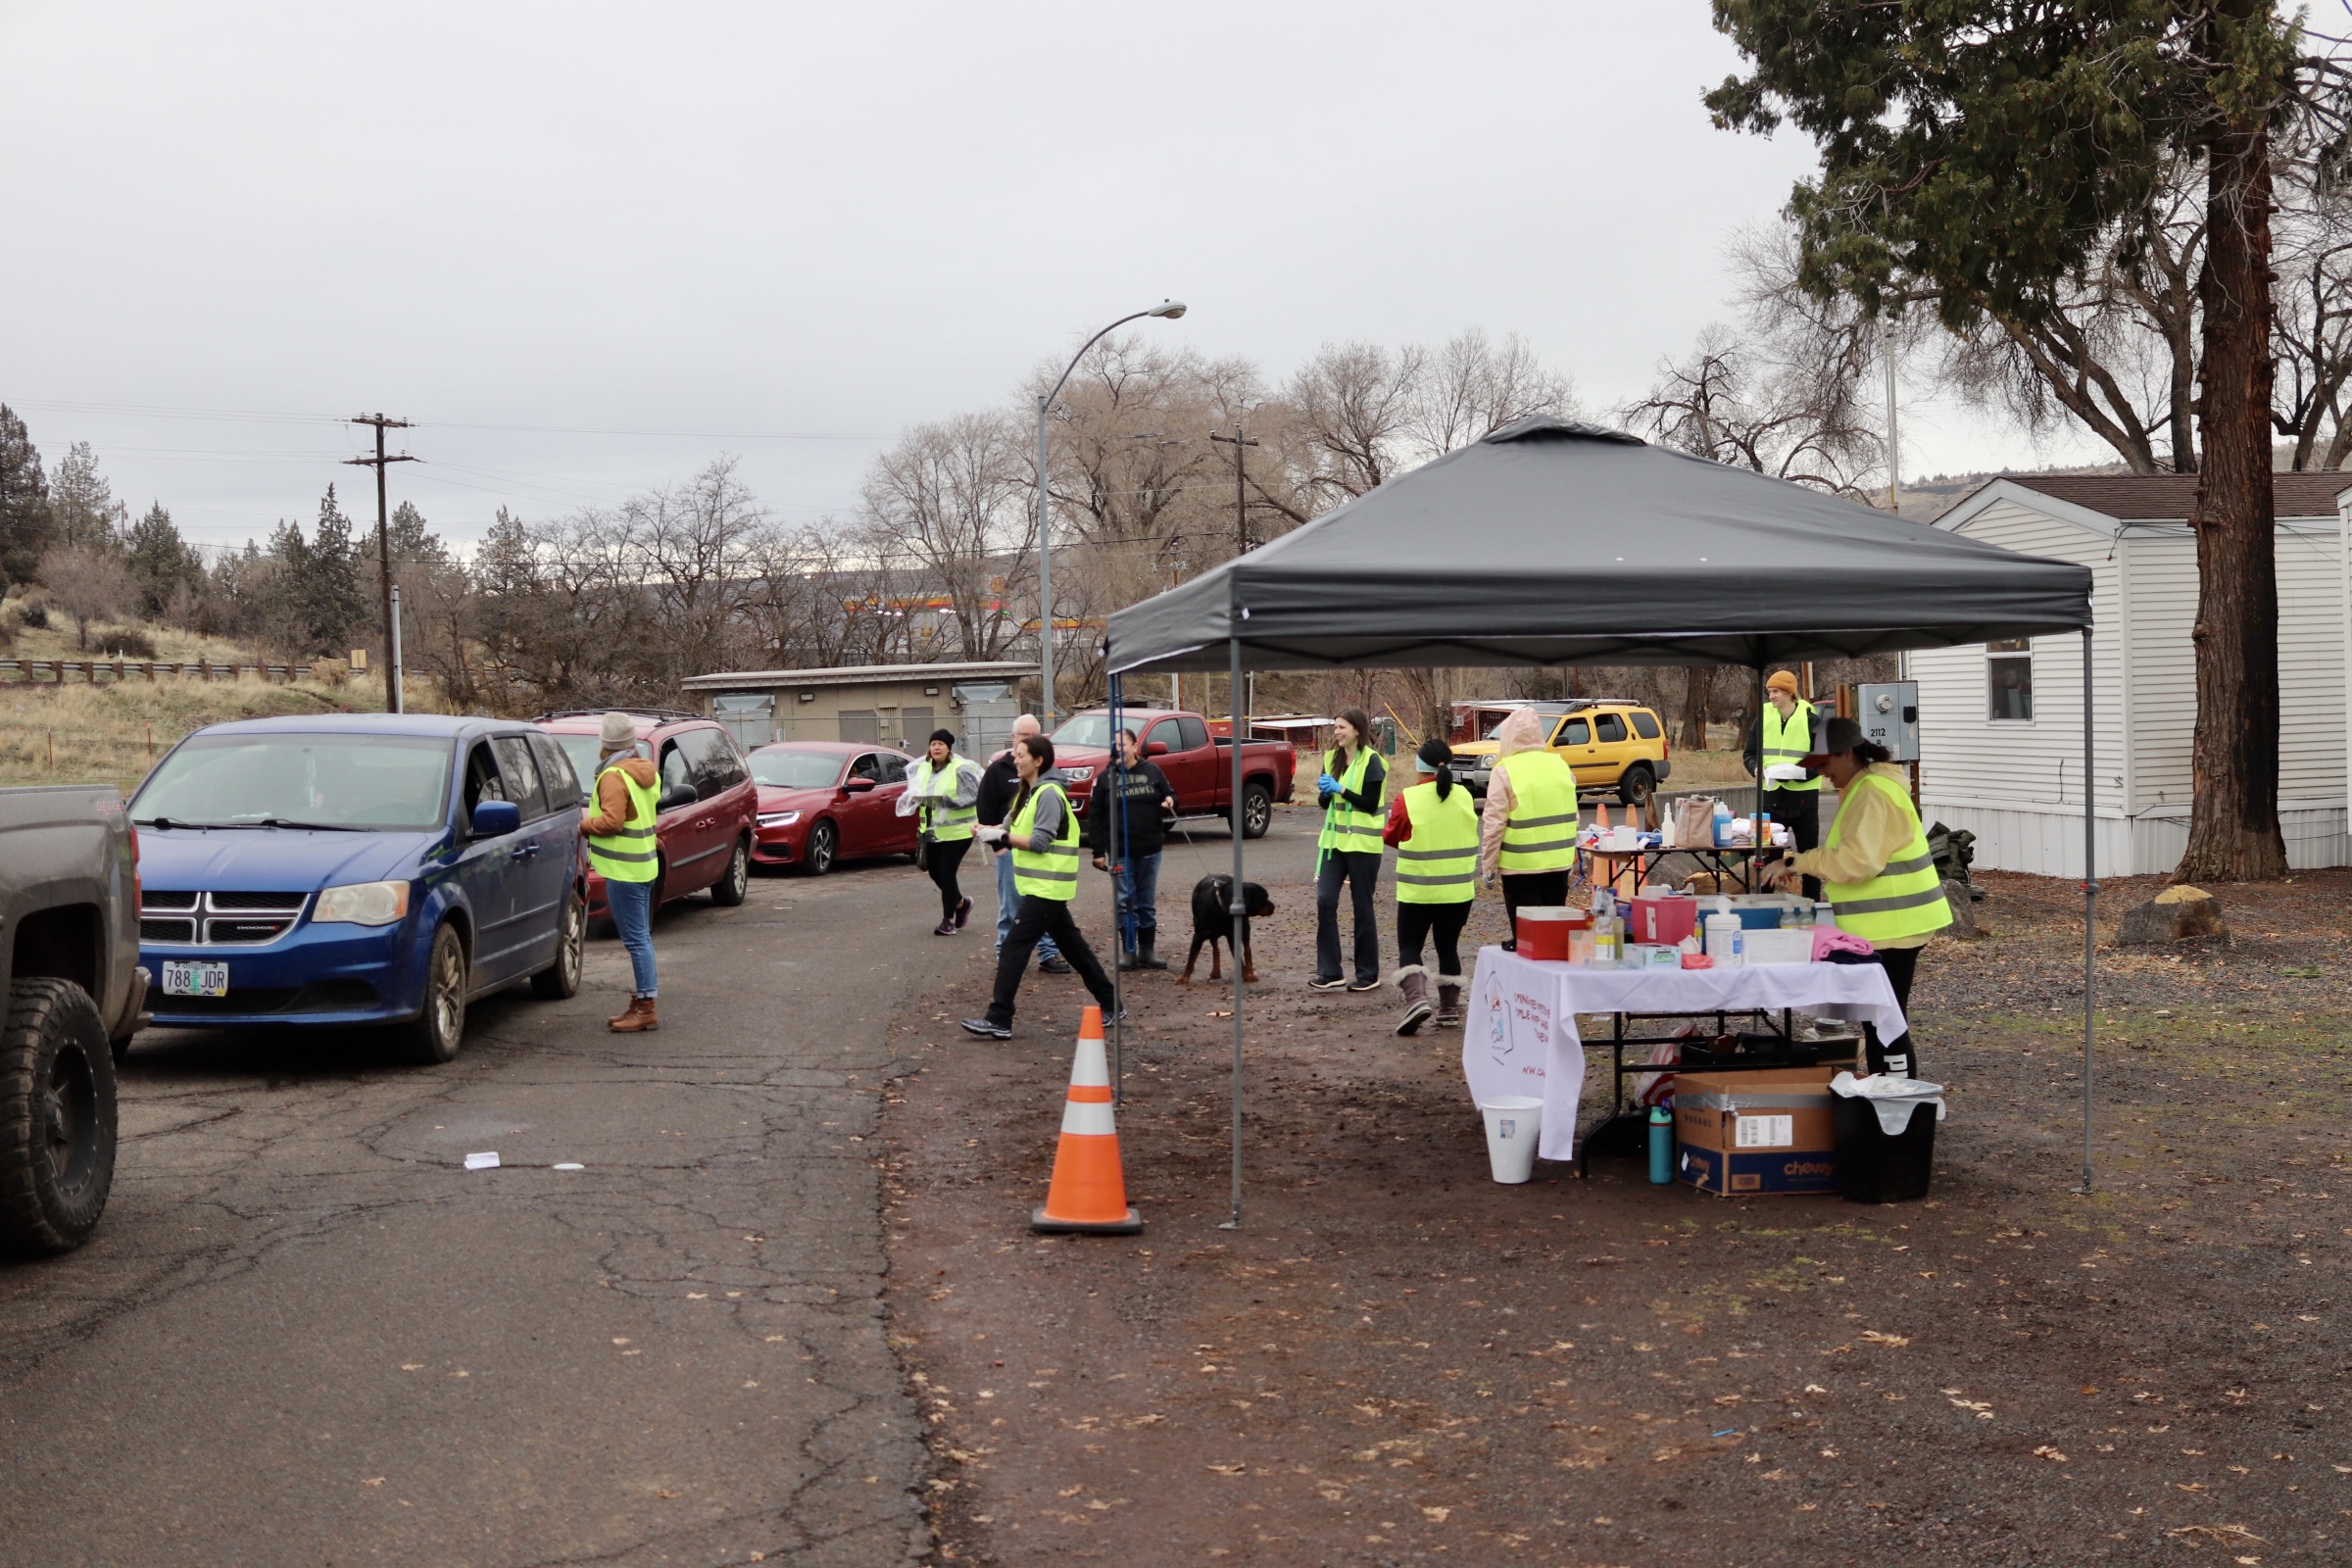
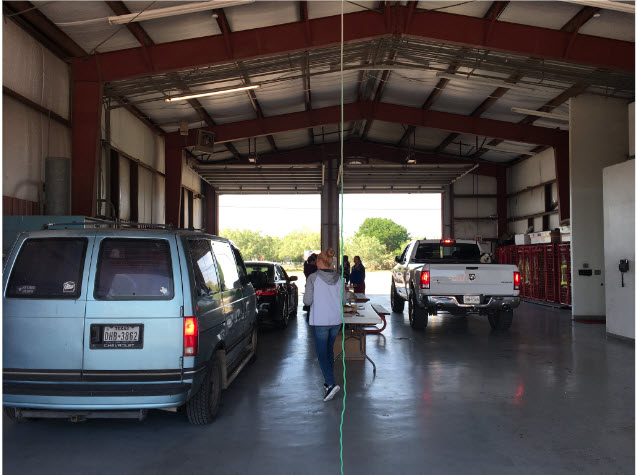
Clinic Day Setup — Curbside is Best
One-Team Flow
The best flow is one where clients stay in their vehicles and proceed through the parking lot in a circular shape.
Two-Team Flow
A double bay fire station is perfect for a two-team setup. The vaccines go on a table in the middle and two full teams service each side. Average wait time can be reduced to five minutes.
Having clients stay in their vehicles is safest for everyone because:
- It limits the spread of diseases through contact with other animals.
- It minimizes animal handling — a key fear-free approach.
- It minimizes flight risk (running off).
- It minimizes the risk of dog fights.
Having clients stay in their vehicles is fastest because each appointment should take about two minutes per pet with the curbside approach.
How Many Can You Do?
70 animals × 3 hours × 6 staff: One veterinarian, three technicians, and two HQ admins.
140 animals × 3 hours × 12 staff: Double the teams, double the output (requires dual-bay parking configuration).
The Team
| Role | Count | Responsibilities |
|---|---|---|
| Veterinarian | 1 | One-minute exam, TPR, rabies vaccines (check your state regulations) |
| Technicians | 3 | One holds for vet, two administer vaccines |
| HQ Admin | 2 | One does curbside check-in via e-Lobby, one records TPRs and checks patients out |
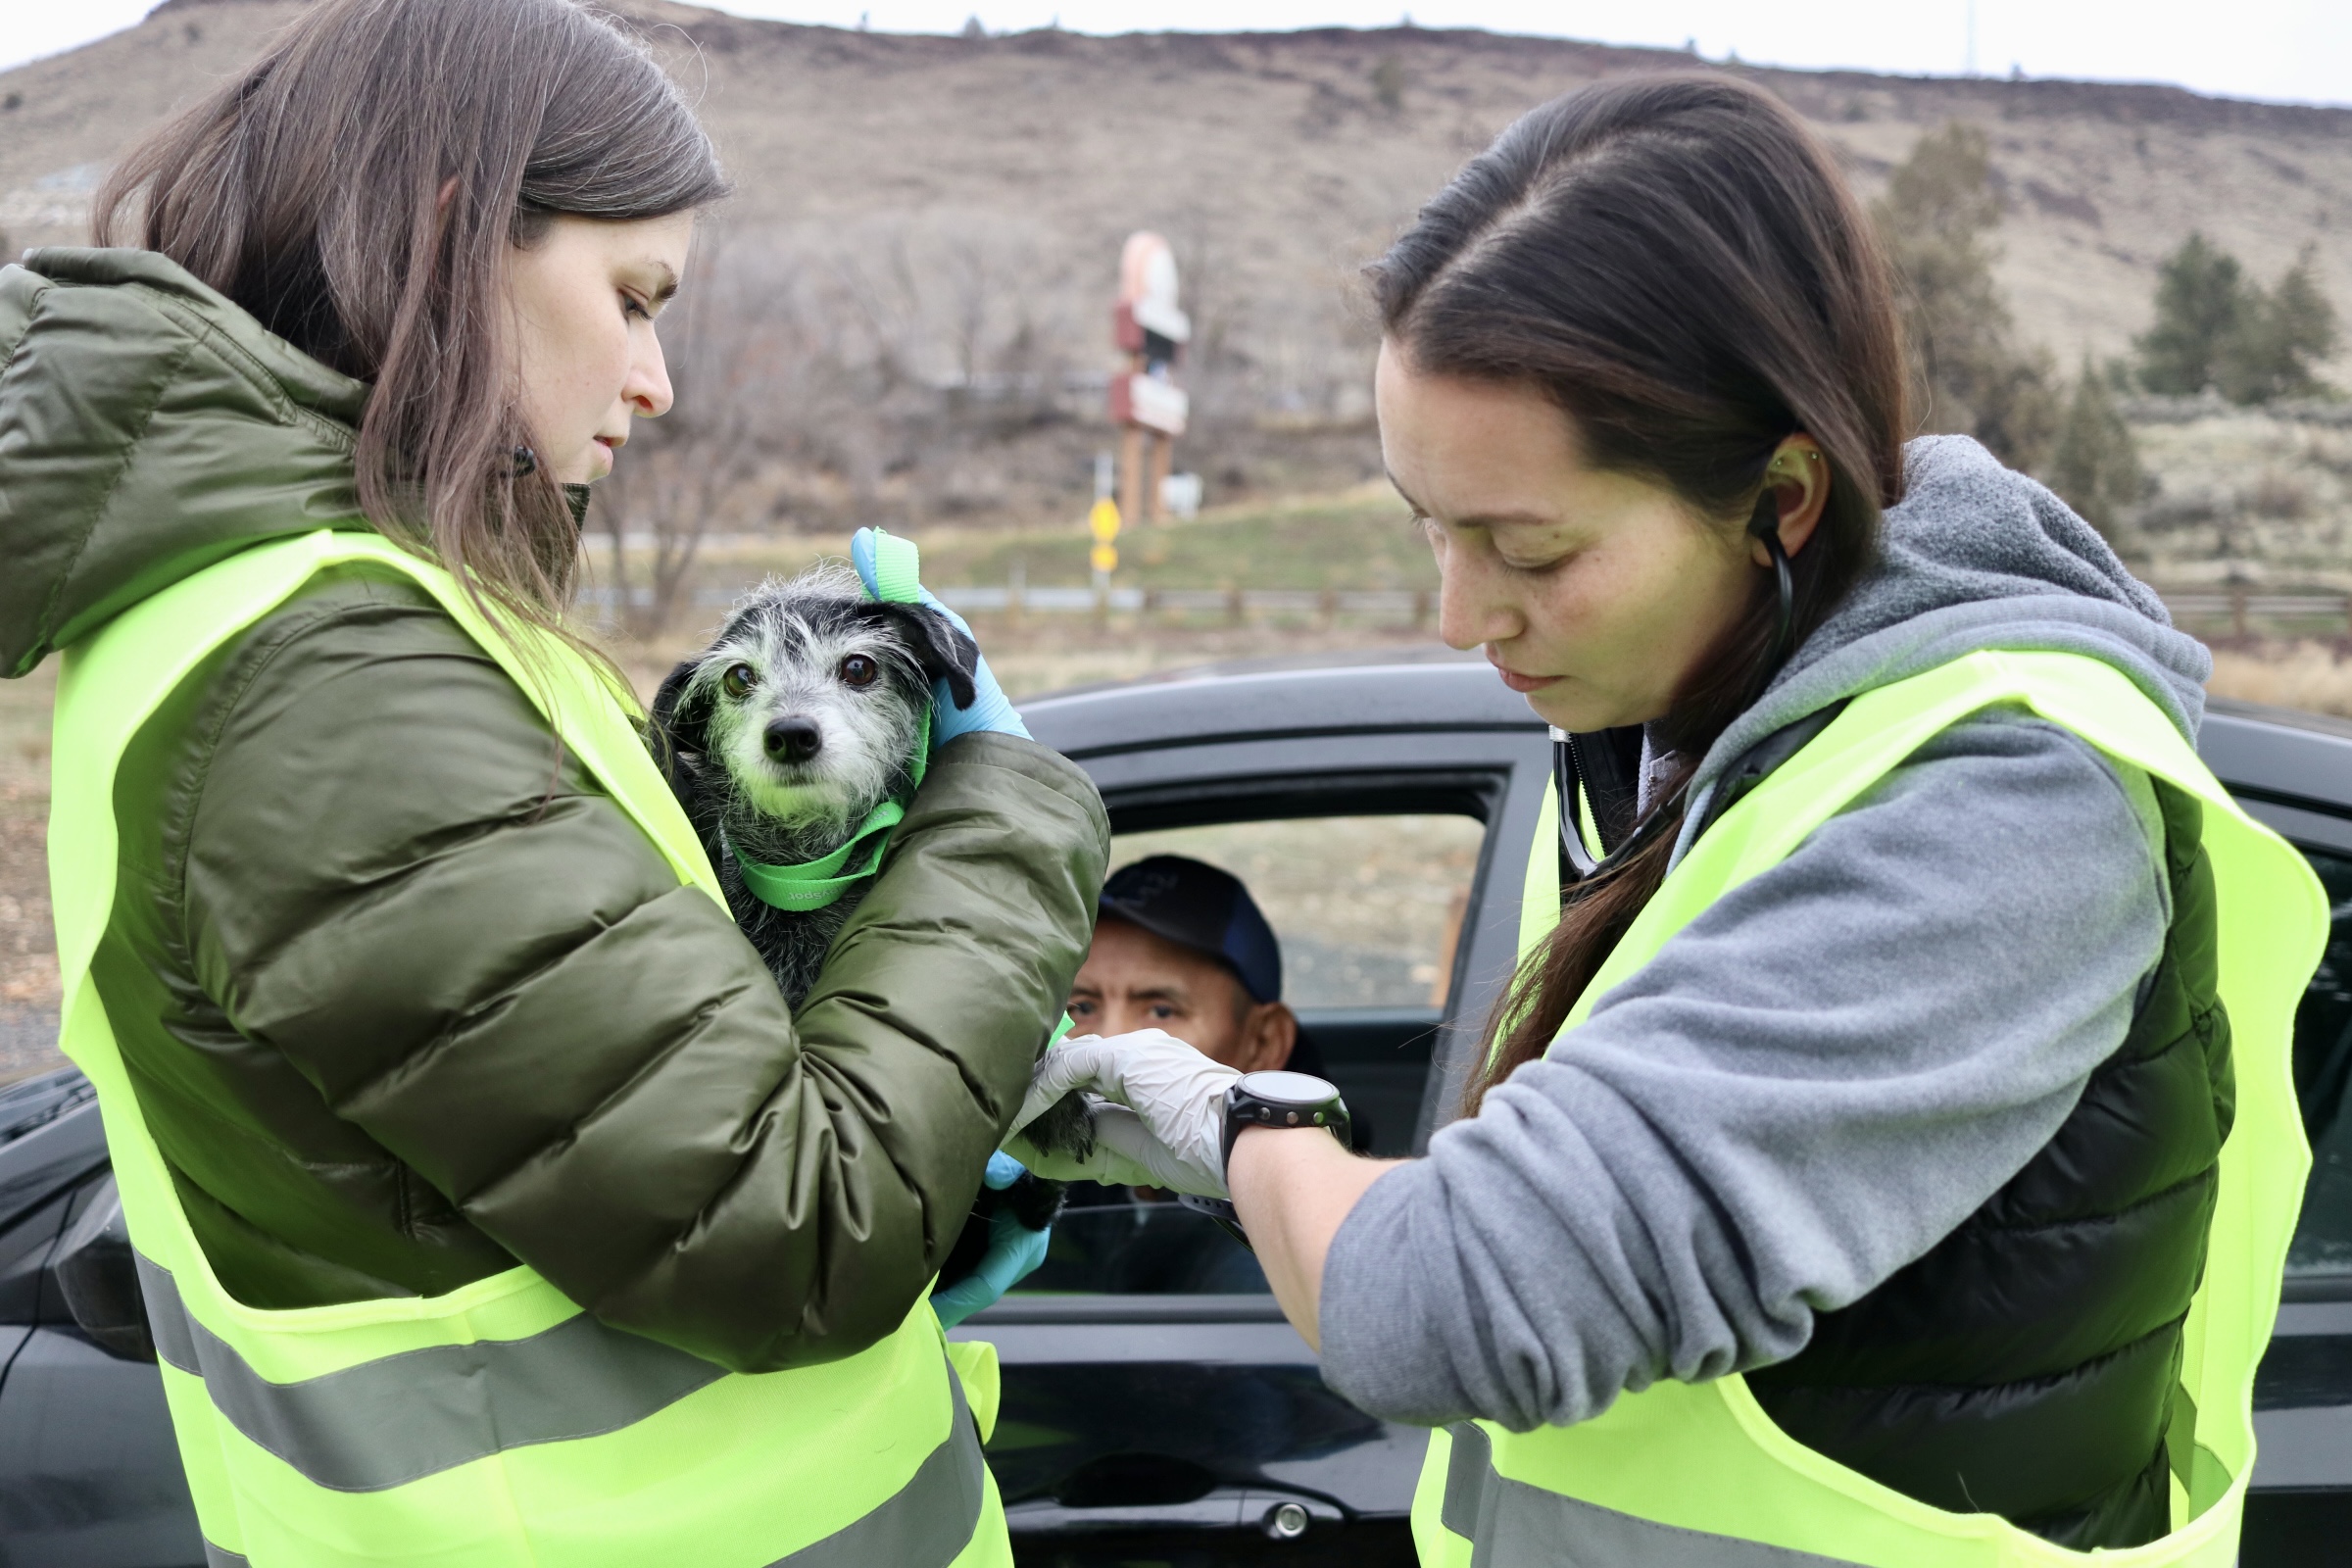
Fear-Free Animal Handling
Take The Free Course!
Any person who works or volunteers at a high-volume clinic can take the Fear Free Shelter Program curriculum free of charge. Sign up here.
Key Tips
- Use spray cheese as a way to control the head and mouth of dogs.
- Use a towel over the head for frightened small dogs and cats.
- Handle the animal as little as possible.
- As few people as possible should interact with the animals, and only qualified medical staff should touch them.
- A muzzle may be required to protect staff.
- Pre-do EVERYTHING (consents, payment) to reduce time at the clinic.
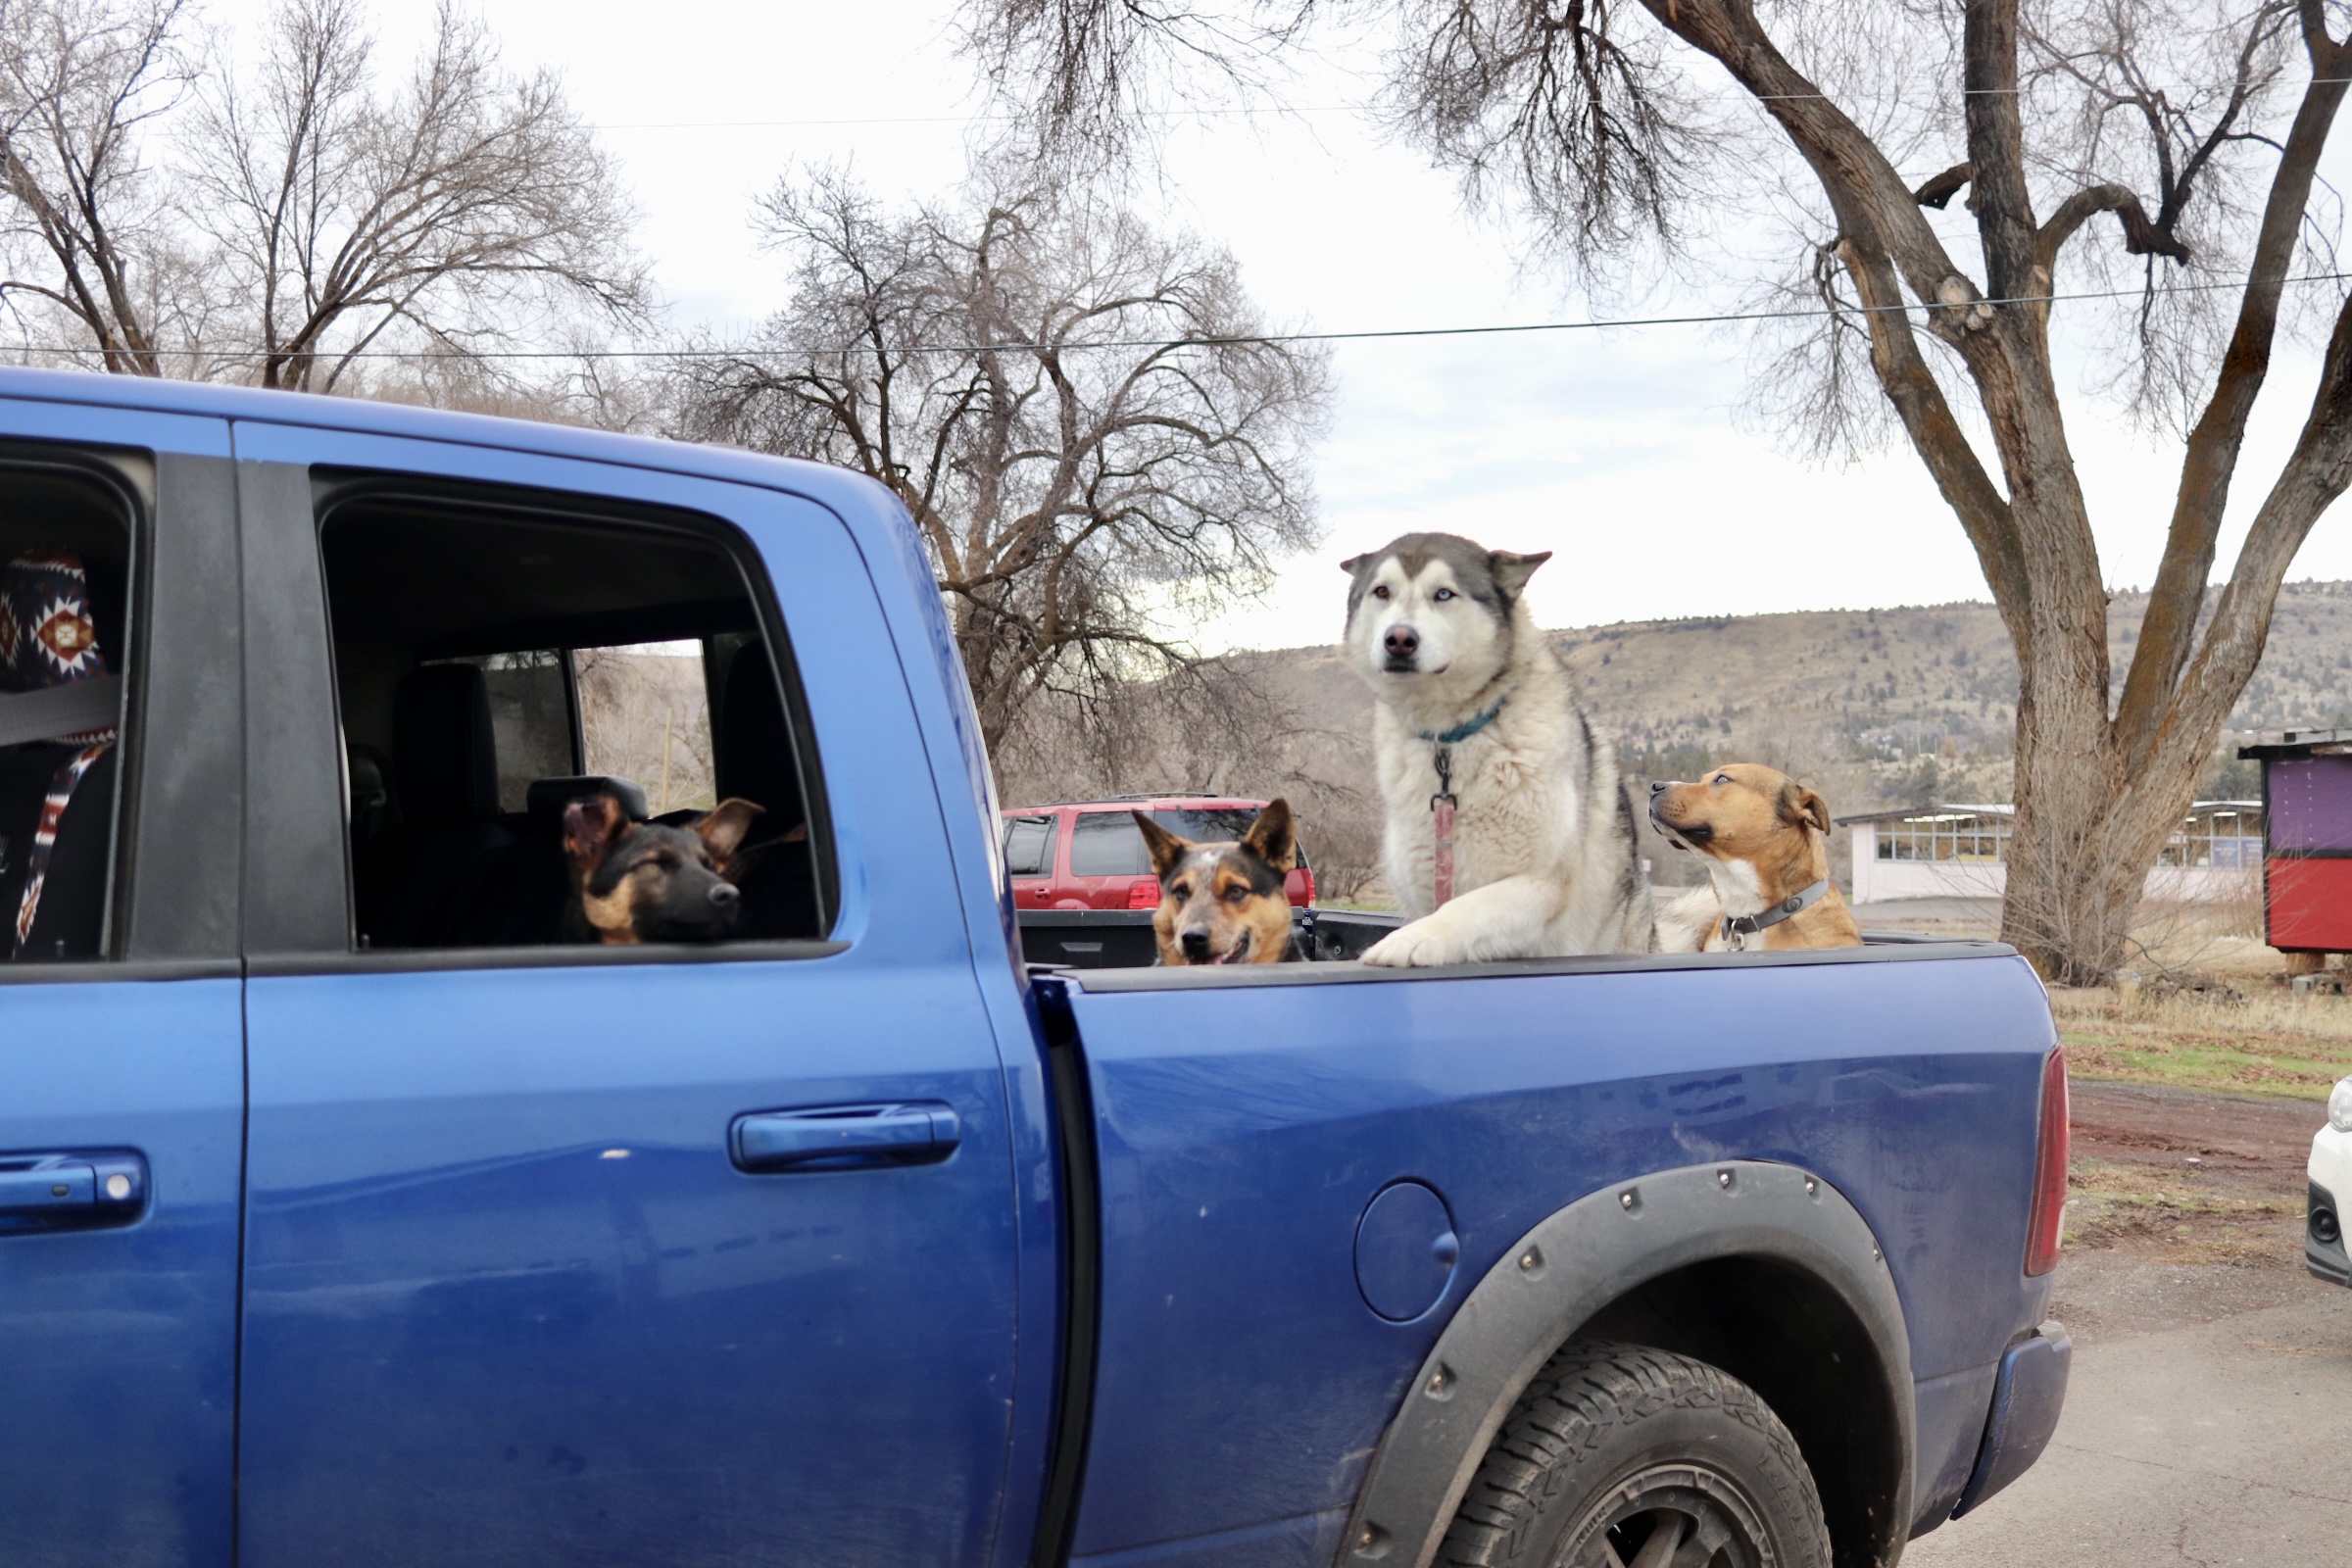
- Leap frog animals to the front if dogs are in the back of a pickup or if you notice high anxiety or aggression.
Why Use HQ for Vaccine Clinics?
Running vaccine clinics through HQ gives your team the ability to:
- Track how many clients to expect.
- Send vaccine reminders.
- Generate rabies certificates.
- Save complete medical histories.
- Auto-register microchips.
- Prepare inventory in advance.