E-Pay & Card Vaulting

What is E-Pay?
E-Pay is a feature that allows your clinic to send public clients a secure payment request via email.
To use E-Pay, your clinic must first sign up with our card processing partner, MP Group.
Once enabled, you can request payment during checkout by simply clicking the credit card icon next to the client's name. This will automatically send the client an email with a link to complete their payment online.
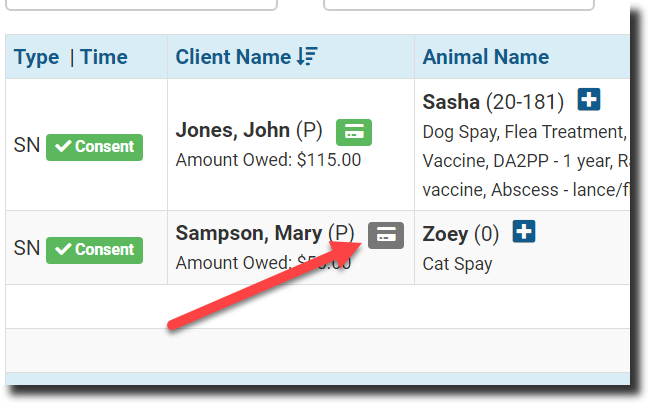
You will notice the e-pay request as a credit card icon next to the public client's name on the Check In/Checkout scree, on the Financial tab within an appointment, or in the E-Lobby.
- Click the credit card icon to receive the option of sending a payment request.
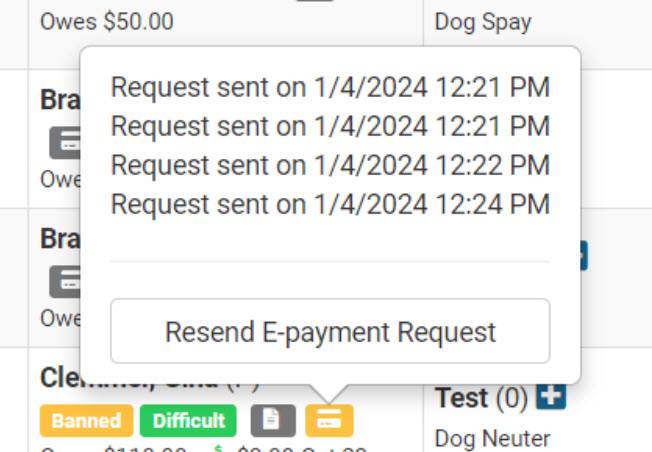
- Once done, a green banner will appear across HQ indicating the request was sent successfully and the icon will turn yellow. (Click the icon again to see the timestamp of when the request was sent.)
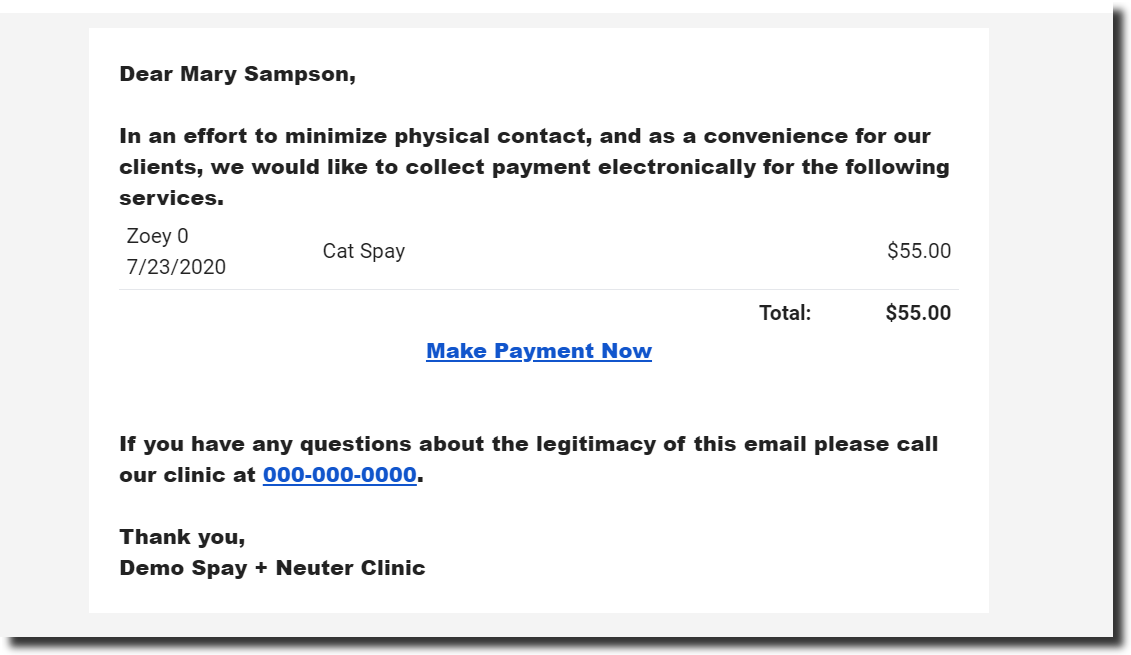
- The client will receive an email with the outstanding balance of all animals for this visit date. They will click Make Payment in the email, enter their card information, and submit the payment. The client cannot pay a partial amount. They are only given the option to pay in full through the payment request.
- When the client pays, the card icon will turn either green or red and the balance due will drop to $0. This will be recorded as a credit card "Online" transaction when looking at the payment details in HQ.
- When a client receives an e-payment request and enters their card details, they can choose to vault the card for future use (similar to saving a payment method on Amazon).
- After payment, the client gets an automatic receipt, and the payment is updated in real time to Clinic HQ.
- For future appointments, the client can use the vaulted card and decide whether or not to enable automatic payments. The card icon next to the client’s name will change color once payment is processed.
What E-Pay Card Colors Mean
The card is grey initially. When you send the e-pay link(by clicking the card), it turns yellow. When the client pays, it turns green or red.
 Grey- no action has been taken.
 Yellow- e-pay link was sent to the client.
 Green- Client PAID and vaulted their card.
 Red- Client PAID but did not vault their card.
When the request is sent to a client, the date and time are logged. Click the yellow icon to see when the requests were sent. You can send an e-payment request multiple times.
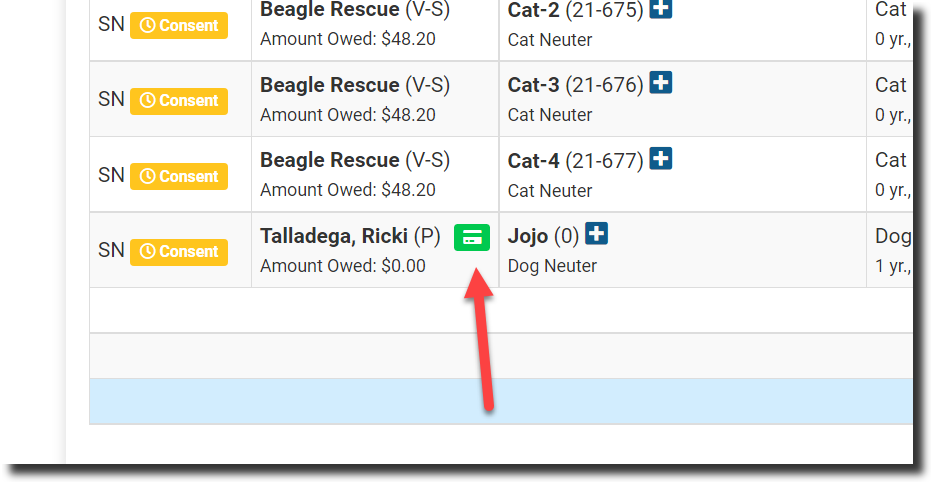
Using E-Pay in the E-Lobby
The animal card will indicate if the client owes money. The credit card icon has a colored dot indicating the status of an e-Pay request. Grey = the request has not been sent.
By clicking the e-Pay button, you can send the link to the owner's email. The colored dot will turn yellow/gold when the request is sent.
Once they have paid, the colored dot will turn green or red, and the amount owed will be $0.

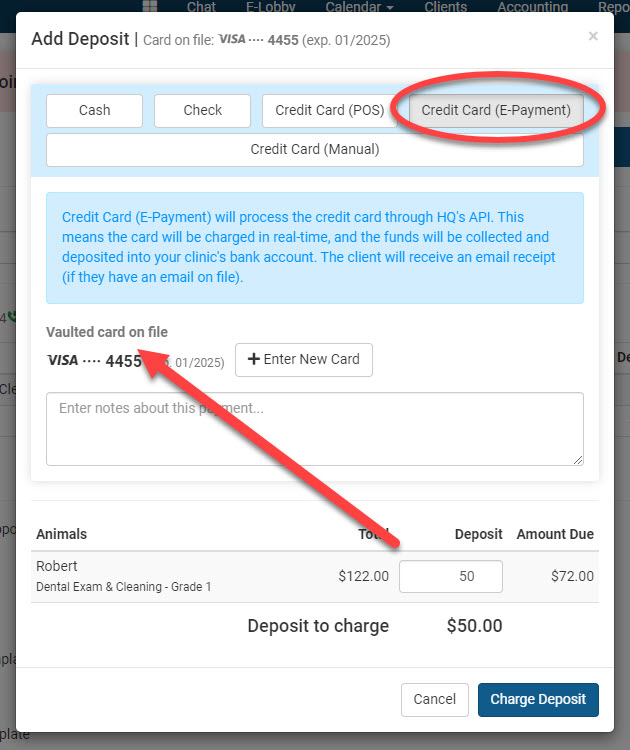
Vaulted Card for Deposits
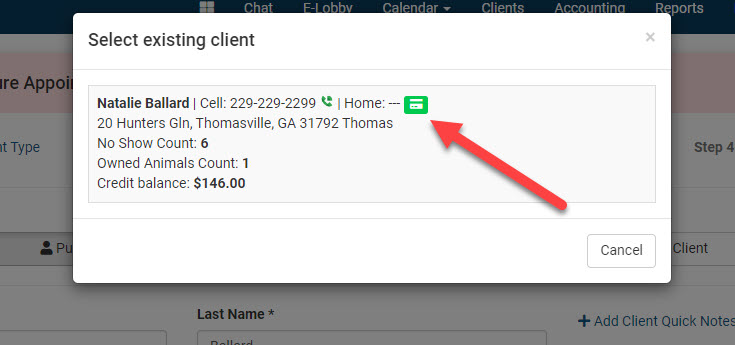
- If the client has previously used e-Pay and vaulted their card, the saved card can be used to charge a deposit when scheduling internally for a new appointment.
- The green card icon will appear next to the clients name when scheduling an existing client.
- From the scheduling window, click +Add Deposit
- The first thing to note is at the top of the popup if the client already has a card on file. If they do, you can simply use the vaulted card.
- If the client wants to use a different card, you can select the Add New Card button.
Card Vaulting
Public clients can save a card on file when paying through an e-payment request, while Volume clients can save a card on file when paying invoices through their Portal.
Vaulting a Card
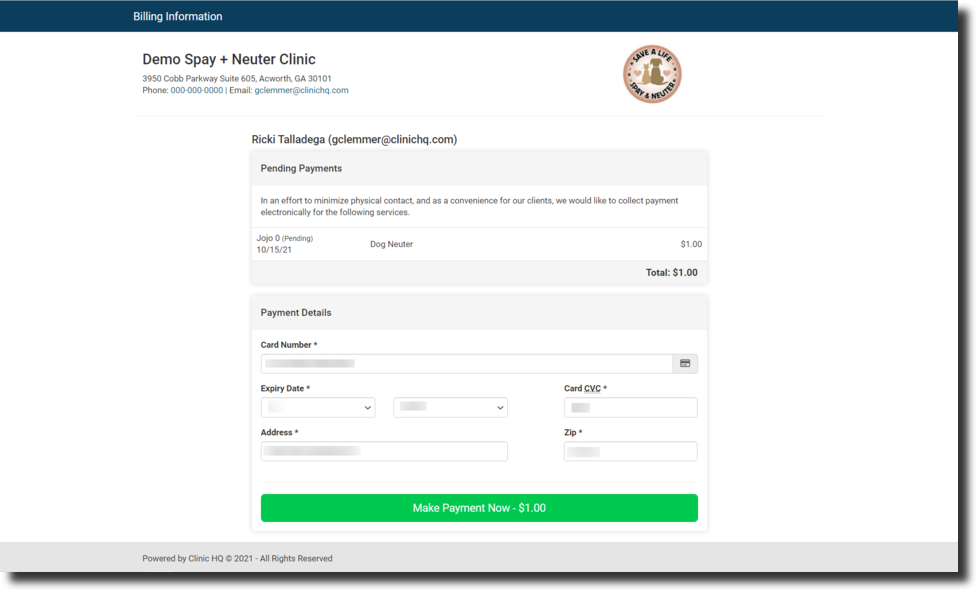
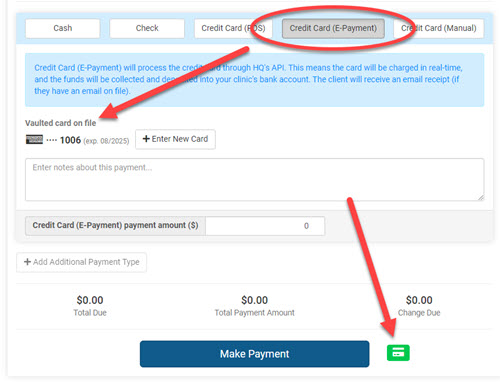
When users receive the e-pay link, they enter their card information to complete payment for services.
It looks like this:
- Once they click the Make Payment button, they will get another pop-up that looks like this:
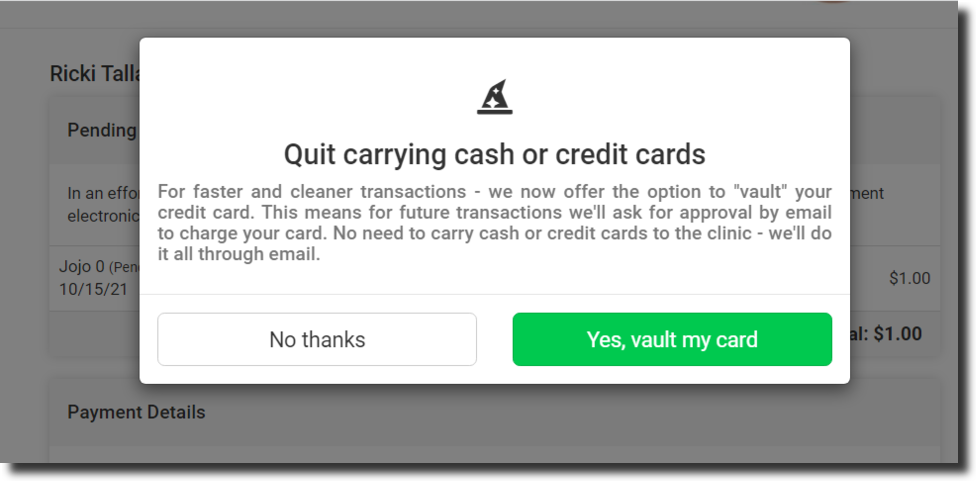
- Once the first payment is made, and the card is vaulted, the credit card icon turns green.
- If you add on another service, simply charge the card without asking permission from the owner again. They have given you permission when they vaulted it.
- You charge the card here in the financial tab of checkout.
- Another receipt will then be sent to the client for the new charge. They will get another email that lets them manage their cards.
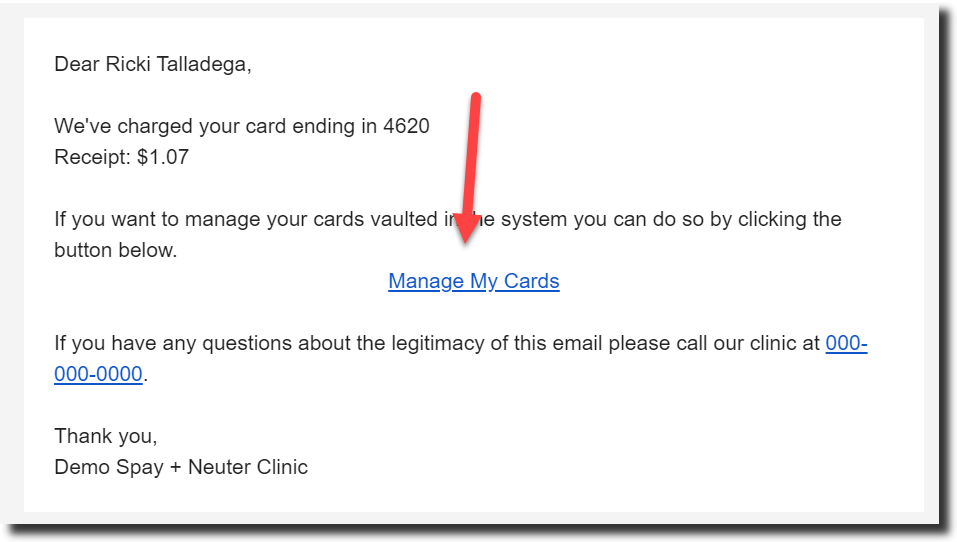 If they click here, it looks like this.
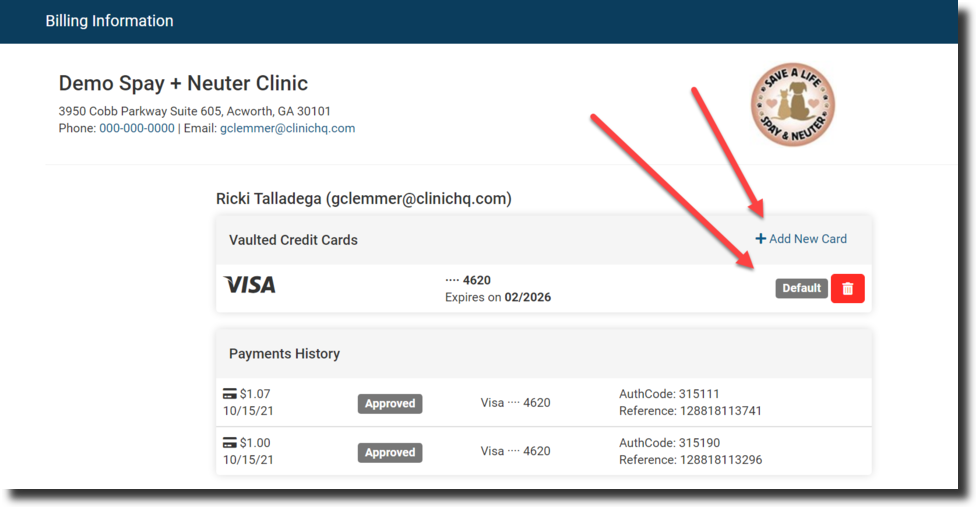
- They can remove their vaulted card at any time by clicking the red trashcan icon. They can switch cards by clicking the +Add New Card link.
- If they cannot manage to do this, you can look them up in HQ and remove the card via the Saved Credit Cards section under their Client Profile. To do this:
- Go to their client profile
- Scroll to the bottom of the page where the "Saved Credit Card" is located
- Remove the card
Troubleshooting E-Pay
What to do if the E-Payment option does not appear.
Please (blank)contact MP Group and verify that your account is active and that the credentials in Settings > E-Payments are correct, (blank)HERE.
"The E-pay Request is not going out. I click the button and nothing happens."
- First, please ensure that the user attempting to send payment requests has permissions enabled on their user role to "View Accounting" and "Modify Accounting."
- If this permission is not enabled, turn it on and save the role. Ask the user to then log out and back in to HQ for the role update to take effect. If the user role is already configured properly, then the issue may be with the user's browser. Please do the following three tasks:
- Latest Version of Chrome - If you already have Chrome installed, now is a good time to ensure you have the latest version installed. Most of the time, Chrome updates on its own, but sometimes not.
To get the latest version:
- Go to Chrome settings with the three dots icon in the top right. Click Settings, then About Chrome in the bottom left panel.
- It should say that your Chrome is up to date, but if it is not, you will have the option to update it.
- Clearing Your Cache - Clearing your cache means clearing the history of the browser. As you visit websites, little pieces of information are retained. By clearing the cache often, your browser will be super fast. You can select settings in Chrome to have it auto-clear daily. You will want to leave passwords in the cache, but in general, you should clear your cache from the beginning of time pretty often.
- Click on the Chrome settings icon in the upper right corner. It looks like the three dots stacked on top of each other.
- Scroll down to History and then select History again on the left of the menu.
- Select Clear Browsing Data.
- Ensure the frame is All Time. FOR BOTH BASIC AND ADVANCED. Under Advanced, check all boxes except passwords.
- Click Clear Browsing Data button.
- Allow Pop-Ups and Redirects
- Click on the Chrome settings icon in the upper right corner. It looks like the three dots stacked on top of each other.
- Select Settings on the menu.
- Select Privacy and security from the left panel.
- Go to Site Settings
- Scroll to the bottom and open Pop-Ups and redirects
- Under the section "Allowed to send pop-ups and use redirects" Click Add. Enter the Clinic HQ site: clinichq.com