Reconciliation & Financial Reports

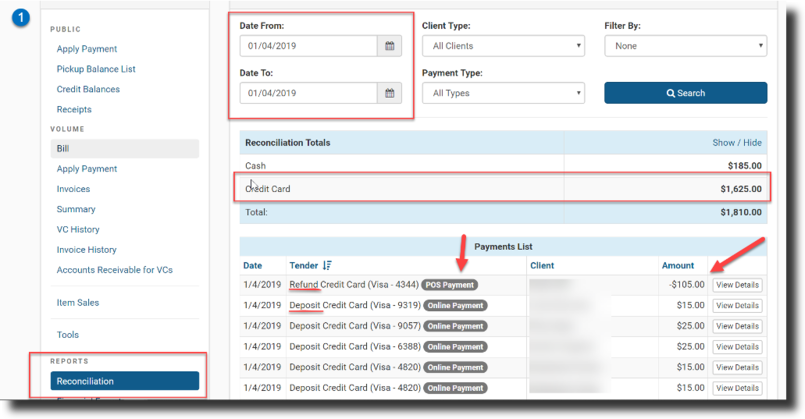
The Reconciliation Report
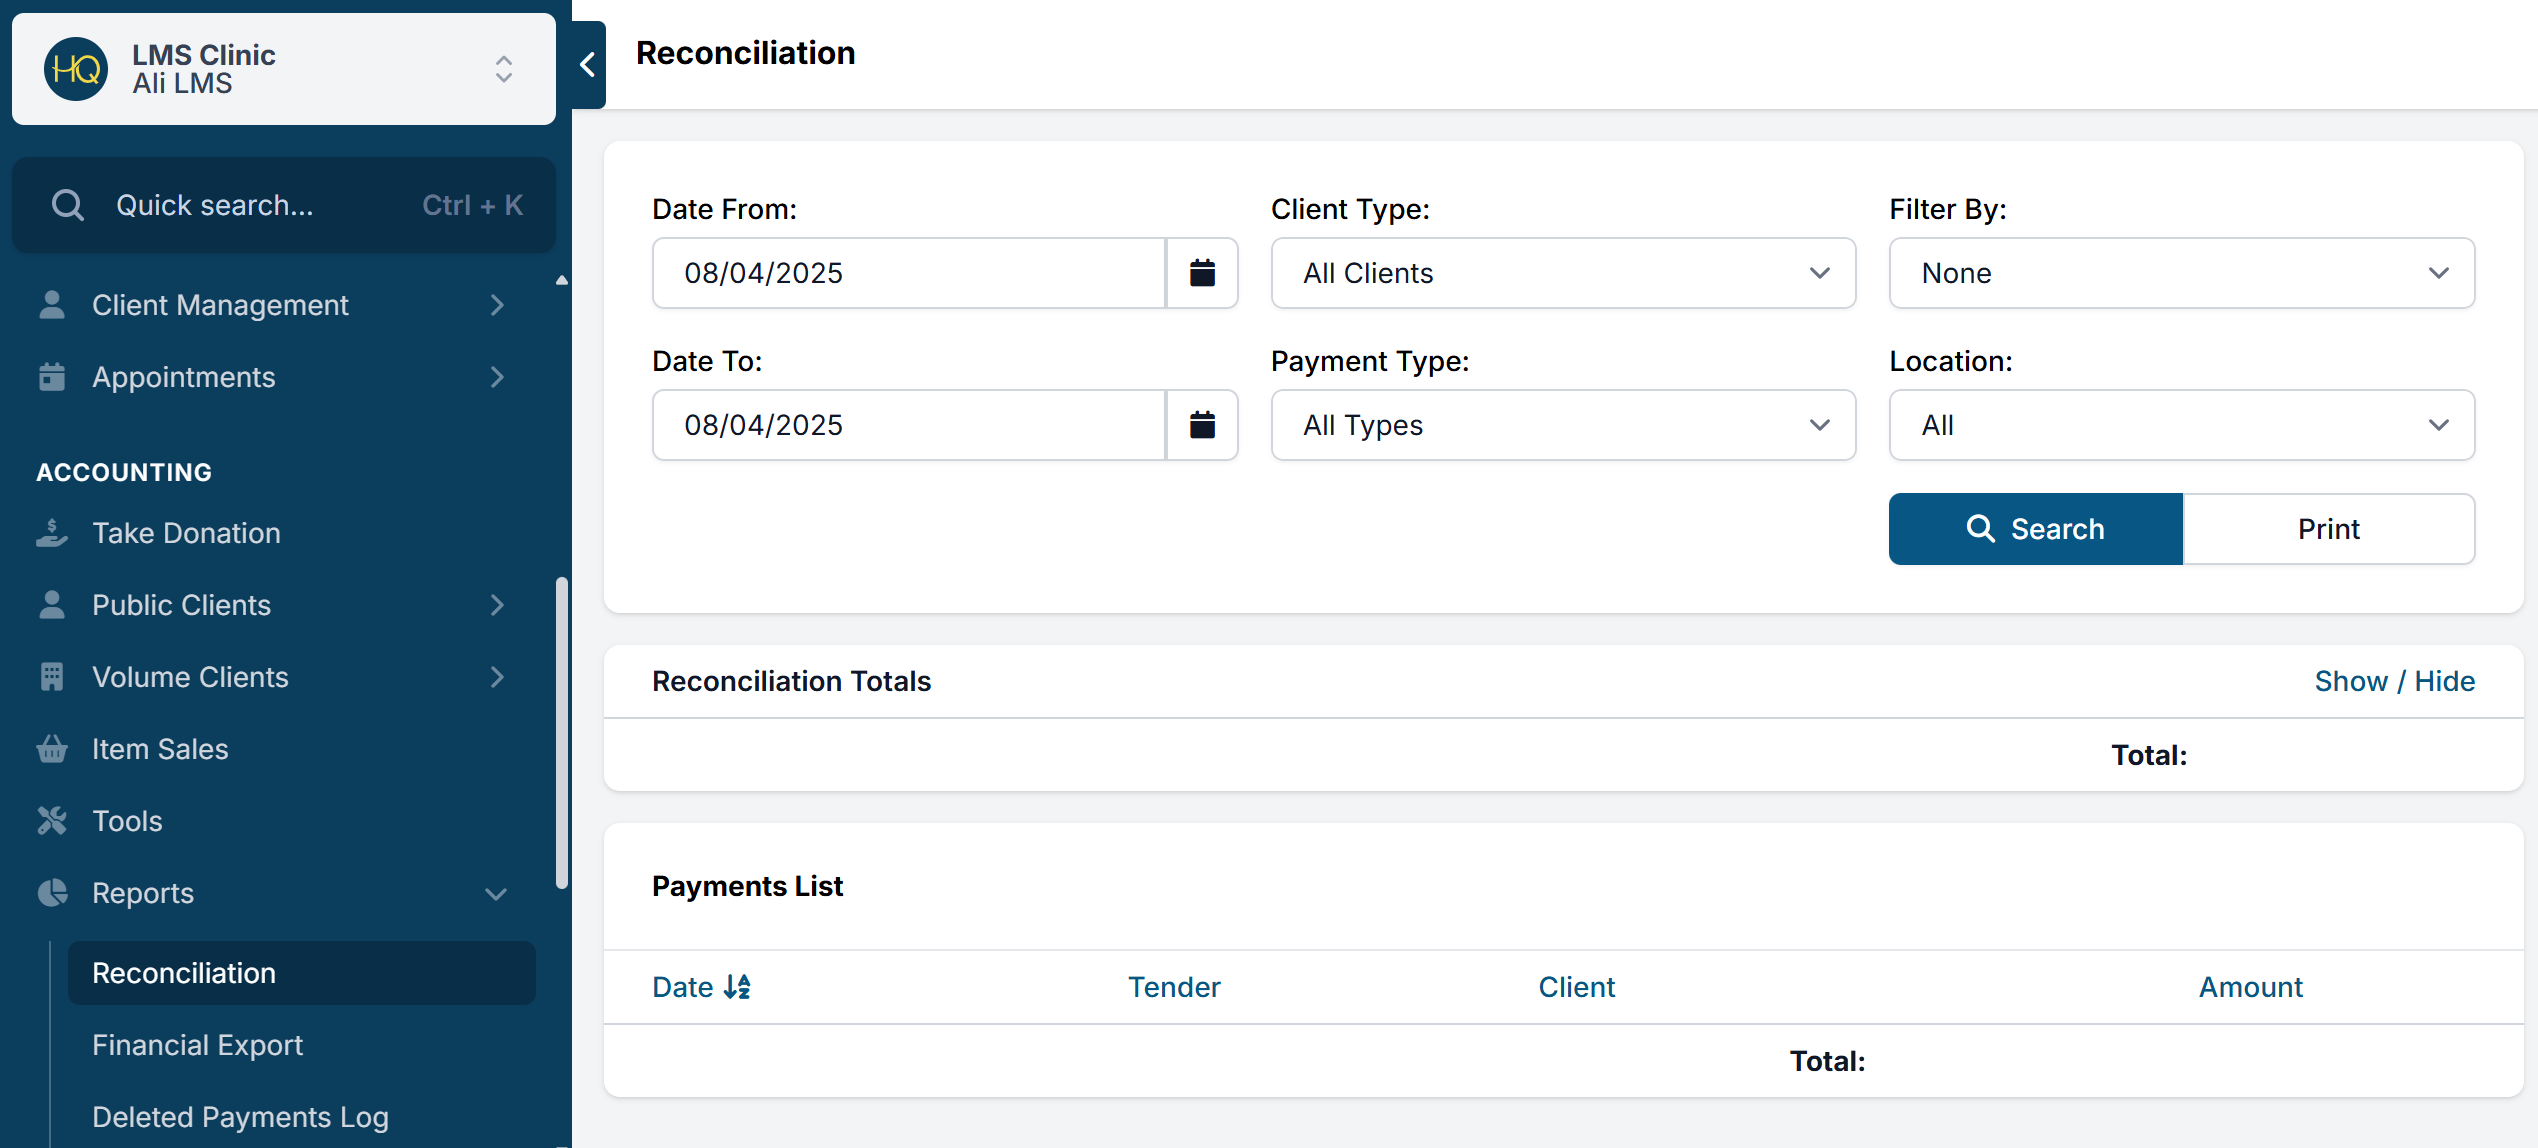
The Reconciliation Report (also called "Recon") is the report used to balance your drawer at the end of the day.
- Navigate to Accounting > Reconciliation.
- Select the Date From and Date To options — typically one day. For mobile clinics, you can also filter by location. For wellness clinics, you can filter by wellness vs. spay/neuter appointments.
- Click Search.
✅ Tip: Clinics should reconcile daily, or at minimum weekly, to count your cash drawer and match credit card totals with your merchant batches.
Reconciling Bank Deposits
At the end of each day, run the reconciliation report and count what you have in the cash drawer plus your credit card receipts to make sure everything balances. Then follow these protocols:
- A manager should print the recon report and initial next to the totals to confirm everything is balanced.
- Fill out a bank deposit slip for the same amounts.
- Photocopy the slip and attach it to the printed recon pages, and store in a three-ring binder.
- Paperclip the deposit slip and money together until a manager is ready to make the bank deposit.
- The manager makes the deposit and attaches the bank receipt to the recon slip bundle.
- Every month, the accounts person should pull up deposits via the bank software and confirm the amounts deposited.
Repurposing or Removing Payments
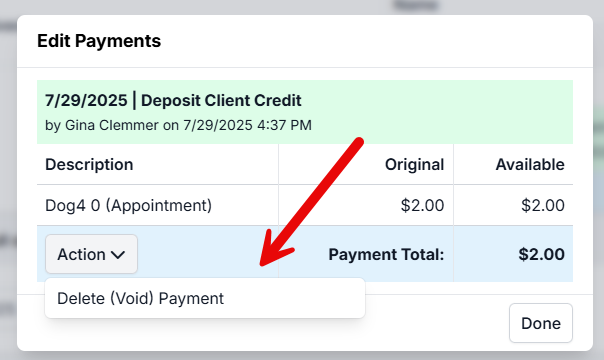
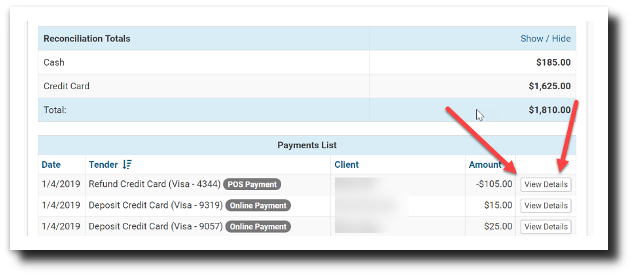
Payments can be removed (refunded or voided) in checkout, but also directly from the reconciliation report:
- Click the View Details button.
- Click Action on the payment.
- Choose the appropriate option from the dropdown menu.
The Financial Export
The financial export is the largest financial report in HQ. It provides a detailed history of every transaction as well as a summary of income by item.

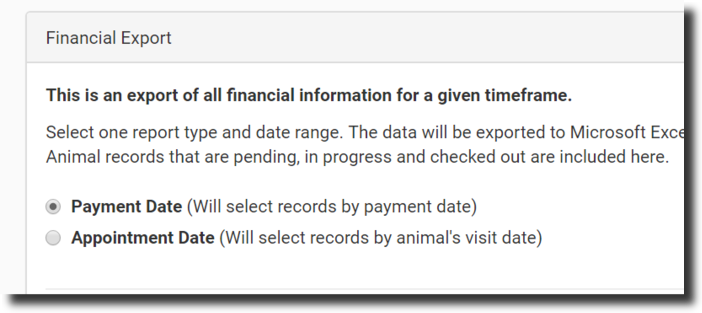
Generating the Financial Export
- Go to Accounting > Financial Export.
- Choose whether to pull transactions by payment date (Cash Based) or appointment date (Accrual Based). Select the desired date range and click Run the Export.
- The report will download in the lower right corner. Click the Excel file to open it.

The Five Report Tabs
The Financial Export contains five separate reports:

- Services Summary – A quick tally of all items sold, quantities, and total earned per service type. QuickBooks codes can be linked here.
- Payment Summary – Sums up all payments. If run by payment date, this will match the reconciliation report.
- Payments – Detailed raw data on all payments.
- Services – All transactions broken out by item type. Raw data — this is the report your accountant will want.
- Donations – All donations.
Services Summary Detail
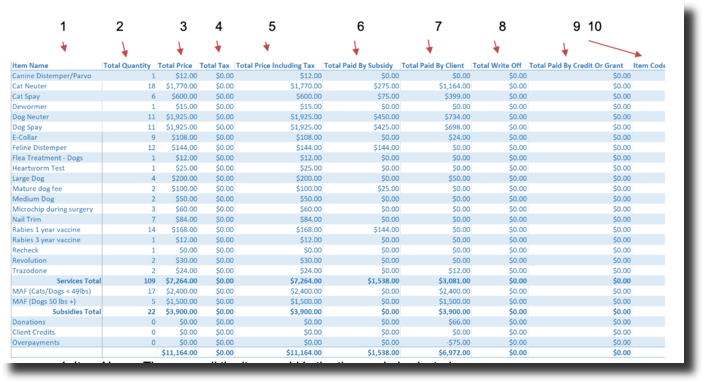
- Item Name – All items sold in the selected period.
- Total Quantity – Total sum of each item.
- Total Price – Normal price from Settings > Services & Products.
- Tax – Tax charged.
- Total Price Tax+ – Total price plus tax.
- Total Paid by Subsidy – Amount covered by a subsidy.
- Total Paid by Client – Actual amount paid by the client.
- Total Write Off – Uncollectable debts written off.
- Total Paid by Credit or Grant – Amount paid by credit.
- Item Codes – QuickBooks codes from Settings > QuickBooks.
Examples:
- John pays $65 of a $68 surgery → $65 appears in "Total Paid By Client".

- John pays $70 for a $68 surgery and donates the change → $2 donation captured in the Donations line.

- John pays $100 and asks you to hold $32 as credit → Client credit shown.

- Surgery fully covered by a voucher/subsidy → Run by appointment date to see the transaction; it won't appear in a payment-date report until paid.

Payments Summary Report
The second tab sums all payments. If run by cash-based (payment date), this number will match the reconciliation report for the same time frame. If run by appointment date, it calculates income for appointments that occurred within the date range, so it will not match the reconciliation report.
Reconciling Payments
Reconcile your transactions in MX Merchant with those in HQ — ideally daily, but at least weekly.
Notes:
- If your clinic accepts online payments, clients can pay at any time, even after the auto-batch has run. These payments appear in that day's HQ reconciliation but won't show in the MX Merchant batch until the next day.
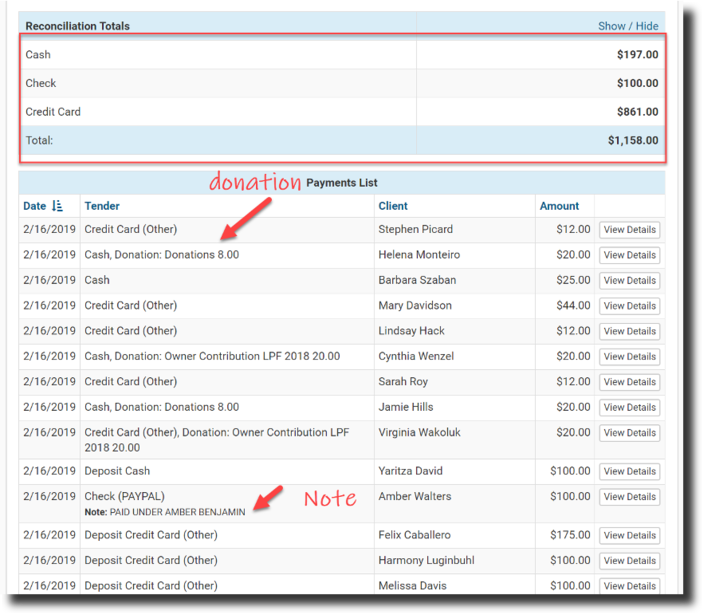
- Donation link transactions appear in MX Merchant but must be manually entered into HQ as donations.
End-of-Day / End-of-Week Steps
- Match HQ recon to batch slip — When the batch runs, a receipt prints with the batch number, each transaction, and a total. Match this to HQ's reconciliation report (Accounting > Reconciliation).
- Match HQ recon to MX Merchant Transactions — Go to MX Merchant > Reports > Transactions and note the last batch date. Pull the same date in HQ > Reconciliation. These should match (exceptions: online deposits paid after auto-batch, or transactions run after auto-batch time).
Understanding Payment Types on the Reconciliation Report
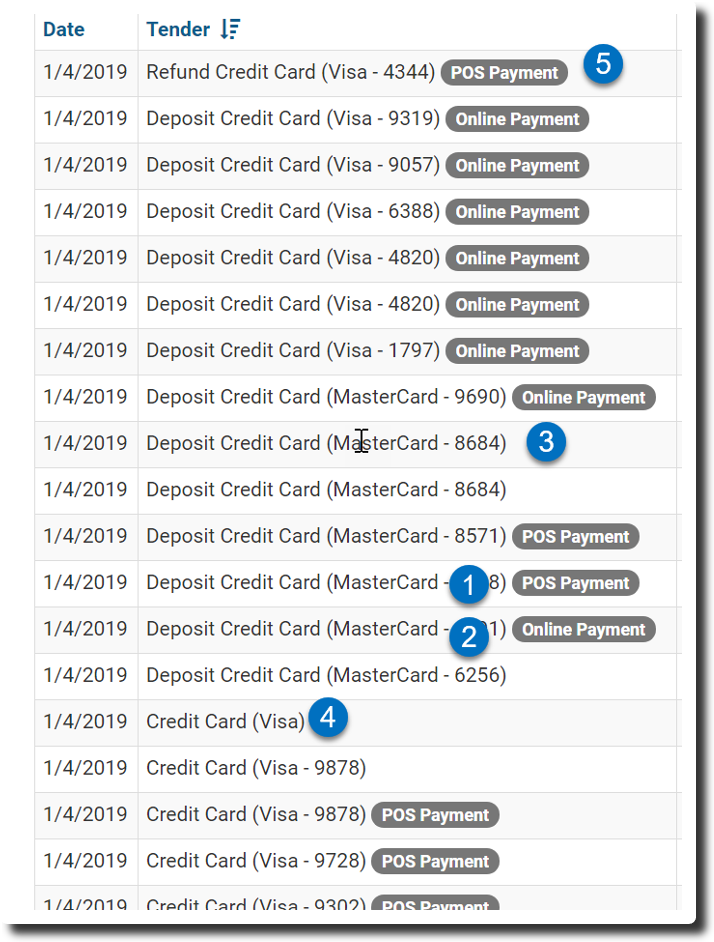
- Credit Card (POS) — Deposit entered by staff with client present; card swiped on Dejavoo terminal.

- Online Payment — Deposit made online by the client.
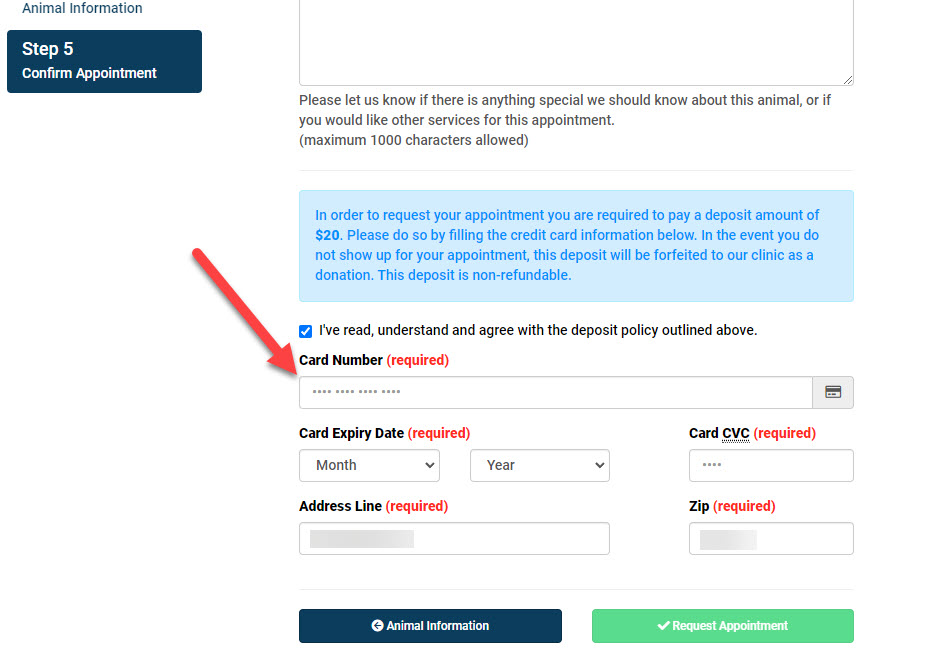
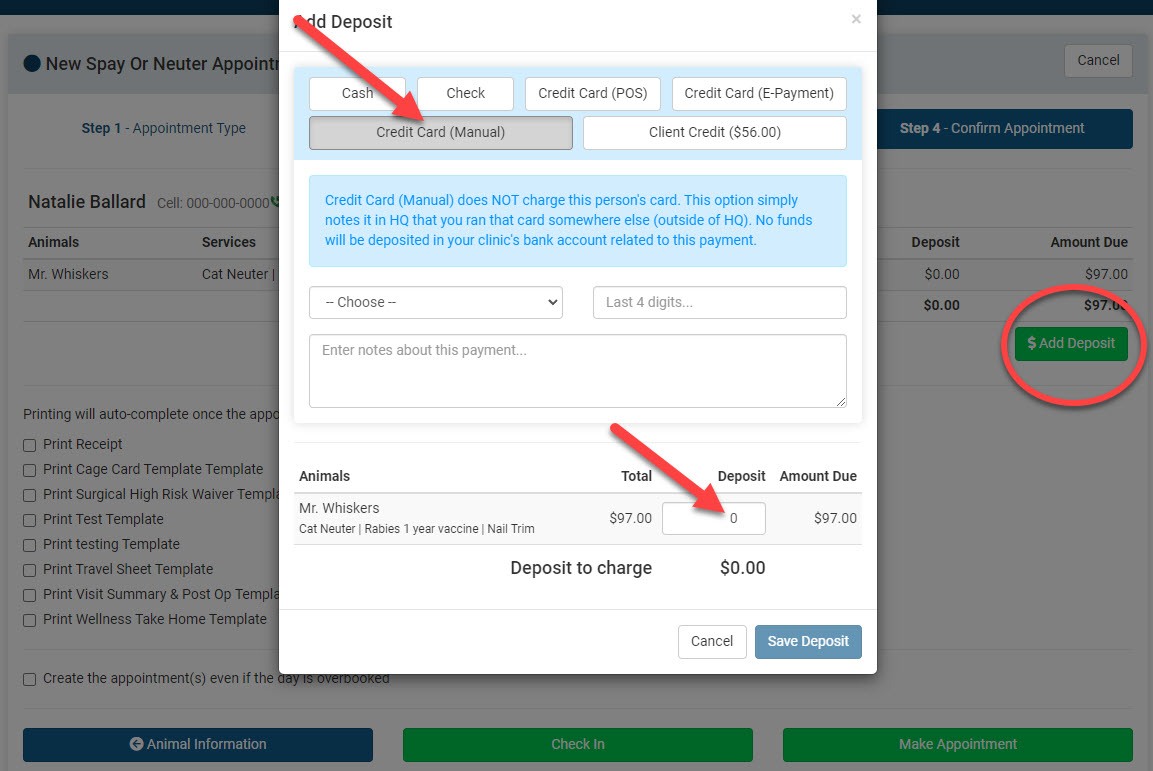
- Credit Card (Manual) — Deposit — Entered by staff without card being swiped or run through e-payments. Transaction occurred outside HQ.
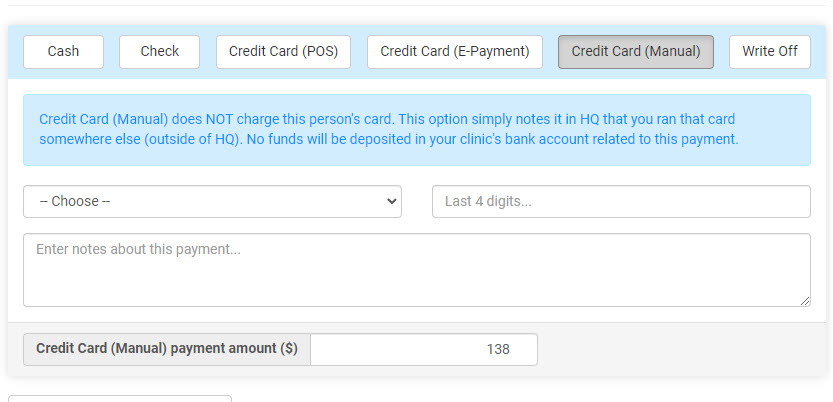
- Credit Card (Manual) — Direct Payment — Payment entered at checkout without card being swiped or run through e-payments.
- Credit Card (Manual) — Least Desirable — Card not swiped and not in e-payments. May have been run directly in MX Merchant with no link back to HQ.
- POS Refund — Refund processed back to the card via HQ. A receipt is sent to the client and the refund is linked back to HQ.
What to Check if Reconciliation is Off
It's in HQ but not on the batch slip:
- Reason 1: "Credit Card (Manual)" was selected instead of POS or E-Payment. Manual payments are not processed through HQ and would not appear in the batch.
- Reason 2: The transaction occurred after the 7:00 PM EST auto-batch cut-off.
![]()
It's on the batch slip but not in HQ:
- Reason 1: The web page was closed before the page updated in HQ. Always wait for the page to update. If an error occurred, use "Credit Card (Manual)" to record it.
- Reason 2: It was run directly in MX Merchant as a "Quick Pay." All credit card transactions should occur only in HQ using POS or E-payment.
Matching Bank Deposits to MX Merchant
Check your bank deposits weekly against MX Merchant to confirm they match.
To check batches in MX Merchant:
- Log in to MX Merchant.
- Go to Reports > Batches.
- The Net Amount should match the deposit amount in your bank.
Reading your bank statement:

- BANKCARD 8076 = MP Group
- DATE = YYMMDD format (e.g., 230922 = September 22, 2023) — the date the batch was settled
- DESCR MTOT DEP = Merchant Total Deposit
- IND NAME = Clinic HQ
Financial Export Per Vet
To see how much revenue a veterinarian generated:
- Go to Accounting > Financial Export, select by Payment Date, input a date range, and click Run the Report.
- Open the downloaded report and go to the Services tab.
- Find the Vet Name column.
Creating a pivot table in Excel may help you analyze the data more effectively.
Outstanding Balances
Public Clients
Go to Accounting > Public Clients > Apply Payment. Set the filter to checked-out appointments and load records as far back as needed by clicking Load Older Records.
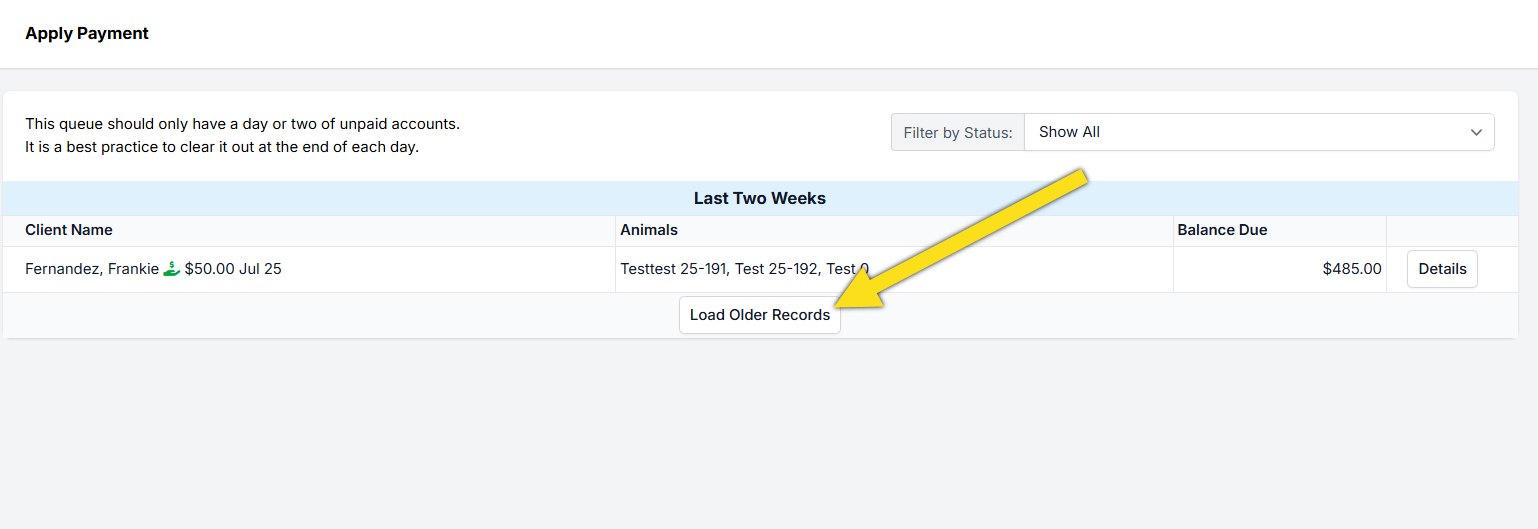
✅ Tip: Right-click and select Print to save this view as a PDF. Clear the queue by the end of each day.
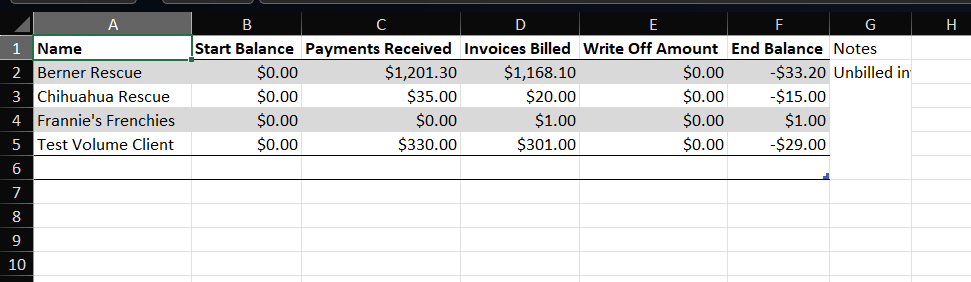
Volume Clients
Go to Accounting > Volume Clients > Accounts Receivable for VCs. Input the date range and click Run Report to export.