Logging In

This section explains how to access your HQ account and keep it secure.
You’ll find:
- Step-by-step instructions for logging in
- Tips to protect your information
- Best practices to ensure HQ runs smoothly
By following these guidelines, you’ll keep your account safe and get the most out of HQ.
Getting Started

Logging into HQ for the First Time
You will receive an email prompting you to create a password and log in to HQ.
- Use Google Chrome for the best experience.
- Each user must log in with a unique email address.
- If you haven’t received the email, check your Spam/Junk folder. If it’s still not there, contact info@clinichq.com.
- Access HQ at clinichq.com.
Complete Your Onboarding Checklist
1. Watch the HQ Flow Video
- Go to the HQ Flow & Top Tools page.
- Watch the 5-minute HQ Flow video at the top of the page. This outlines our recommended clinical flow.
2. Watch the Top Tools Videos
- On the same page, watch the short videos highlighting HQ’s top tools.
- These explain the core features and how HQ works.
3. Appoint an HQ Admin
- Assign one or two people to manage your HQ setup.
- Setup takes approximately 6–8 hours.
4. Set a “Go Live” Date
- Budget 30 days for setup and training.
- Communicate the go-live date to your staff.
- Email info@clinichq.com once you set your date—we’ll call on your go-live day to check in, answer questions, and provide support.
HQ Admin Setup
- From the University site, click Course Login (top right) and select the yellow OnePass button.
- Allow HQ to connect your account so your HQ login and University login match.
- Once logged in, click My Courses (top right) and begin the HQ Setup course, following along with the videos.
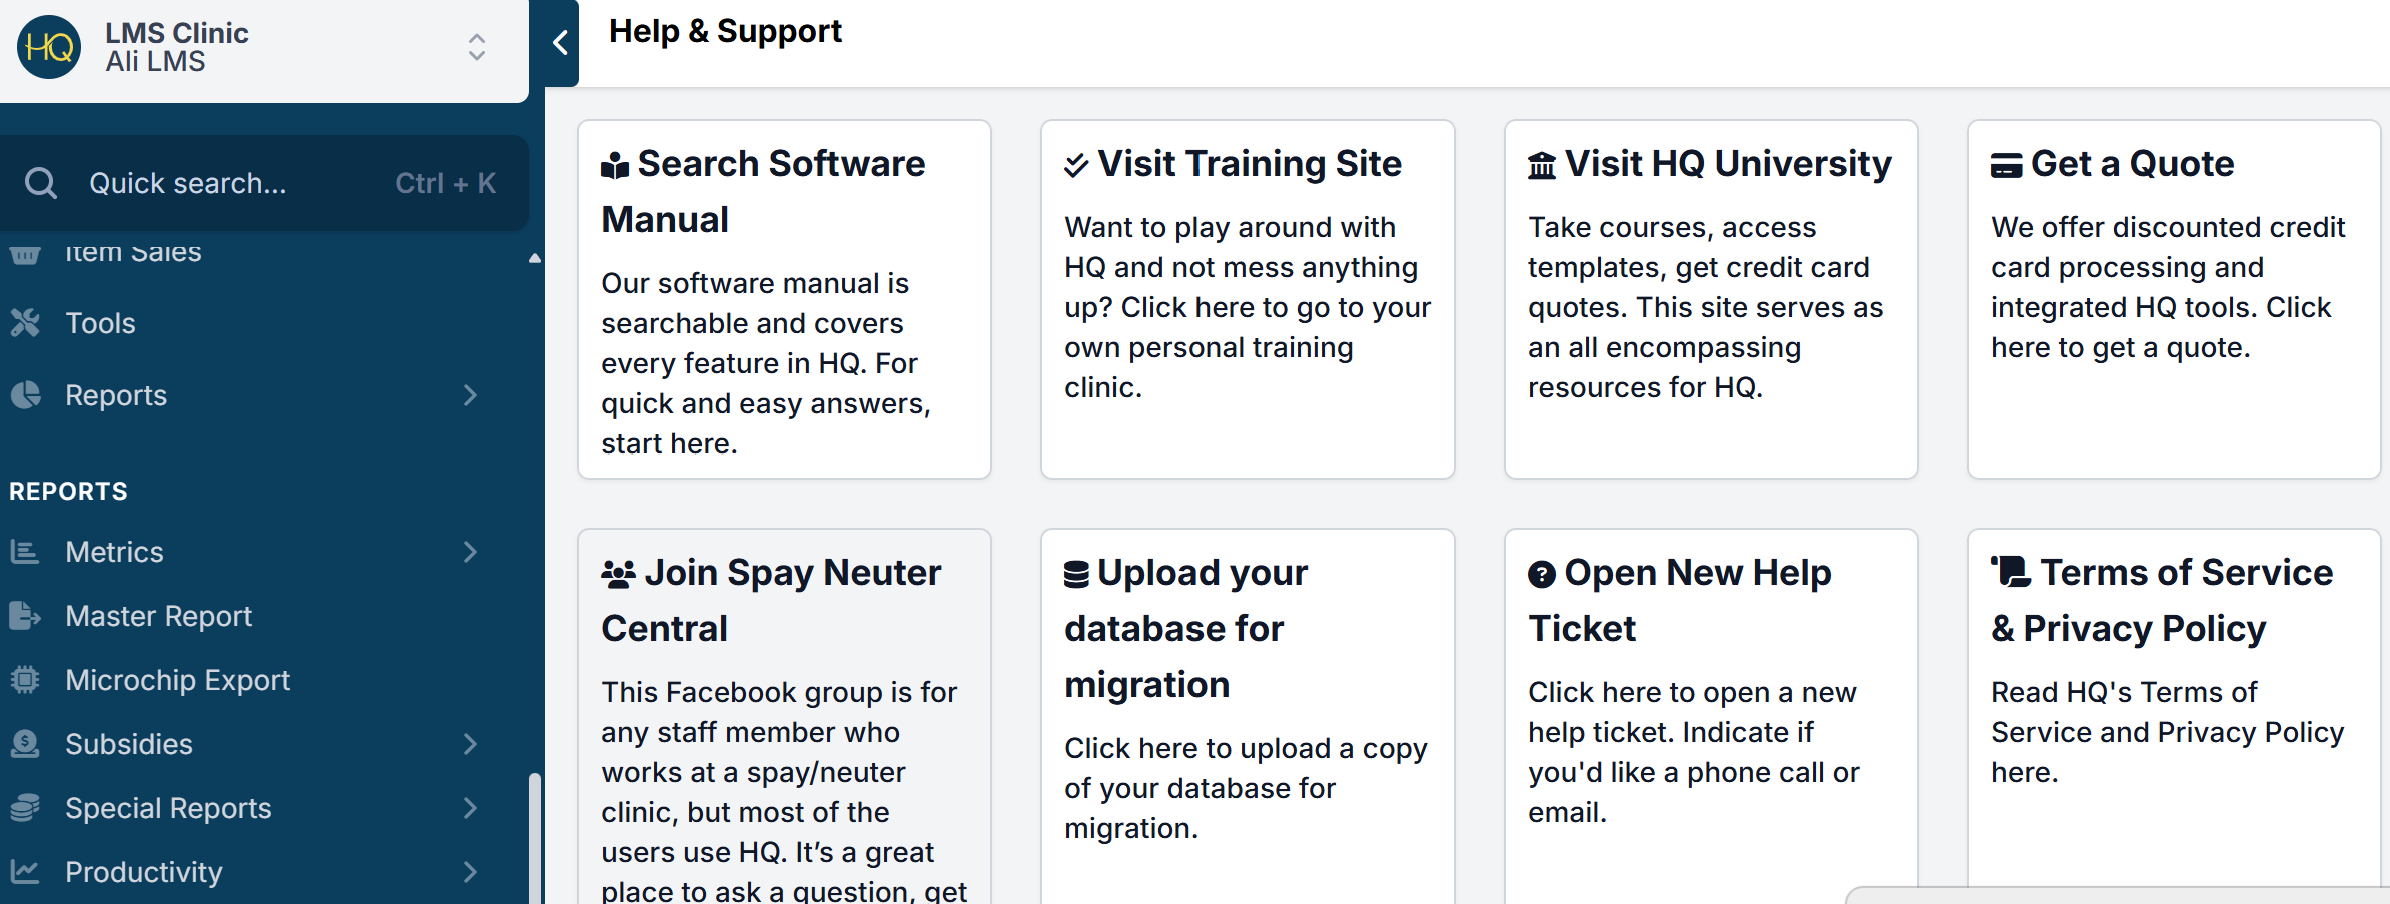
Staff Training
- All staff have access to a training site built directly into HQ.
- To access: click Help & Support → Visit Training Site.
- Each user has their own training site with built-in generic templates to practice on.
- Staff should complete the Go Live Training for hands-on experience using the practice site:
- Admin course for administrative roles.
- Medical course for clinical roles.
Stay Connected
- Join our Facebook community: Spay/Neuter Central is a support group for staff and volunteers working in high-volume spay/neuter or wellness clinics. It’s a great place to ask questions, share tips, and find a little humor in the spay/neuter world.
✅ Pro tip: Bookmark this manual so you can return to it easily!
HQ OnePass
With OnePass, you can access all three HQ sites using the same credentials:
- Clinic HQ
- Clinic HQ University
- Clinic HQ Training Clinic
Simply log in with your Clinic HQ username and password.
✅ Pro tip: If you are already logged into Clinic HQ and open the Help section, you’ll automatically be logged into all three sites.
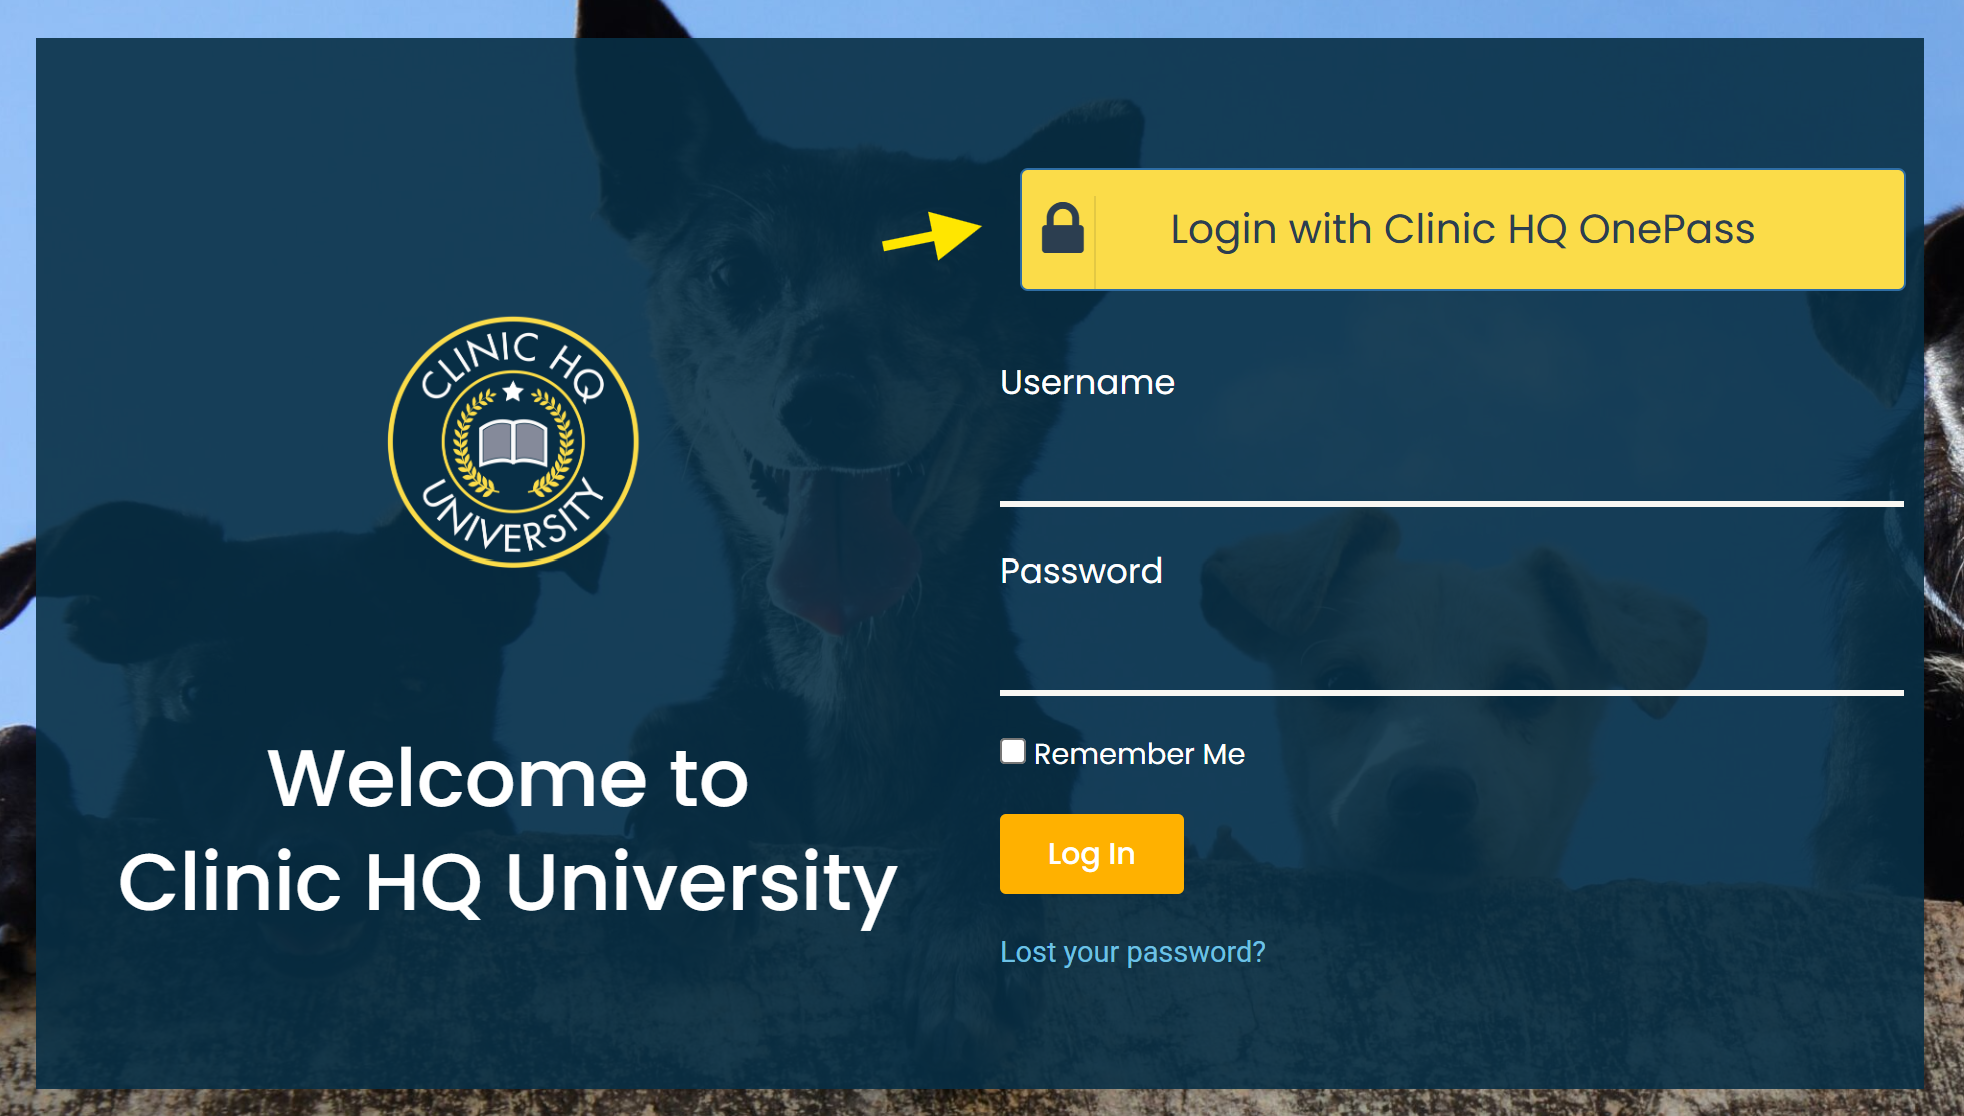
Logging into Clinic HQ University alone:
- Go to HQ University
- Click Log In With Clinic HQ OnePass.
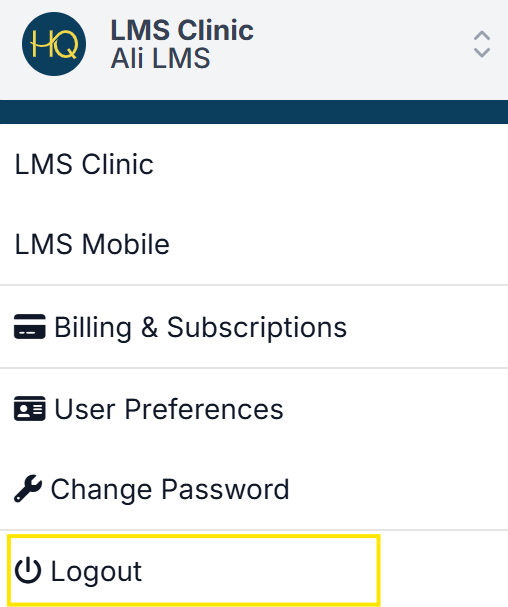
Logging Out
It may be a good idea to log out from time to time, especially if you share a desktop with other users. Each user should be logging in under their own name.
To log out:
- Go to Profile > Logout.
- There are many places in HQ where your user login is tracked. Always log in with only your login.
NEVER share your login information.
Password Setup
Your password protects your personal information and keeps your data secure. Follow the steps outlined below.
Creating Your Password
- Your clinic manager will create your user account in HQ (see the Settings section for details).
- You’ll receive an email invitation to create your password.
- If you don’t see it, check your spam/junk folder.
- Still missing? Open a help ticket and include the email address used during setup.
- Create your password. It must meet both requirements:
- At least 8 characters long
- Includes at least one non-alphanumeric character (e.g., ! or +)
❌ Caution: Do not set up a user until their email address has been activated.
Never Use a “General” Login
Each staff member must have their own individual login. Shared logins such as "frontdesk@clinichq.com" are not allowed.
Why shared logins are unsafe:
- If one employee changes the password, everyone else gets locked out.
- Multiple people using the same login increases the chance someone signs in from an unauthorized browser, putting client information at risk.
- HQ tracks which user completes each task. With shared logins, this accountability is lost.
Account Management (User Preferences)
Maintaining strong account security is essential for protecting client information and safeguarding access to Clinic HQ. All users are expected to implement key security measures, including creating strong passwords, enabling two-factor authentication (2FA), and generating recovery codes for emergency access. Users should also set up passkeys for a more secure login experience that is resistant to phishing and credential theft.
Together, these account management tools significantly reduce the risk of unauthorized access and help prevent user-related data breaches.
User Preferences
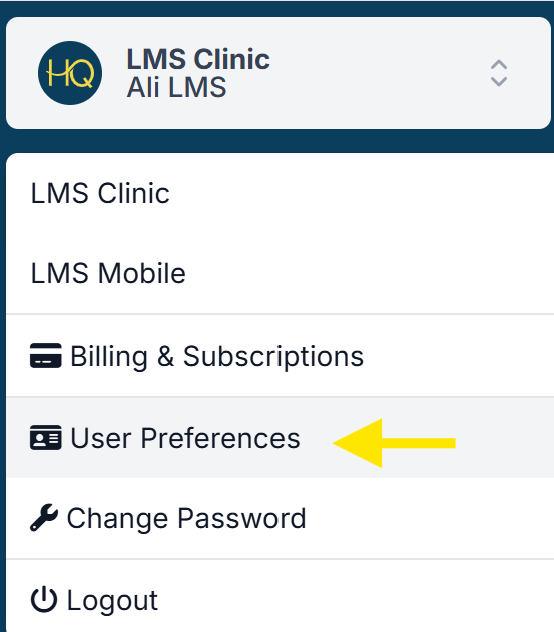
To manage your account, navigate to User Preferences
- Click on your clinic's name in the upper left corner of the navigation menu.
- Click User Preferences.
Enable Two-Factor Authentication (2FA)
2FA adds a second layer of verification to your login process, requiring both your password and a time-based code or authentication prompt. This prevents attackers from accessing your account even if your password is compromised.
Save Recovery Codes
Recovery codes provide a secure fallback method for accessing your account if you lose access to your authentication device. These one-time use codes should be stored in a safe location and used only when needed.
Set Up a Passkey
Passkeys provide a highly secure, phishing-resistant authentication method by replacing passwords with credentials tied to your device protected by biometrics or a device PIN. This allows for faster, more secure logins and ensures that credentials cannot be intercepted or reused by attackers.
Updating User Information
Easily manage and update your personal account details by navigating to the user preferences section. You can modify your name, phone number, or email address here. Simply follow the steps to keep your information up to date.
- Click on your clinic name in the upper left corner of the navigation menu.
- Navigate to User Preferences.
- Choose Profile to update your name or phone number, then click Save.
- Select Email to modify your email address, then click Change Email.
Changing Your Password
It’s a good idea to change your password if it has been compromised, is too simple, has been shared, or you’ve forgotten it. Keeping your account secure is always worth the extra step!
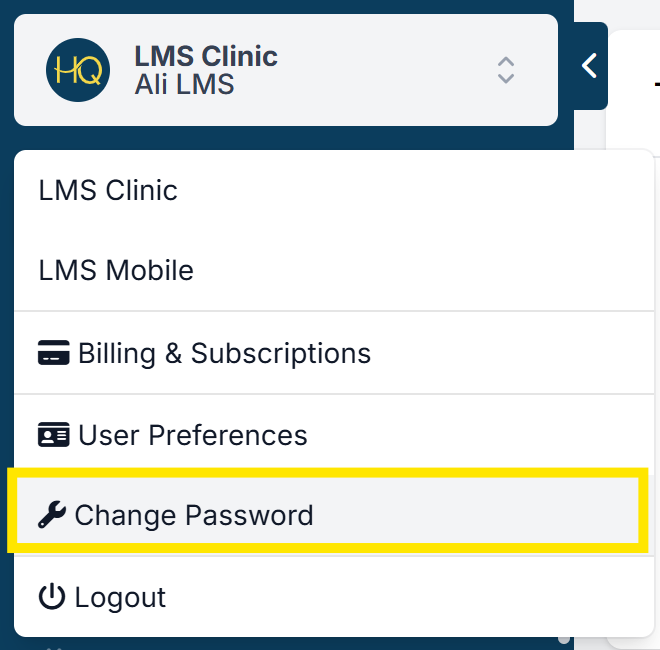
How to Change Your Password
- Click your Clinic Name in the top-left corner.
- Select Change Password.
- Enter your current password in the first field.
- Enter your new password in the next two fields to confirm it.
Password requirements
- At least 8 characters long
- Includes at least one non-alphanumeric character (e.g., ! or *)
How to Reset a Forgotten Password
- Click the Login button in the upper-right corner of HQ, or follow THIS link.
- Enter your email address.
- A temporary password will be sent to your inbox immediately.
- Use this temporary password to log in.
- Then follow the steps above to change it to a new, memorable password.
Didn’t receive the email?
- Check your spam or junk folder.
- If it’s not there, ask someone in your clinic to open a help ticket, and we’ll assist.
Two-Factor Authentication
Two-factor authentication (2FA) adds an extra layer of security by requiring both your password and a second form of verification. This makes it much harder for unauthorized users to access your account.
When you log into Clinic HQ with 2FA enabled, you’ll enter:
- Your email
- Your password
- A 6-digit code generated by the Google Authenticator app
How to Enable Two-Factor Authentication
- Download the Google Authenticator app on your personal phone:
- Log into Clinic HQ and go to Profile > User Preferences.
- Click Enable next to Two-Factor Authentication.
- On your phone, open Google Authenticator and tap the + icon.
- Select Scan QR Code, then use your phone’s camera to scan the unique QR code displayed on your computer.
- Your account will now appear in Google Authenticator with a 6-digit code that refreshes every 15 seconds.
- Enter the 6-digit code in HQ and click Enable.
You’re all set!

Testing Your Login
- Click your Profile button and log out of Clinic HQ.
- Log back in with your email and password.
- When prompted, open the Google Authenticator app and enter the current 6-digit code before it expires.
- Click Log In.
Passkey Authentication
Passkeys are credentials that validate your identity using touch, facial recognition, a device password, or a PIN. They can be used as a simple and secure alternative to your password and two-factor credentials.
Why use a passkey?
Passkeys offer stronger security than traditional 2FA by eliminating passwords and using cryptographic keys that can’t be phished or intercepted. Because the private key never leaves your device and authentication is tied to the legitimate website’s domain, attackers can’t steal or reuse your credentials. They’re also easier for users, replacing codes and passwords with quick biometric or device-based verification.
Set up
- Click on your Clinic Name in the upper left corner of your screen.
- Navigate to User Preferences.
- Open Passkeys.
- Click Add a passkey.
- Click Create passkey. Your device will prompt you to save a passkey for Clinic HQ to your device. Follow these prompts to complete setup. Depending on the device, you can choose to use biometric sign ins such as facial recognition and touch ID, or a device password or PIN.
Logging in
- Go to https://clinichq.com/ > Login.
- Click Log in with a passkey. You may need to select your stored passkey if multiple users access the same device.
- If using biometric data, scan your face or fingerprint. For passcodes or PINs, enter the information in the popup.
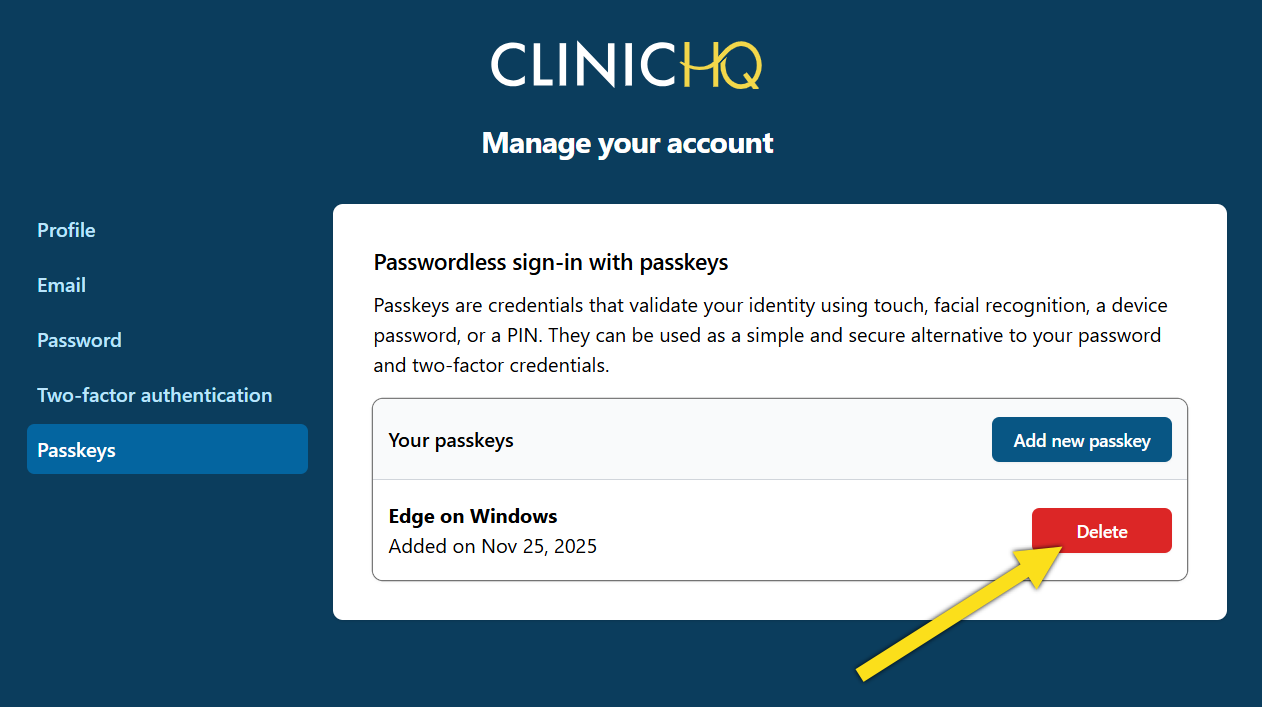
Deleting Passkeys
If you no longer use a device or need to remove a passkey for security reasons, you can delete it directly from your account settings. Deleting a passkey ensures that the associated device can no longer be used to access your account. After removal, make sure another authentication method such as a password, 2FA, or an additional passkey is still active so you don’t lose access.
Preventing Data Breaches
Here are some important guidelines for secure user management in Clinic HQ. Protecting your clinic’s data starts with strong user management. The following best practices reduce the risk of unauthorized access and support responsible system use.
Use Organization-Affiliated Email Addresses
The most common breach occurs when personal accounts (e.g., aliyourrescue@gmail.com) are hacked.
- Always use organization-affiliated emails (e.g., ali@yourrescue.org).
- This gives your team more control and makes transitions easier if roles change or staff leave.
Avoid Shared or Generic User Accounts
Shared logins (e.g., frontdesk@… or welcome@…) are discouraged.
Shared logins have the following drawbacks:
- Limit visibility into who is accessing the system.
- Increase the risk of security issues.
- Make tracking activity easier by creating individual accounts for each team member.
Regularly Review and Remove Inactive Users
- Your HQ administrator should periodically review your user list.
- Remove or deactivate accounts that are inactive or no longer needed.
- This keeps the system secure and your user list accurate.
Don’t Use Other People’s Computer Accounts
- Always log into your own Clinic HQ account.
- Never save your password in a browser on someone else’s computer profile.
- Shared computer accounts can allow unauthorized access without a password.
Understand the HQ Admin’s Role
The HQ Admin is responsible for managing users, including:
- Inviting new users
- Removing or deactivating accounts
- Assigning roles and permissions
- Monitoring access levels
- Limiting access to essential users helps protect the system and keep operations smooth.
What to Do if You Suspect a Security Issue
If you think a user account has been compromised or notice unusual activity:
- Remove or deactivate unnecessary user accounts.
- Have the HQ Admin reset the password.
- Re-invite only essential users with secure, organization-affiliated emails.
✅ Pro Tip: Conduct a quarterly review of your user list to stay ahead of potential risks.
Use Two-Factor Authentication (2FA)
- Enable two-factor authentication to add an extra layer of security beyond just a password. Learn how to set it up HERE
See more information about HQ Security HERE
Recovery Codes
Recovery codes serve as a secure backup option if you lose access to your primary authentication device. These one-time use codes should be stored in a safe location and used only when necessary to regain account access.
Generate Recovery Codes
Once you set up two-factor authentication, you get a list of recovery codes for your account. If you need to reset these codes, go to User Preferences > Two-Factor Authentication > Reset recovery codes.
Storing Recovery Codes
Store your recovery codes in a secure, offline location where only you can access them. Avoid saving them in email, cloud storage, or unencrypted notes. Instead, keep them in a password manager or a physical secure place, such as a locked drawer or safe, to ensure they’re available if you lose access to your authentication device.
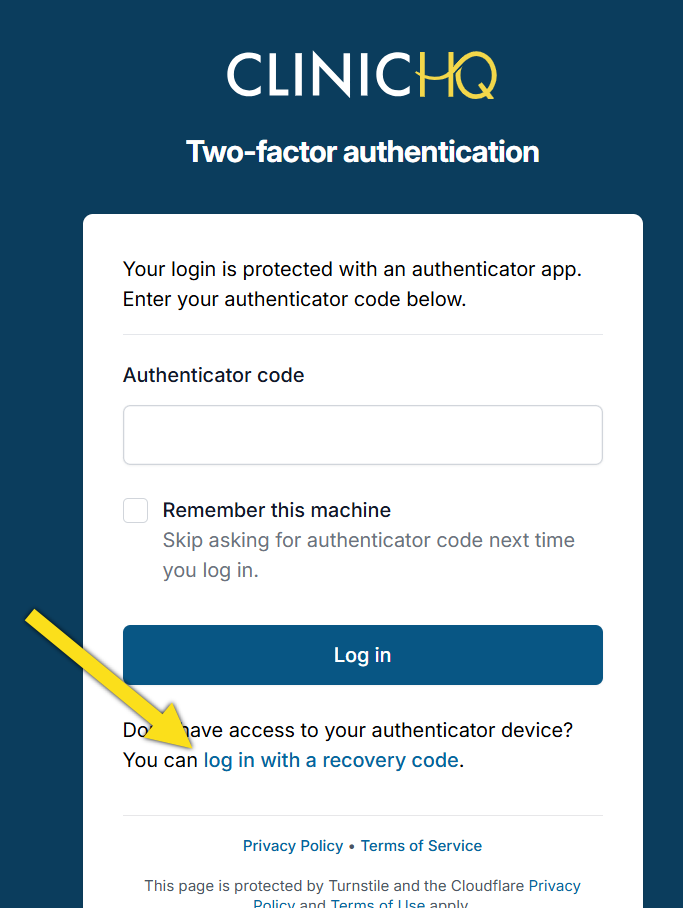
Log in with Recovery Code
If you do not have access to your authenticator app and need to log in using a recovery code, follow these steps:
- Go to https://clinichq.com/ and click Login.
- Enter your username and password and click Log in.
- Instead of entering an authenticator code, you will click Log in with a recovery code.
- Enter one of your recovery codes and click Log in.