5.1.2. S/N Online (E-Appointments)
Online Spay & Neuter Scheduler
The online spay & neuter scheduler allows public clients to create appointments for any kind of appointment that your clinic offers. This gives you a clear picture of what’s ahead and allows you to open the line of communication with your client before they step into your clinic.
!TIP Note: Many settings must be setup for e-appointments to work. This are setup in Settings > E-Appointments located here. This section assumes these settings have already been setup.
▶️ Video: For a quick video on e-appointments, click here
Previewing the Scheduler
- Go to the Settings tab in HQ.
- Scroll down to the Scheduling section.
- Click on E-Appointments.
- By default, spay/neuter is the primary appointment type. If it’s not enabled, click the enable button to turn it on.
✅ Pro Tip: Learn how to add this link to your website here.
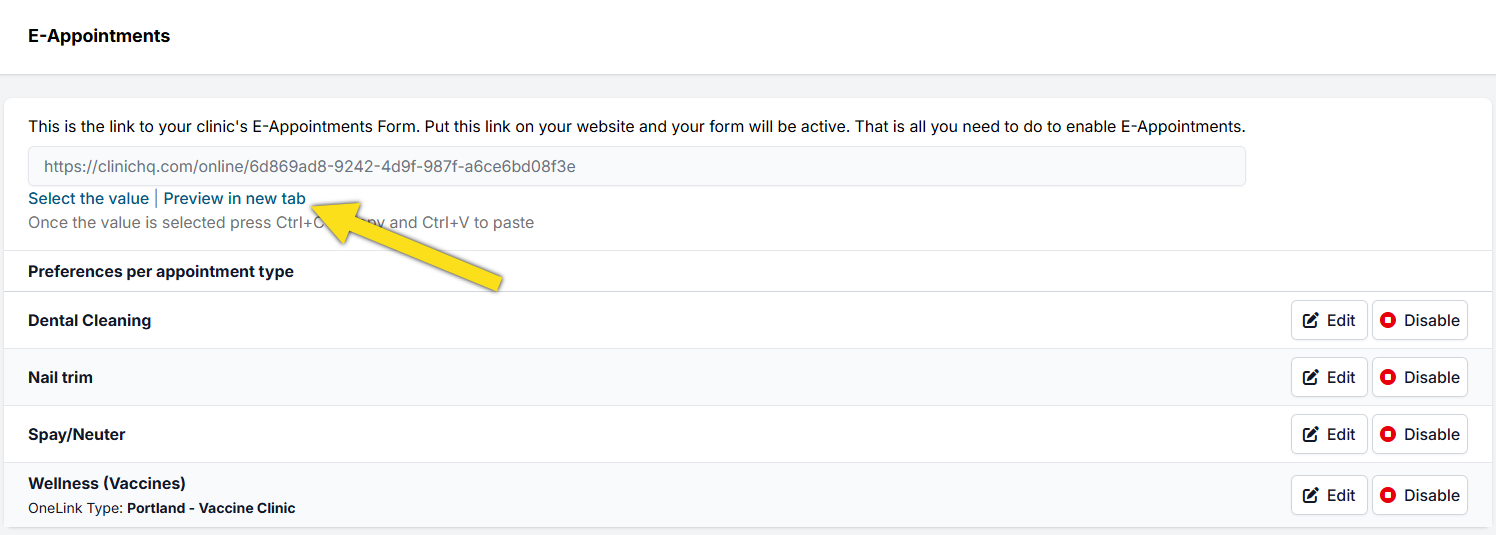
From here:
- Each clinic is automatically assigned a link when setting up Clinic HQ. This is the link you will use on your website to direct clients to book appointments.
- To view your active scheduler link, click Preview in New Tab. This will open a new tab where you can see the scheduler from the client’s perspective based on the appointment types you have customized for your clinic.
Using the Scheduler
- Select Appointment Type. This should have already been set up by your clinic. If not, go here. The client will start by choosing the appointment type they wish to book (e.g., spay/neuter, dental, vaccines). They will provide basic animal information such as species, size, and sex.
- View Available Appointments. Based on the client’s input, HQ will show open appointments that match their needs and your clinic’s availability.
- Enter Contact Information. The client provides phone number, email, and physical address. If the address does not auto-populate, clients can select Enter Custom Address to input it manually.
- Enter Detailed Animal Information. Clients provide additional animal details.
- Confirm Appointment Details.
- Service Selection and Payment. Clients select services/packages in advance, view prices, and optionally pay a deposit. Custom questions can also be added. Clients must check a box confirming they have read and understood your deposit policy.
- Request Appointment and Pending Status. Clients click Request Appointment. They receive a pending notice, followed by an email confirmation once your clinic approves. Multiple requests on the same page autofill details to save time.
The e-appointment form considers two elements:
- The day’s total number of appointments must be less than the maximum capacity.
- The appointment must fit within the available tile for the selected species/sex.
- Only days meeting both conditions will be listed online.
✅ Pro Tip: The “Appointment Request Received” email notice cannot be customized. It simply confirms the request was successful, is pending review, and whether a deposit was taken.
Timing of E-Appointments
- Appointments can be requested until midnight in your time zone for the following day.
- Same-day appointment requests cannot be made. The e-appointment form only shows future availability.
- Same-day scheduling must be done internally.
Overbooking Protection
Our scheduling engine ensures clients cannot overbook your clinic.
✅ Pro Tip: The moment an appointment is requested online, it is immediately removed from your calendar — even before confirmation. This prevents double-booking.
!TIP The next step in this process is to approve the e-appointments. Jump to that section to learn how.