13.2. Deducting When You'll Invoice

Invoiced Subsidies Overview.
A subsidy, also referred to as a discount, can be applied to line items on an appointment to change the price, pull money from a grant, or bill a third party. This section explains how to apply discounts that when you'll need to invoice a third party to cover the bill.
When to Use Invoiced Subsidies.
An invoiced subsidy is used to discount services for the client and divert payment to another entity.
The associated funding partnership must be an invoiced partnership.
Learn how to set up the funding partnership HERE.
Two common uses of invoiced subsidies are voucher programs and volume clients paying on behalf of public clients.
If vouchers are prepaid by an organization, use a subsidy that draws down from a pot of funds instead.
Learn more HERE.
Create a Subsidy.
First, create the funding partnership the subsidy will be associated with.
Next, create the subsidy itself.
The Client Discount reflects how much is taken off the bill for the client in front of you.
The Invoiced Amount reflects how much will be billed to the third party organization.
Learn how to configure subsidy settings HERE.
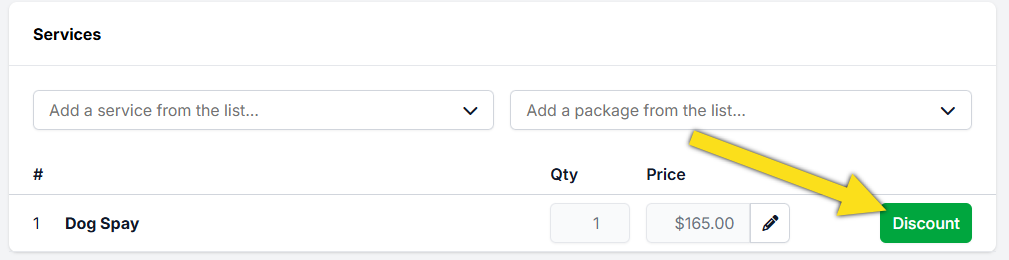
Apply the Discount.
- Click the green Discount button next to the service in Checkout > Appointment > Services.
- Review the list of active subsidies.
- Select the appropriate subsidy and click Apply.
Here is an example of an applied invoiced subsidy.
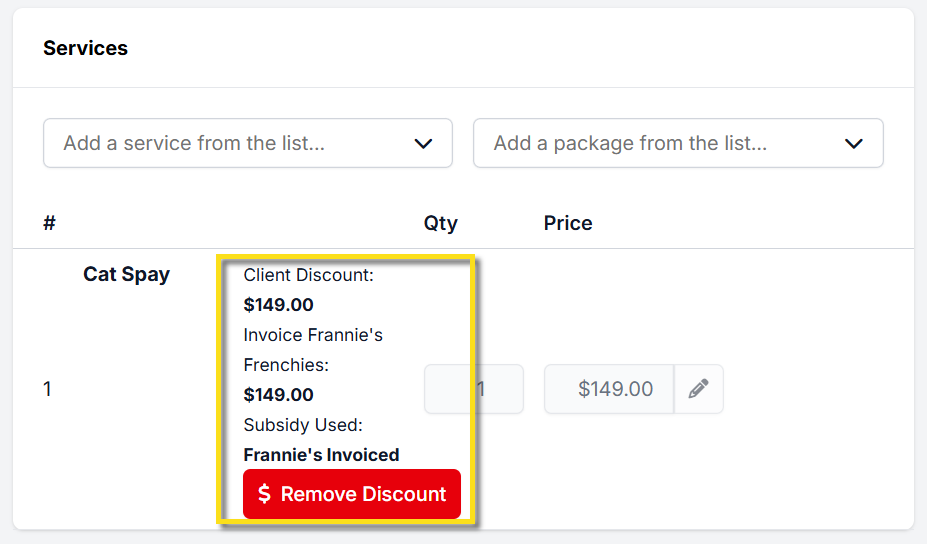
The Client Discount shows how much is deducted from the client’s bill.
The subsidized amount also appears in the Discount column on the Financial tab of Checkout.
Generate the Invoice.
Once an appointment with an invoiced subsidy is checked out, the volume client can be billed.
❌ Caution: Verify all charges carefully before generating invoices, as correcting billing errors can be time-consuming.
- Go to Accounting.
- Select Volume Clients.
- Select Bill.
- Tick the charges to be billed.
- Click Generate Invoices.
❌ Caution: Only one discount or subsidy can be applied per line item.
If more than one subsidy is required for a single item, review the setup instructions HERE.