13.1. Deducting From a Pot of Funds

Applying Subsidies That Pull From Grant or Donation Funds.
A subsidy, also referred to as a discount, can be applied to line items on an appointment to change the price, pull money from a grant, or bill a third party.
This section explains how to apply discounts that pull from a pot of funds such as grants or client donations.
Set Up Your Funding Partnership.
The first step is to establish a funding partnership.
This is where your funds are logged.
Your Clinic HQ administrator may have already set up default funding partnerships, such as a General Donations fund.
Learn how to set up a pre-paid funding partnership here:
HERE
Create a Subsidy.
A subsidy is the tool used to discount an item.
Each subsidy must be assigned an associated funding partnership.
For example, your clinic may have a general donation pot that clients can contribute to.
Those funds can then be used to discount spay surgeries through a Spay It Forward subsidy.
In this scenario, the donation pot is the funding partnership, and Spay It Forward is the subsidy.
Learn how to set up a subsidy here:
HERE
Apply the Discount or Subsidy.
When a discount is applied, a subsidy is selected and used to change prices and determine who owes what.
- Navigate to Checkout.
- Open the Appointment.
- View Services.
- Click the green Discount button next to the appropriate line item.
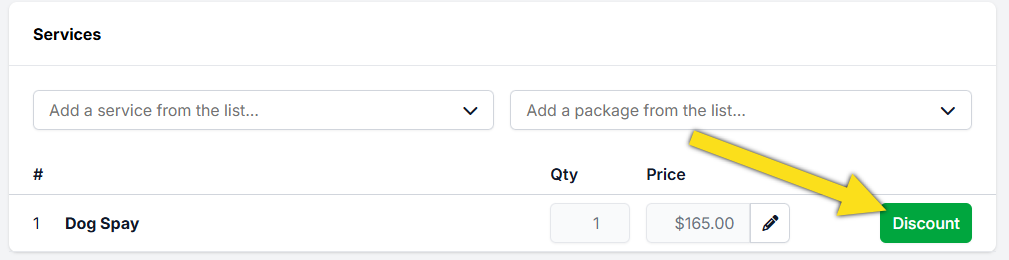
#_ Review the list of active subsidies.
- Select the subsidy you want to use.
- Click Apply to update the service price.
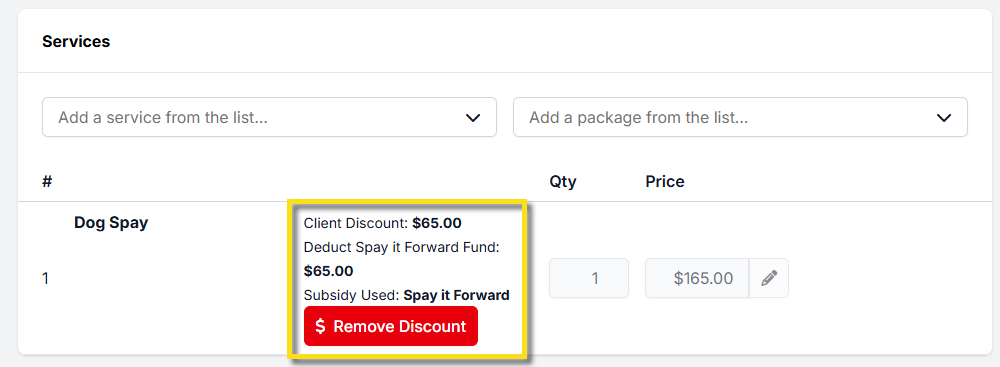
On the Financial tab in Checkout, the subsidized amount appears in the Discount column.
Important Subsidy Rules.
- Only one subsidy discount can be applied per line item.
- The Client Discount amount is how much is deducted from their bill.
- The Pot Deduct amount (also called Deduction Amount) is how much is used from the funding pot.
If your clinic needs to apply more than one subsidy to a single item, review the setup instructions here:
HERE