24.14.2. Dymo Set Up
To print labels in HQ, you must use a Dymo Wireless LabelWriter and a Windows-based device such as a PC or Surface Go tablet. Printing from Mac devices is not supported.
Note: We no longer provide troubleshooting support for Dymo 450 models, Dymo 550 models, or any Dymo printers connected to a Mac.
DYMO Driver Installation Video
The video below walks through the correct process for installing the Dymo LabelWriter driver required for use with HQ.
HERE IS A VIDEO ON HOW TO INSTALL THE DYMO LABELWRITER DRIVER
The Dymo Wireless LabelWriter is the best option for printing labels.
- It does not need to be connected to a single computer.
- It works well with Surface Go tablets.
- It allows the use of third-party label brands.
The Dymo 550 model requires Dymo-brand labels only, which makes it a less desirable option.
Step 1: Order Label Printer and Compatible Labels
- Recommended Printer: Here's link on Amazon
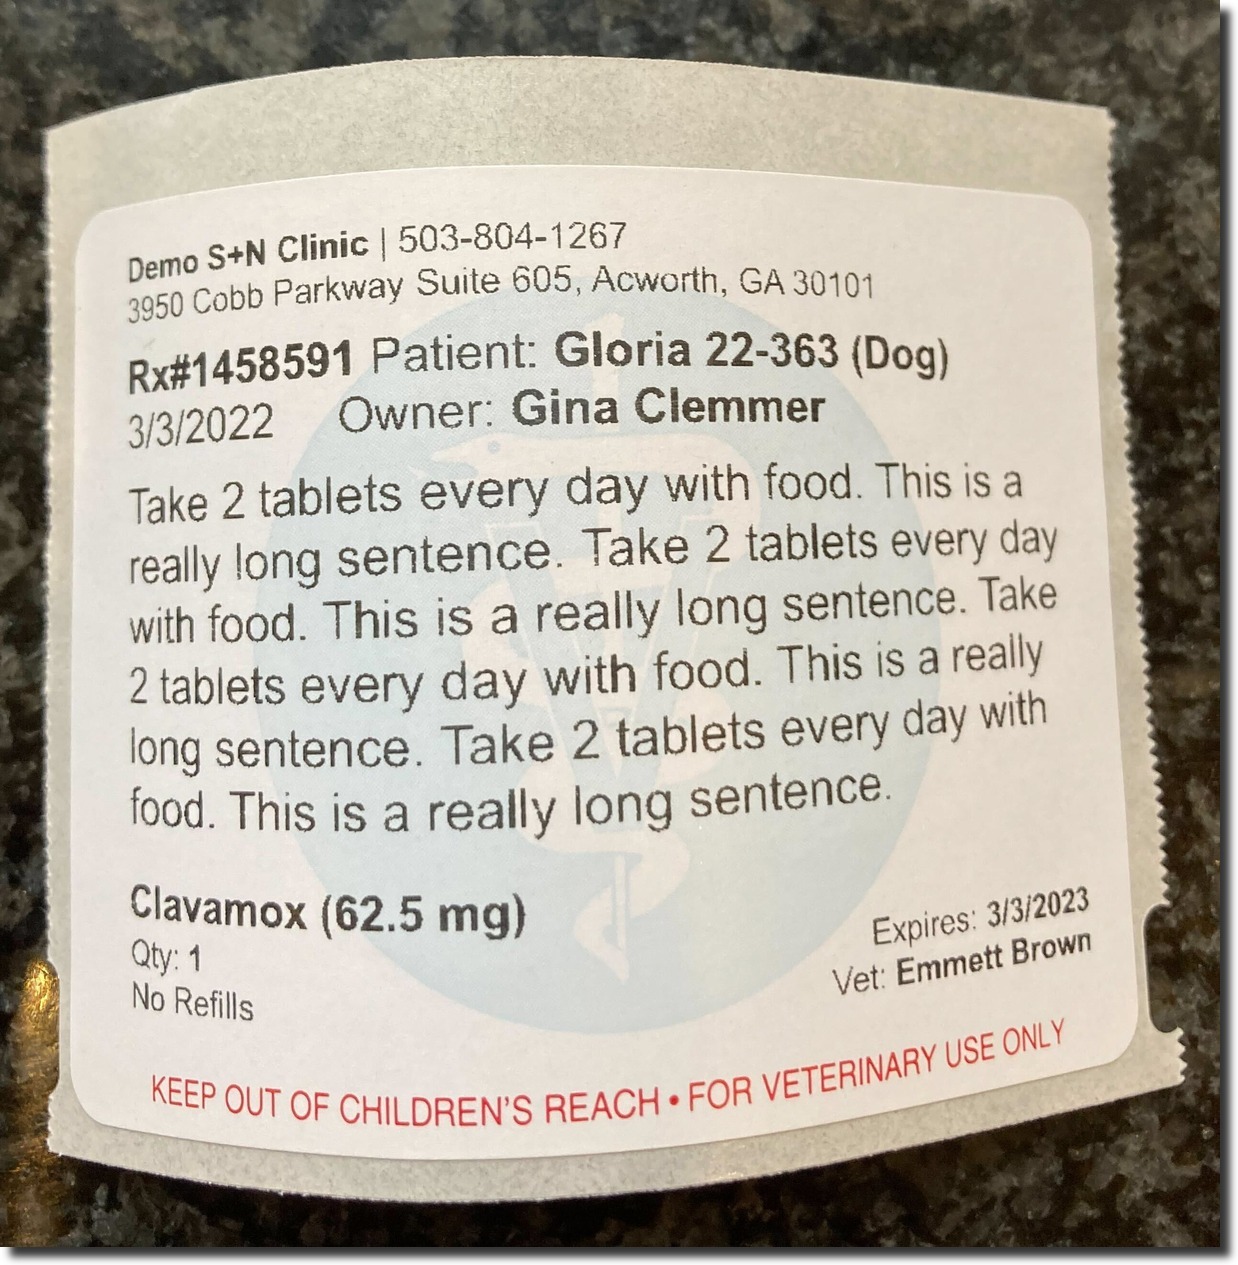
- Recommended labels: There are many sizes of labels, but our suggestion is to order 2 ¾ x 2 1/8 with a “caduceus watermark.” HERE'S A LINK to view and order at Amazon. Note: 550 Label writers cannot run these labels.
Installing the Dymo Wireless LabelWriter Driver
It might seem like you can simply search for “Dymo Wireless Driver” and download the correct one — but that’s not the case. This is because Clinic HQ is a web-based platform and the default recommended Dymo software DYMO CONNECT is not compatible.
The correct driver for web-based printing is linked below. Be sure to use only this version to ensure compatibility with Clinic HQ. Dymo Wireless LabelWriter (also 450 machine)
Windows: Click the link here to download the driver from Dymo's Website: DLS8Setup8.7.4.exe
- Once the driver has installed, you will be prompted to plug in your labelwriter via USB cord to your computer.
- You should then plug in the label writer (it should have two cords).
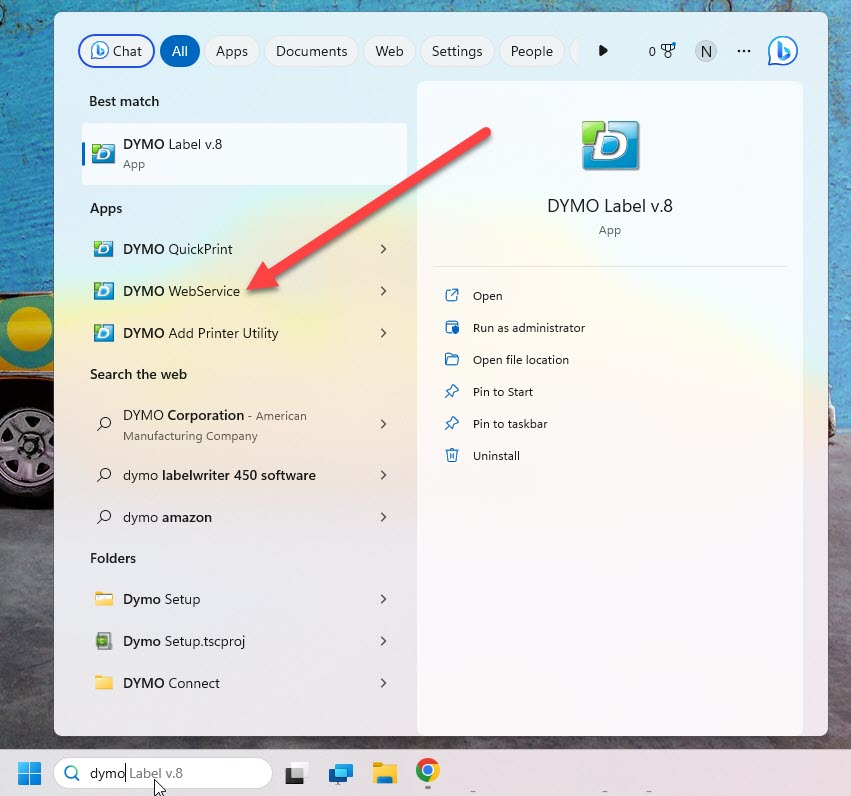
- Then go to the Start menu for your computer, navigate to Dymo and turn on DYMO WebService.
- Make sure it’s turned on by going to the “Show Hidden Icons” dialogue box in the lower right screen.
- Click on the Dymo WebService icon and if it’s not already selected, select Start Service.
Input Label Size And Settings
- Go to Settings > Prescription Labels.
- Click Printer Settings.
- Select your Printer and Label Size.
- Save settings.