5.3. Volume Spay/Neuter Appointments
5.3.4. Managing Volume Client Appointments
Volume Client Portal (VCP) Overview
In the Volume Client Portal (VCP), a client can manage their released and scheduled appointments. They can confirm the species, sex, and size of the animals, sign consent forms, and more.
Key Features of the VCP
Entering Animal Data
Once you provide access to your volume client, they will be able to enter data in an easy-to-understand interface.
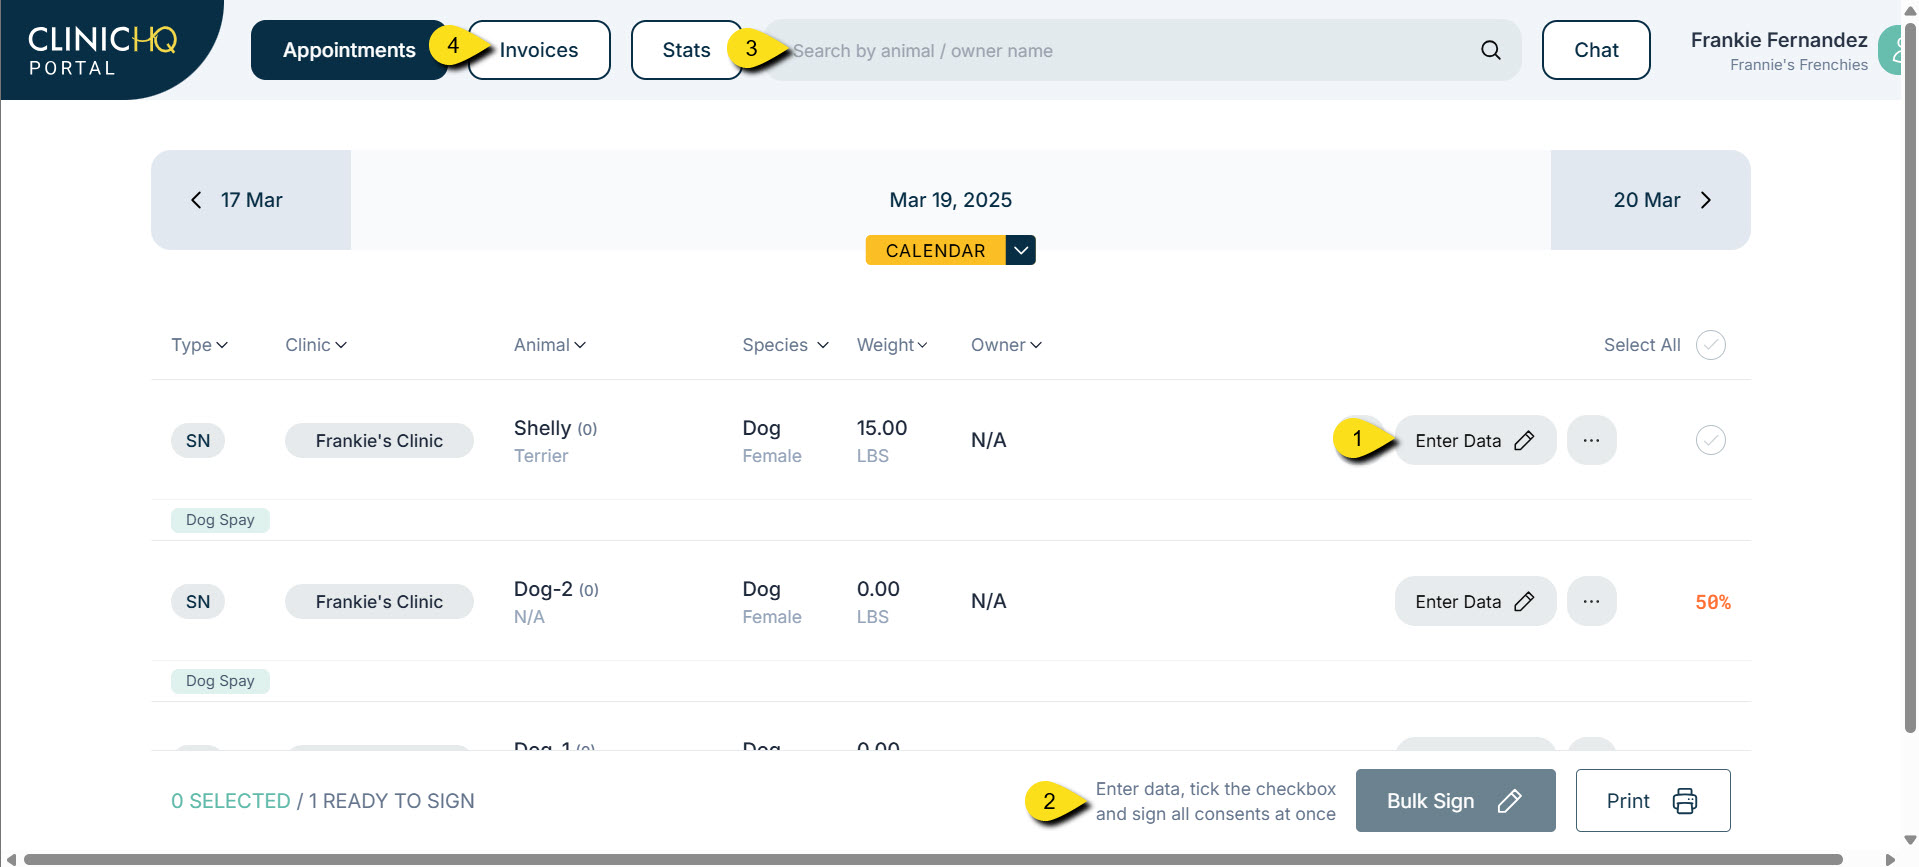
- Clients see the appointments on the Appointments tab.
- If no appointments are available on a particular day, they can click Calendar to navigate to their appointment date.
- To begin completing data entry, they click the Enter Data button.
- The Animal Info screen opens, where they can add names, weight, sex, breed, color, age, and any owner information (if it is an owned animal).
- Once data is filled in, the client selects Services or Packages for the animal.
Signing Consent Forms
After data and services are entered for every animal, the volume client has the option to sign all consents at once or send individual consents to an owner (if an owner was listed).
- To sign consents, tick each checkmark or click Select all.
- Click Bulk Sign.
The “Search Animals” Tab
- Clients can search animals by name, owner name, or microchip number.
- To reprint spay/neuter or rabies certificates, they can click Paperwork for that animal.
Viewing and Paying Invoices
Volume clients can view invoices and pay for them via Portal Pay if your clinic uses our card processing partner MP Group.
- Go to the Invoices tab.
- View open invoices and make payments directly through the portal.