9.7.1. Verbal High-Risk Waivers
⚠️ Important: To use high-risk waiver tools, your clinic must be using Patient Flow. These workflows are only available within Patient Flow.
HQ automates the process of collecting high-risk waivers through workflows for verbal consent or email consent (see next section). The ASPCA Spay/Neuter Alliance uses verbal waivers for owners, shelters, and transport partners. Your clinic may choose this model or adapt it to require a witness.
For a verbal high-risk waiver, staff calls the owner, reads a customized script explaining the reasons for the waiver, and records whether the owner accepts or declines. An optional setting requires a witness’s initials before moving forward.
Steps to Issue a Verbal High-Risk Waiver
- From Patient Flow, open the Exam & Premed screen. In the Exam column, click Normal.
- This button is the entry point for everything related to an animal’s exam.
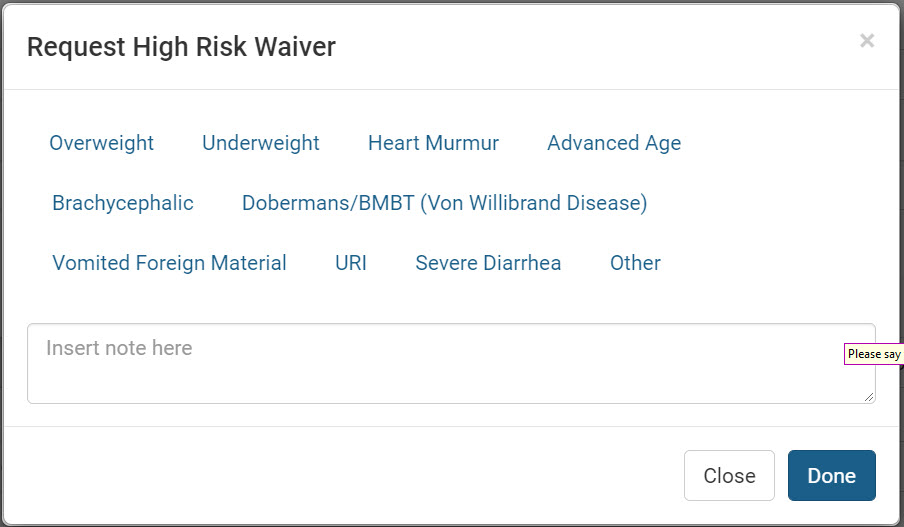
#_ On the Exam screen, click Request High-Risk Waiver.
- Select the reason(s) for requesting the waiver.
- If you select Other, a text box will appear to specify details.
- When finished, click Done.
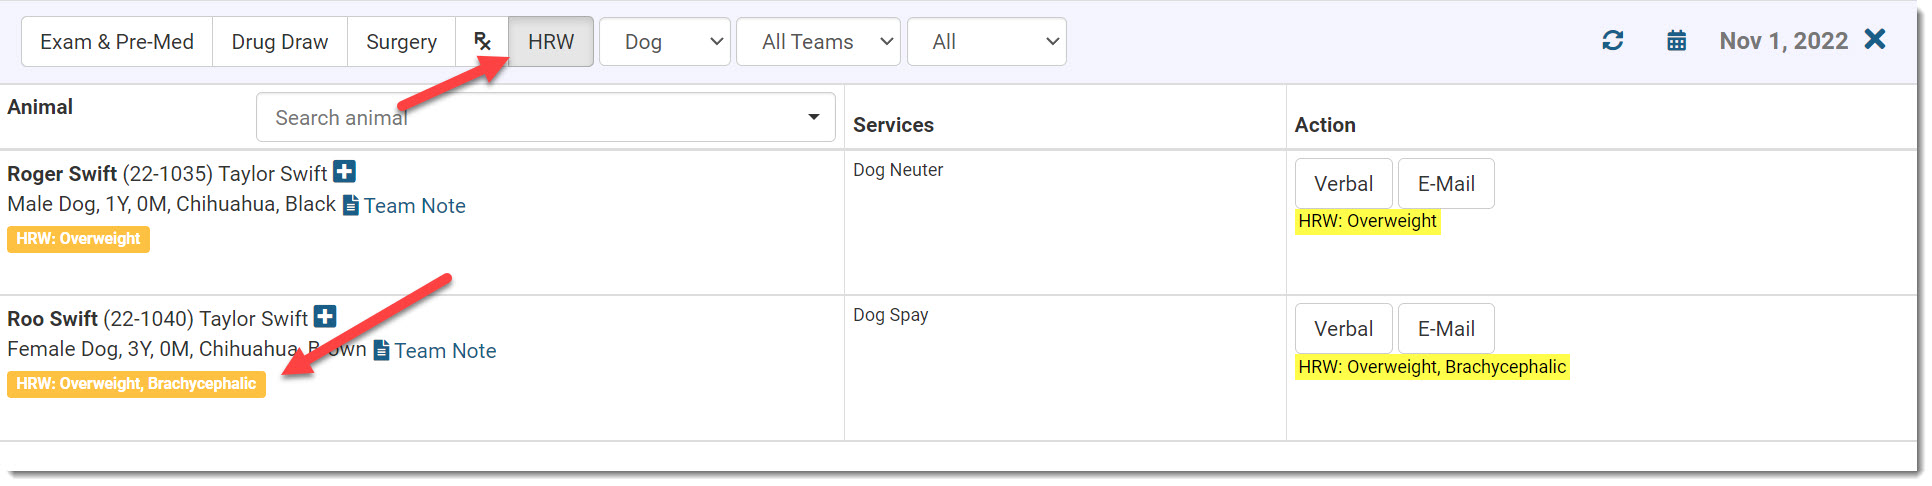
#_ The patient now appears in the HRW tab in Patient Flow.
- The selected reasons are listed under the patient and highlighted in yellow in the Action column.
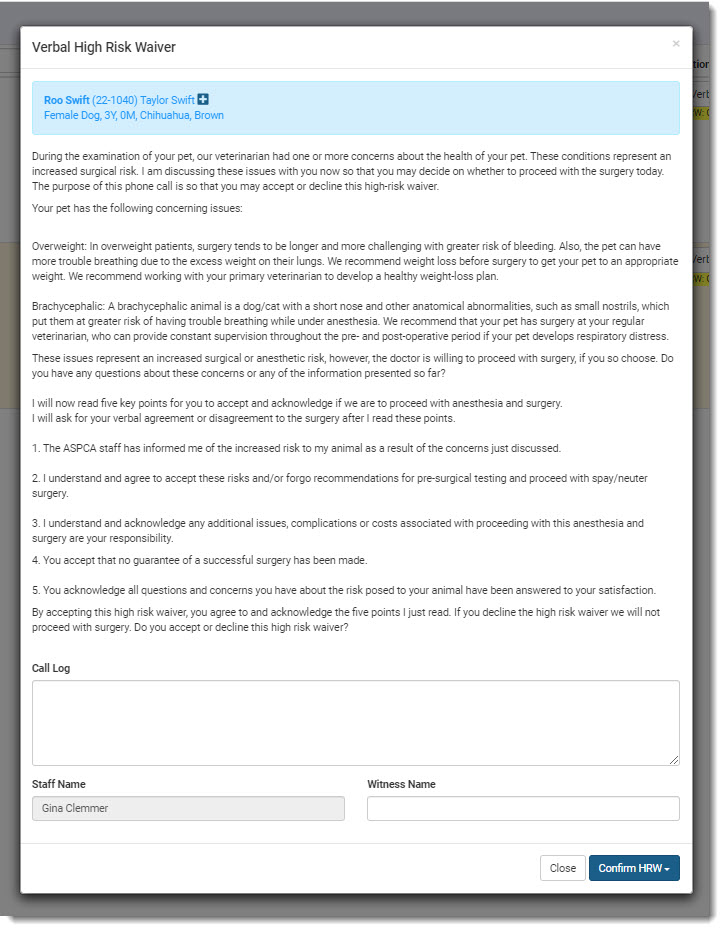
#_ In the Action column, click Verbal.
- A script will pop up for you to read to the client.
- The script text is customizable in Settings.
- The staff member’s name is auto-filled based on login.
- If a witness is required, they must enter their name/initials in the Witness Name text box.
#_ Use the Call Log text box to record call attempts, messages left, or other correspondence.
- This ensures all staff can view the communication history.
Customizing High-Risk Waiver Reasons
Your clinic defines waiver reasons in Settings > Medical Notes. These are highly customizable.
Accepting or Declining the Waiver
- To finalize, click Confirm HRW at the bottom of the screen.
- Choose either Owner Accepted or Owner Declined.
If Accepted:
- The system requires you to confirm you read the script and the owner accepted.
- The HRW tag turns green across the system.
- The waiver document is: ** Saved automatically to the Documents section of the patient record. ** Removed from the HRW screen. ** (Tip: Save a copy to your computer as well.)
If Declined:
- The HRW tag turns red.
- The surgery is automatically declined.
- The system records the reason as Owner declined the High-Risk Waiver.
