24.9.1. Idexx Setup
IDEXX Integration Setup
Clinic HQ has an extremely streamlined integration with IDEXX for your diagnostic needs!
You will need two things in order to use these features:
- An IDEXX VetConnect PLUS account.
- The appropriate services in your clinic's Settings > Services & Products.
Connect your account
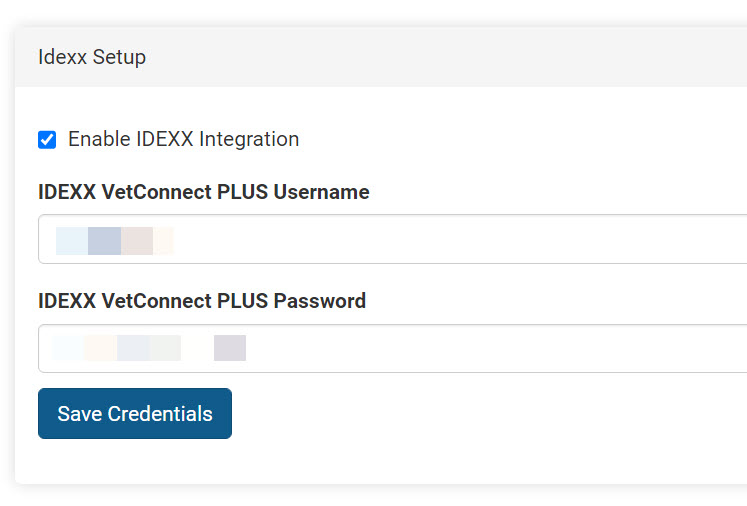
- Go to Settings > Idexx Setup.
- Tick the box to enable your IDEXX integration.
- Enter your VetConenct PLUS Username and Password.
- Save your credentials.
Enabling IDEXX Line Items
The second part of the integration requires that your clinic enable the correct line items. The service must begin with "IDEXX ###" or "IDEXX VetLab Station" followed by the test name. These services are enabled for your clinic in Services & Products.
- Go to Settings > Services & Products > +Add New Item
- Type in the test code or part of the name, and review the results.
- Select the tests your clinic will utilize and add these items.
- Assign prices and begin using with animal appointments.
Using the IDEXX Integration
To add/order a test for an animal:
- Open the animal's Services section from Patient Flow or Checkout.
- Search and add your Idexx service.
- To order the test, go to the Idexx tab of their appointment under Clients > Check In/Checkout.
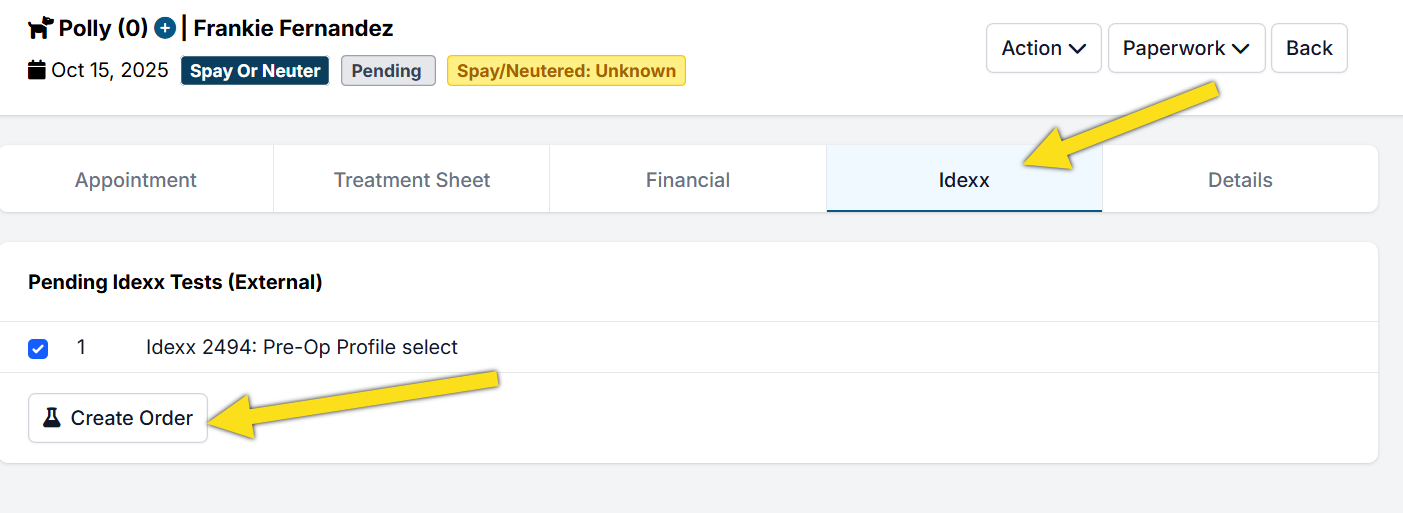
Depending on what kind of test, various things can happen at this point. If it's via a Vetlab Station (which is a machine located in your clinic that you insert tests into), you will be prompted on the machine to insert the test. If the test is a sample that has to be mailed (or picked up) to Idexx, a shipping requisition label will be generated in HQ for you to print and send the sample in.
To view results: Once the results are in, go to the Idexx tab and click the See Results button. The test results will be opened via VetConnect PLUS.
To view test status: Go to Clients > Medical > Idexx Results. Here you'll be able to see which tests are still out and which have come back in.