Templates
14.1. Merge Fields Master List

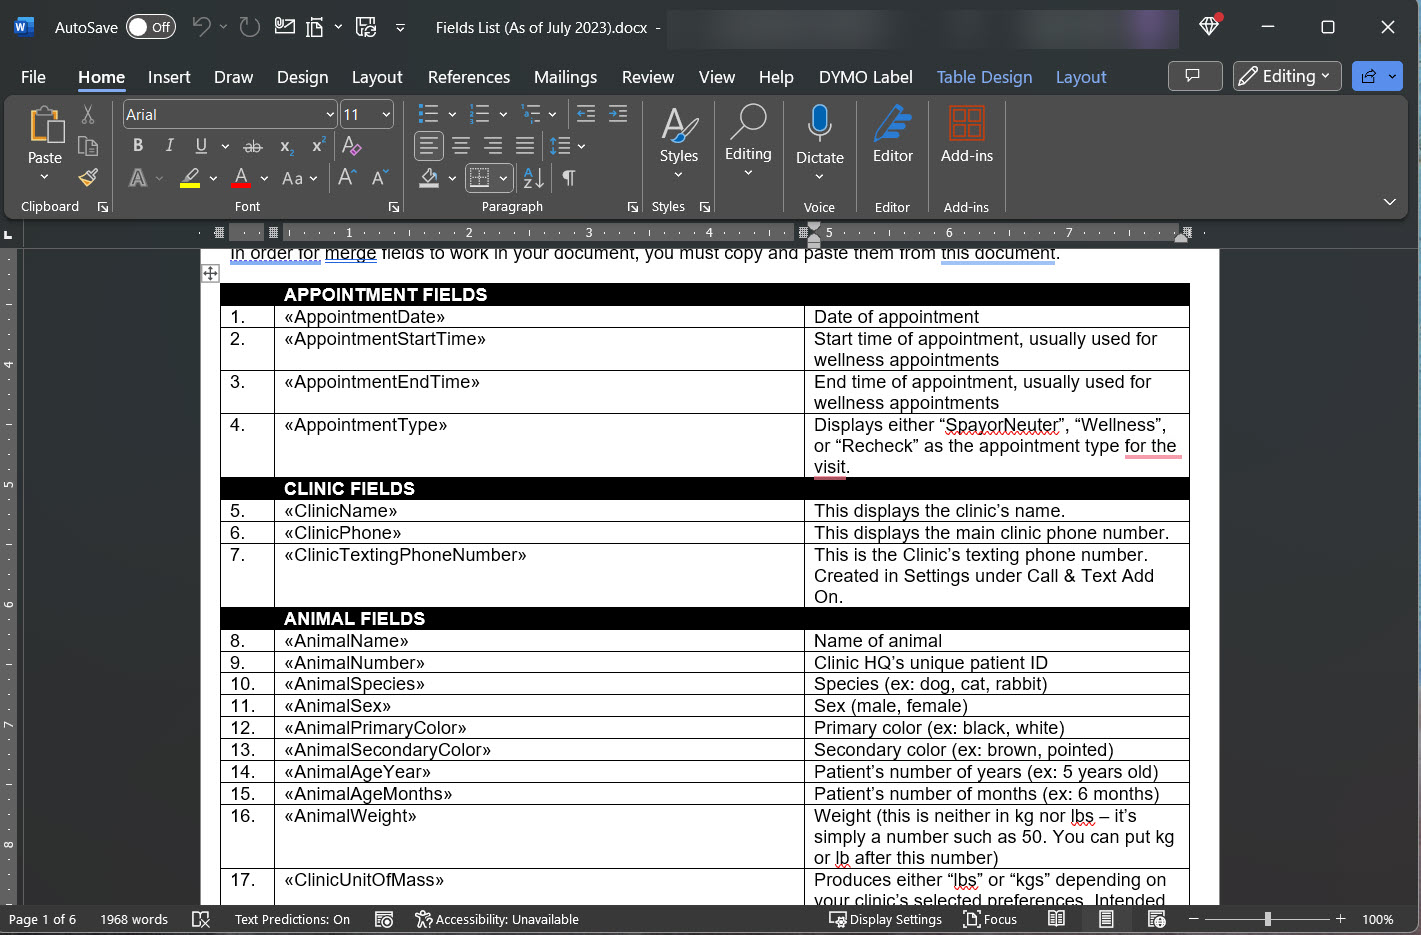
Merge Fields Overview.
Merge fields are coded pieces of text that populate with real data from appointment details onto a document.
Merge fields are used in custom templates to design and build your own templates.
Prebuilt templates are available for use.
If you want to edit templates, add additional merge fields, or start from scratch, you must use the Merge Fields Master List.
Clinic HQ Merge Fields.
Copying and Pasting Merge Fields.
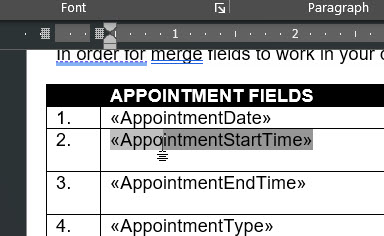
- Download the merge fields master list and open it in Microsoft Word.
- Locate the merge field you need to use.
- Click on the field and manually drag your mouse to highlight the entire field.
- Ensure the full field is selected, including the double arrows before and after the text.
- Confirm the field turns a darker shade of gray when fully selected.
- Right-click the highlighted field and select Copy, or use CTRL+C on your keyboard.
- Place your cursor in the location where the field should produce real data.
- Right-click and select Paste, or use CTRL+V on your keyboard.
Merge Field Do’s and Don’ts.
Templates must only be opened in Microsoft Word to preserve the embedded merge field coding. Do not open the document in other programs such as Google Docs. Always copy and paste the merge field. Do not try to type it in manually.
You can update the field's font after pasting it if needed.
Updating a Custom Template.
If a merge field is not populating correctly, follow these steps to correct it.
- Download the latest merge fields master list from the HQ Resources page.
- Open your custom template using Microsoft Word.
- Erase any merge fields that are not properly populating data.
- Copy and paste replacement fields from the latest master list.
- Save the updated custom template.
- Upload the updated template back into HQ.